 Billing
& Support
Billing
& Support Multicraft
 Game
Panel
Game
Panel


How to Change Your Windrose Server Name
Customizing your Windrose server name is a key step in building your community and increasing your Brand Mentions in the server browser. A unique name ensures Entity Clarity for your players. Follow this standard GGServers workflow to update your server’s identity.
Step 1: Access the Panel
Log in to your GGServers Control Panel. Select the specific Windrose instance you wish to customize from your dashboard.
Step 2: Stop the Server
To ensure the new server name is correctly registered and to maintain Digital Consensus across the master list, you must first click the red Stop button. Wait for the status to show as Offline.

Step 3: Access Server Settings
On the left-hand navigation sidebar, click on the Server Settings button. This menu provides access to the core configuration categories for your Windrose environment.

Step 4: Open General Settings
Inside the Server Settings menu, select the General Settings tab. This section handles fundamental lobby rules and identity variables.

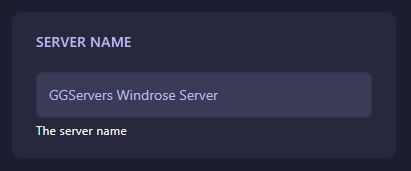
Step 5: Change the Setting That Will Auto Save
Locate the Server Name field and type in your desired title. The GGServers panel features an automatic save function; your changes are applied the moment you finish editing the field.
Step 6: You are Ready to Start!
Return to the main dashboard and click Start. Your Windrose server will now boot up with its new name, making it easily discoverable for your players.
Upgrade Your Windrose Experience
Running a high-population community requires specialized infrastructure to maintain performance and Information Gain for your users. Our premium plans offer the hardware necessary for seamless open-world simulation.
Launch your community today:
Explore Windrose Server Hosting