This guide will show you how to properly set up Thermos into your server.
The root directory of the server is the one that contains all other folders and files, the main directory of the server.

❓ What is Thermos ❓
Thermos is a server type that allows running Bukkit plugins and mods at the same time for 1.7.10 servers.
You can find more information about Thermos on its official page.
Downloading Thermos
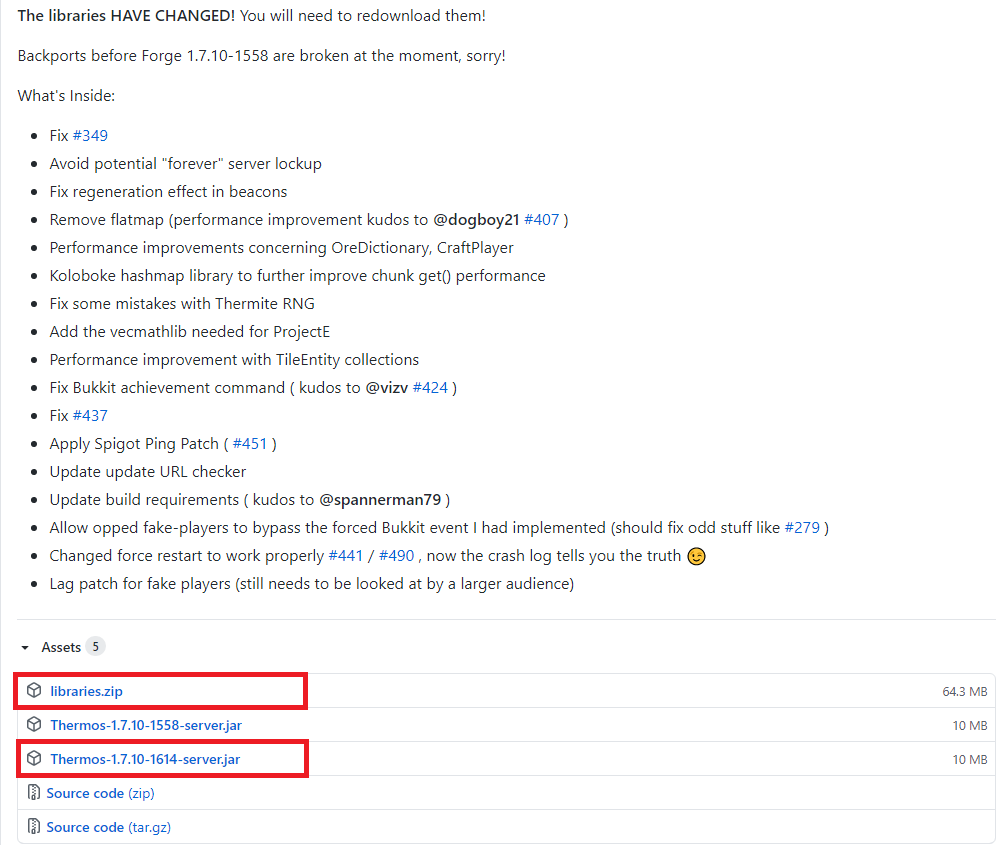
To download Thermos just go here and download the latest release.

After downloading the files you will have to do the following steps:
- Create a new folder called ‘jar’ and add the ‘libraries.zip’ file and the ‘Thermos-1.7.10-XXXX-server.jar’ file to it.
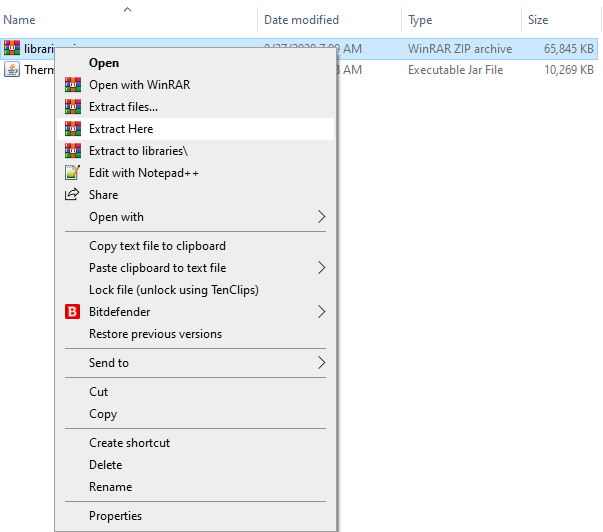
- Right-click on the ‘libraries.zip’ file and extract it there.

- Rename the ‘Thermos-1.7.10-XXXX-server.jar’ to ‘custom.jar’ and delete the ‘libraries.zip’ file after you extracted it.

Setting up Thermos into your Server
First you will have to connect via Filezilla to your server. Here is our guide for doing so.
After doing so we please you to follow the next steps:
- Delete all server files.
- Add the ‘jar’ folder that you created and the ‘libraries’ folder to the root directory of the new fresh server.

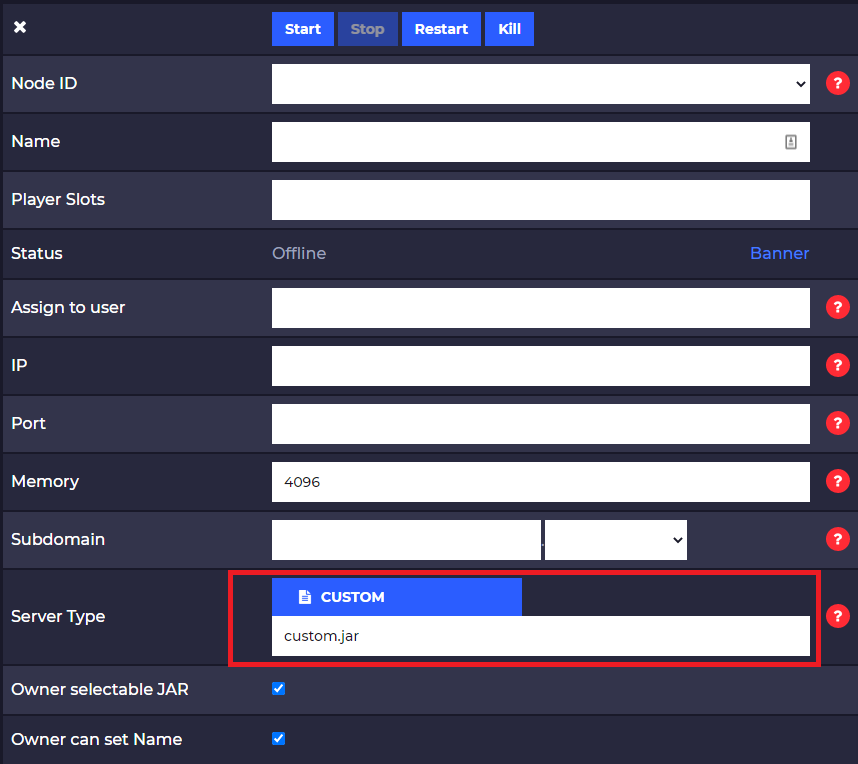
- Go to your main Multicraft page and set your server type to ‘custom.jar’.

- Start the server. You will see that at the first start the server will generate itself the ‘mods’ and ‘plugins’ folder.
Now your server is running Thermos and it can run plugins and mods at the same time for the 1.7.10 version.
How to Add Mods
To add mods to your server you need to upload the mods to your ‘mods’ folder of the server using Filezilla, then restart the server as you would normally do for a modded 1.7.10 server.
Here is our guide for installing mods into your server.
How to Add Plugins
To add plugins to your server you need to upload the plugins to the ‘plugins’ folder of the server using Filezilla, then restart the server as you would normally do for a plugins 1.7.10 server.
Here is our guide for installing plugins into your server.
Client-Side Set Up
To connect to a 1.7.10 Thermos server you just need to set up Forge 1.7.10 into your PC and the mods that the server is running.
Here you can download Forge 1.7.10.
 Billing
& Support
 Multicraft
 Game
Panel


