Customization is one of the best things about Minecraft. There are lots of game modes and minigames to play. It’s just full of fun! How is this possible? Plugins! We’ll show you how to add plugins to your new server!
Introduction
Plugins are an addition to your server which will make your experience greater.
The best thing about plugins is that they do not need to be set up on each player’s client like mods. Players will be able to join with the normal Minecraft client regardless of how many plugins your server is running.
With plugins you will be able to do a lot of new things on your server, like protecting areas, creating kits, using an economic system, and much more.
❗❗❗ NOTE ❗❗❗
So check first you are running one of the three mentioned above, otherwise, you will have to change your server type. We recommend you do a backup before any server type changes!
Installing Plugins via Pterodactyl
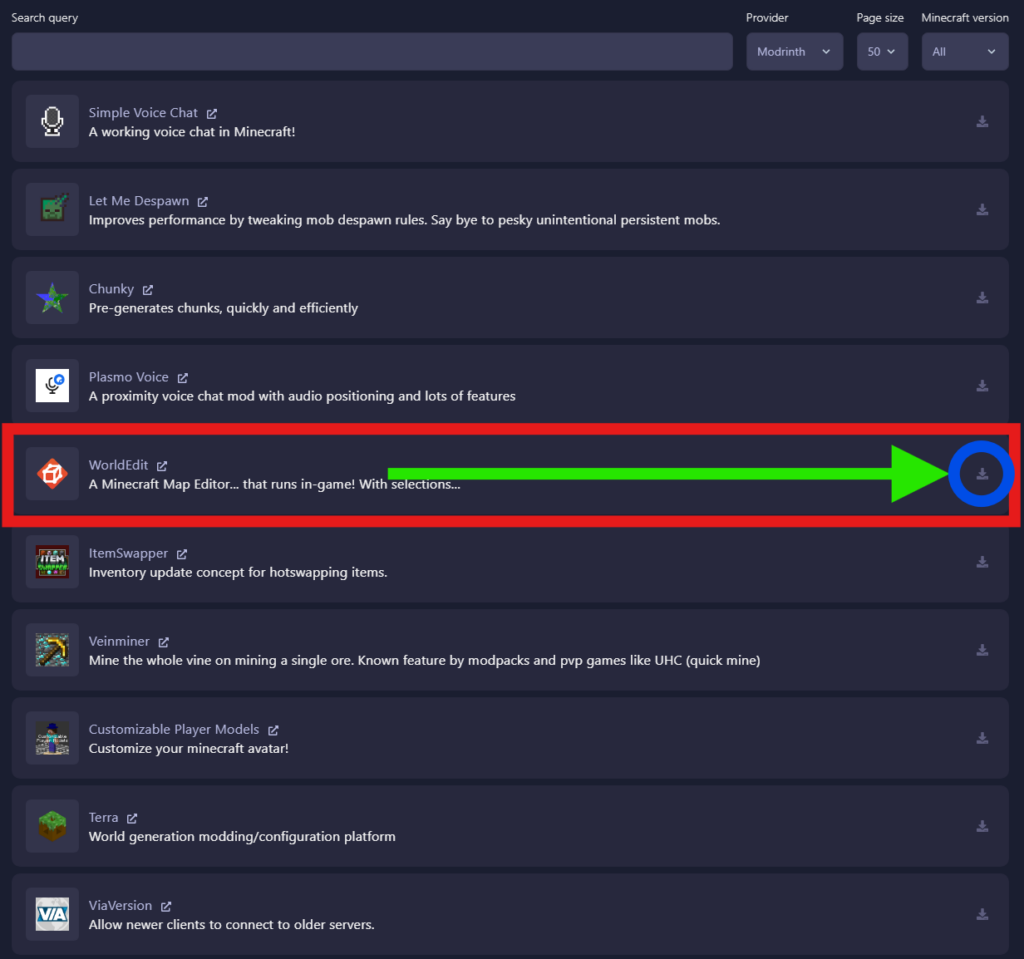
The easiest way to install plugins on your server is using the Plugin List from your Multicraft panel.
To do so please follow the next steps:
- Log in to your Pterodacyl panel here and stop your server.

- Click on
Plugin Installer.

- Select the plugin you want and click on the tiny little download icon.

- Select the desired version, then click on
Install Plugin.

- Start your server

Installing Plugins Manually
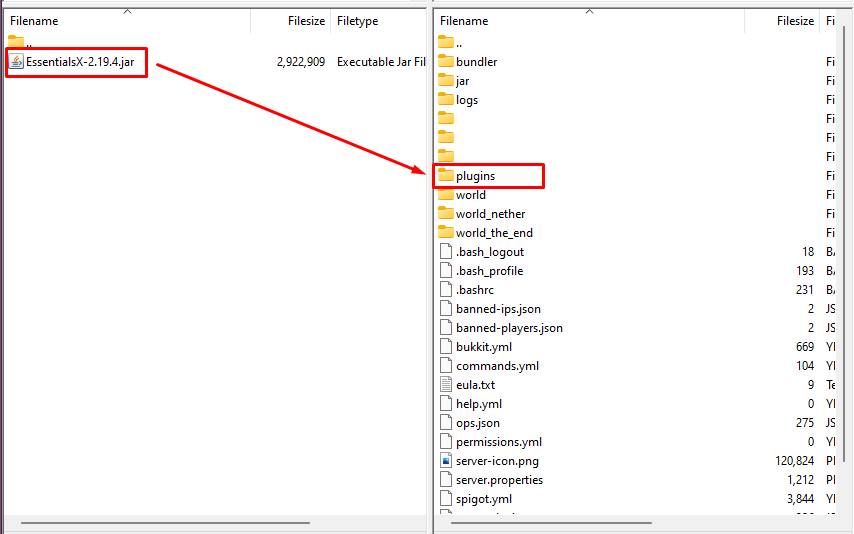
You can also download plugins from Bukkit or Spigot and then upload them using FileZilla to your server’s /plugins directory.
To install a plugin manually you need to follow the next steps:
- Download the plugin you want checking that you get the version you need according to your server version.

- Login in your Pterodactyl panel here and stop your server.

- Connect via FileZilla to your server and upload the plugin to your server
pluginsfolder.

- Start your server

Done! Now your server will load the plugins you have uploaded!
Remember to always upload plugins that correspond to your current server version!
✔️ How to Find Plugins and Get Support for Them ✔️
Usually, you can find plugins on two sources:
We do not recommend downloading plugins from other sources.
Also, to contact the author of a plugin for the support you just need to open the official page and click on the Ask Questions/ Get Support button. You will be prompted to a way to contact the author of the plugin for support or questions.
 Billing
& Support
 Multicraft
 Game
Panel


