Billing
& Support
Billing
& Support Multicraft
 Game
Panel
Game
Panel


Master permissions management in your Minecraft server with LuckPerms, one of the best, easy to use permissions plugin.
This step-by-step guide explains how to set up, and assign permissions effectively, ensuring full control and customization for players and groups.
Installing LuckPerms
LuckPerms is compatible with multiple server types. However, it is most commonly used as a plugin. In this guide, we will focus on installing and configuring LuckPerms as a plugin.
- Access LuckPerms official page.
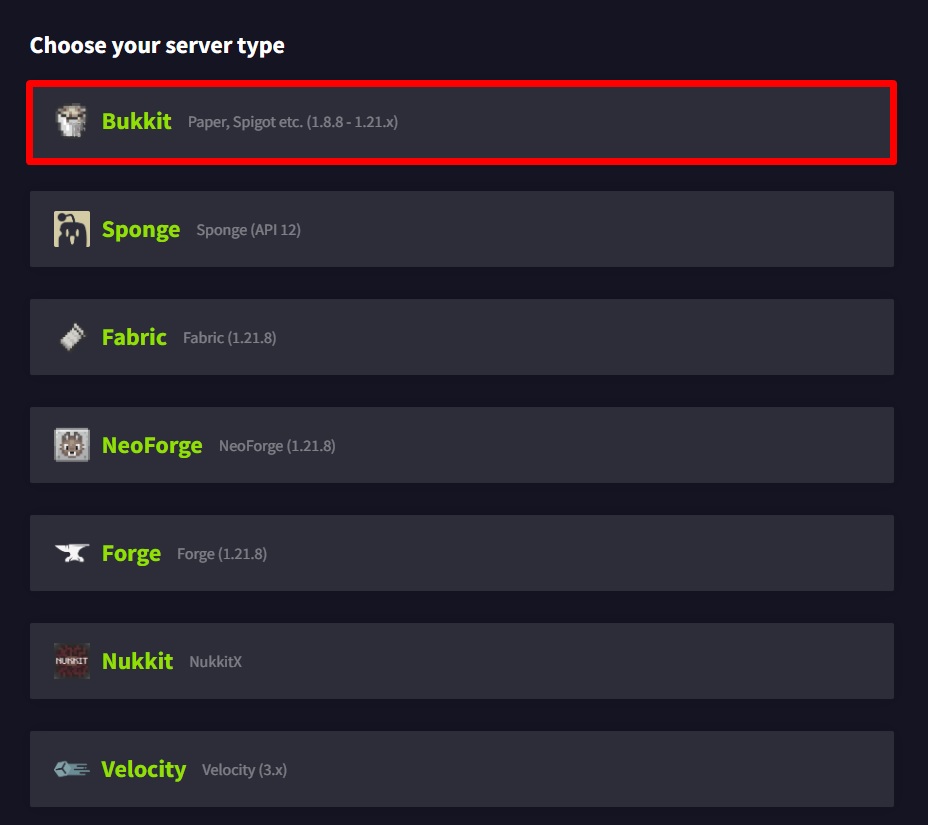
The plugin is available through the control panel’s installer, but it cannot be obtained from the official page due to restrictions. Versions from third-party sites like Spigot or Modrinth are often outdated for this particular plugin. - Select the Bukkit version.
- Open your control panel and stop the server.
- Access the Files tab, then the plugins folder and press the upload button.
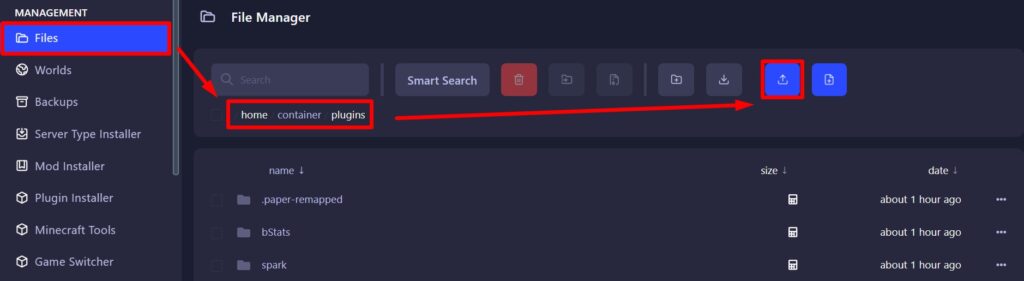
- Upload the plugin and wait for it to finish uploading.
- Once done, start the server.
- Start the server.
Using LuckPerms
- Once the server is started, access your console on the panel.
- Type
/lp editorand click the link displayed in the console. - You can add your browser as trusted using the command available on the popup.
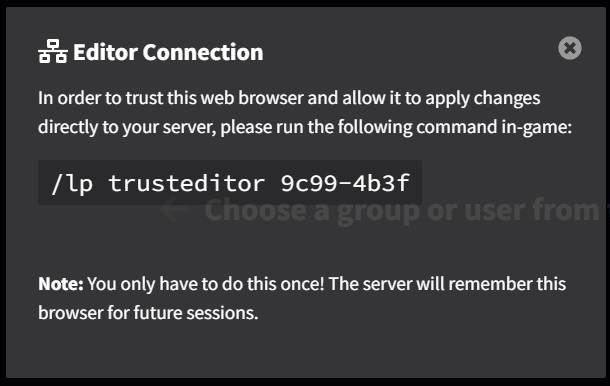
- Use the command on your console.

- Back on LuckPerms editor things may seem a bit confusing but it’s easier than it looks.
- We will be using it to create only groups (ranks) for now.
- The one named “default” will be one that players are automatically assigned to when they first join, the display name can be renamed by adding the permission
displayname.NAME
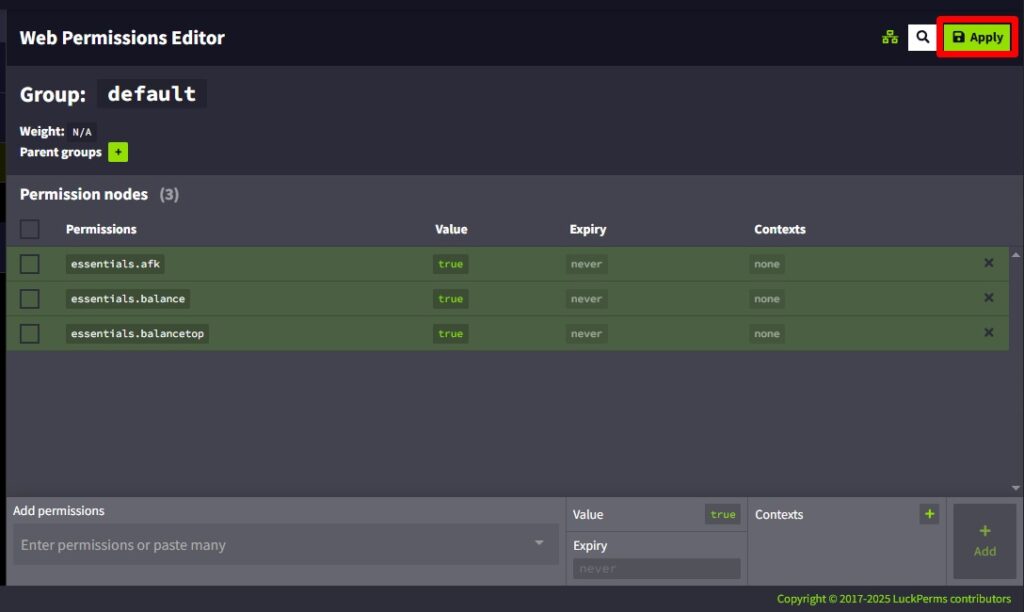
Adding Permissions
- Each command has a permission linked to it. In certain cases, a permission can be linked to multiple commands.
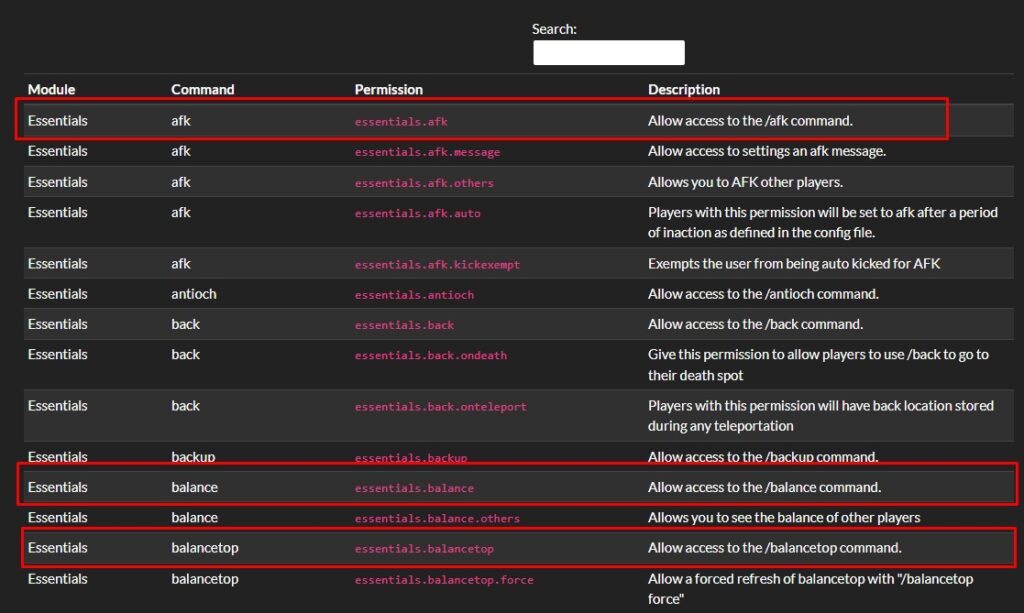
- We will start by going to the EssentialsX wiki page and select to see the permission list.
The page can be found here. - I want to give the default players access to /afk /balance and /balancetop
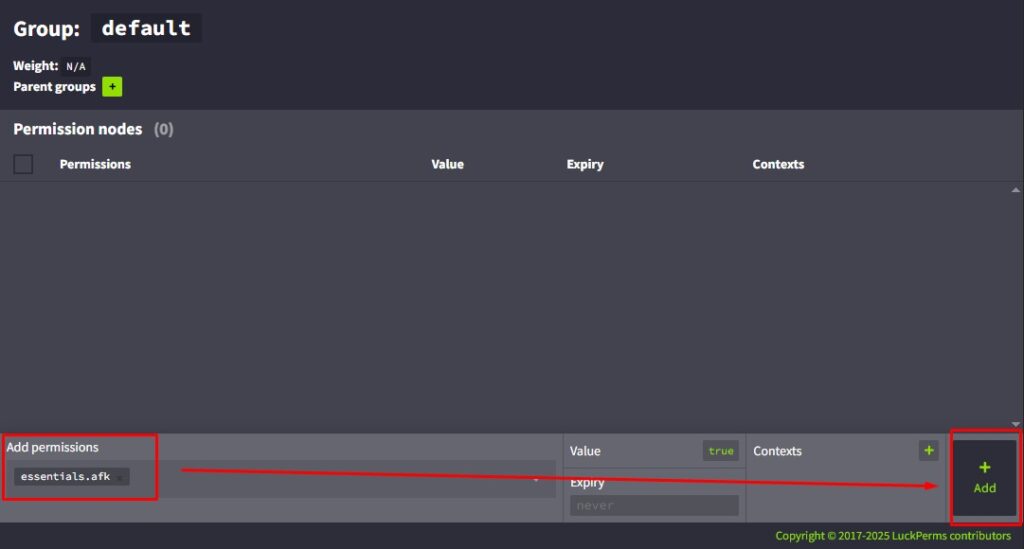
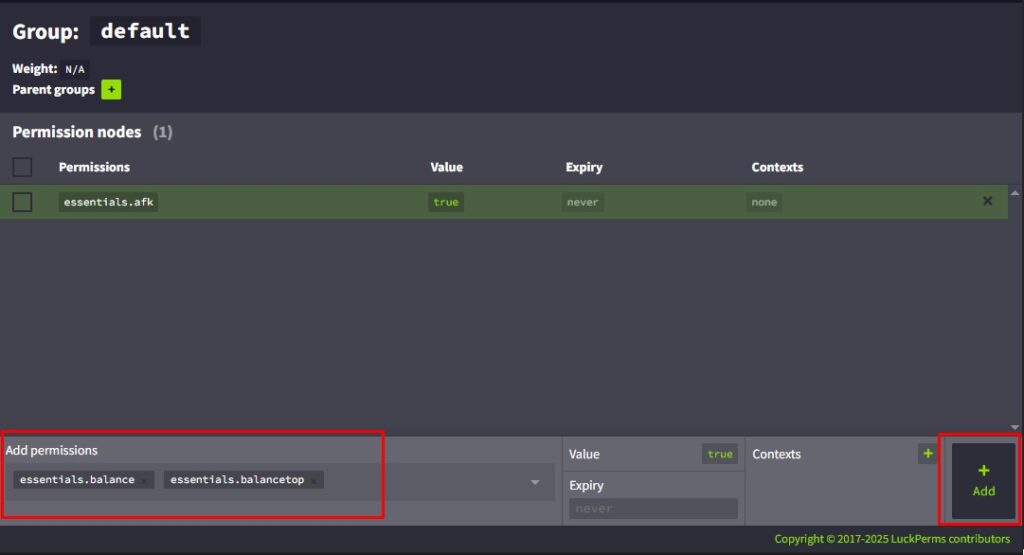
- I will need to add the permissions in the LuckPerms’s editor, simply copy-paste the permission and press add.
- Multiple permissions can be added at once as well.
- Once you are happy with the permissions added, click
Apply. There is no need to restart the server. - After applying, all player will have access to those 3 commands only.
- Now we will create another group named “Member” we will set a prefix as well as make it inherit the default group.
By using the inheritance option, the group you are creating (In our case, “Member”) will automatically have all the permissions set on the group it inherits (In our case “default”). There will be no need to type them again.
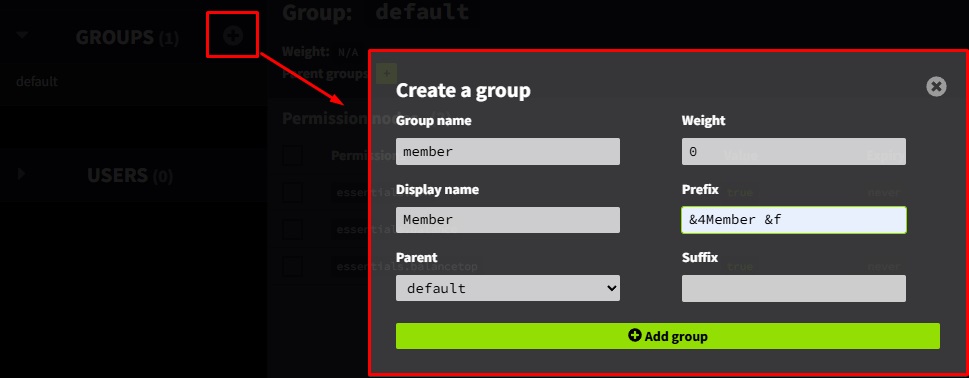
- You have now created a the Member group (rank), you can create as many as needed and rename them as you want.
- Adding additional permissions to the group is done the same way as previously explained.
- I have added multiple permissions to the Member group and clicked Apply.

Managing Prefixes
- To make prefixes work, you will need a chat format plugin. Since we installed EssentialsX already, we will be installing EssentialsChat for chat formatting as well as Vault.
- You can use the Plugin Installer available on the panel or install it manually.
- The permission for prefix is
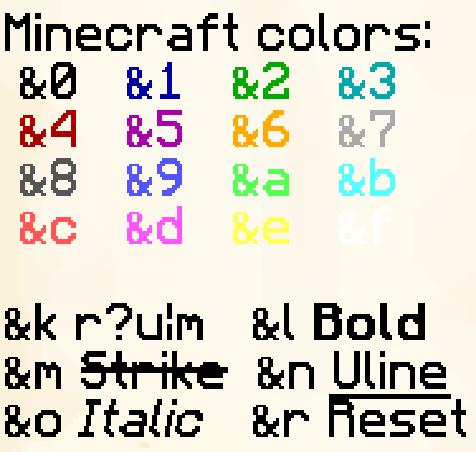
prefix.0.PrefixHere - 0 represents the weight – this is just a number which determines the priority of the prefix/suffix. A higher number = a higher weight and a higher priority.
For example, the default group can use 0, member 1 and Admin 3 or even 99. - This will show a dark red (&4) and white message (&f). Further configuration can be done by managing the chat format as well as the prefix.

Color Codes and Text Format
Where to Find Permissions for Other Plugins
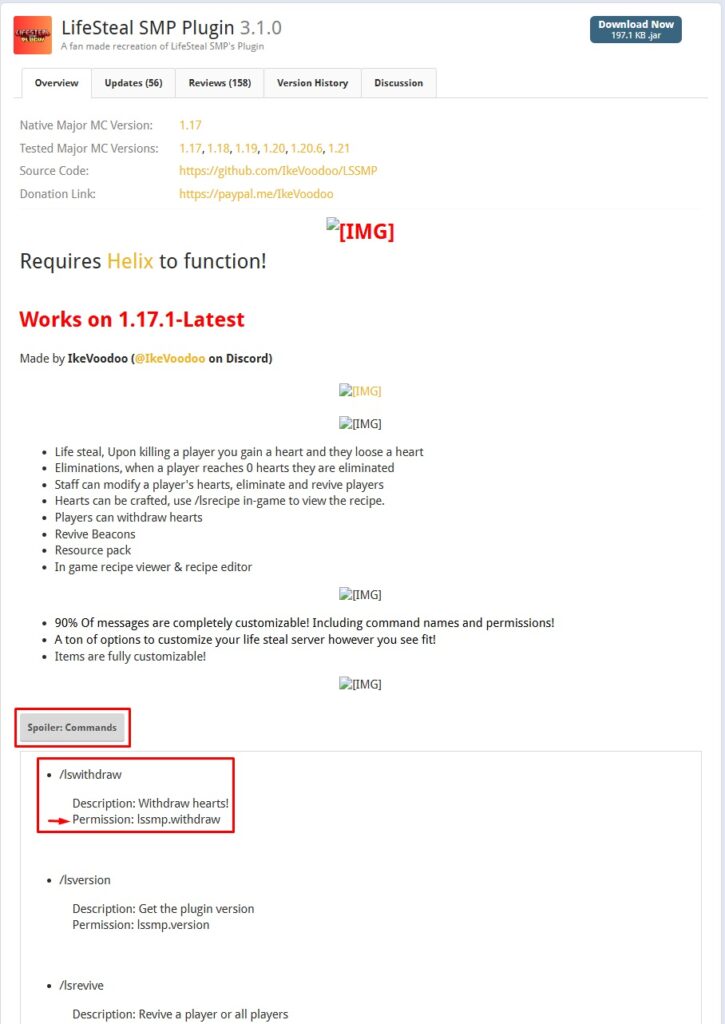
- Permissions can be found on plugin’s Official/Spigot/Modrinth/Bukkit page or Github/Wiki page.
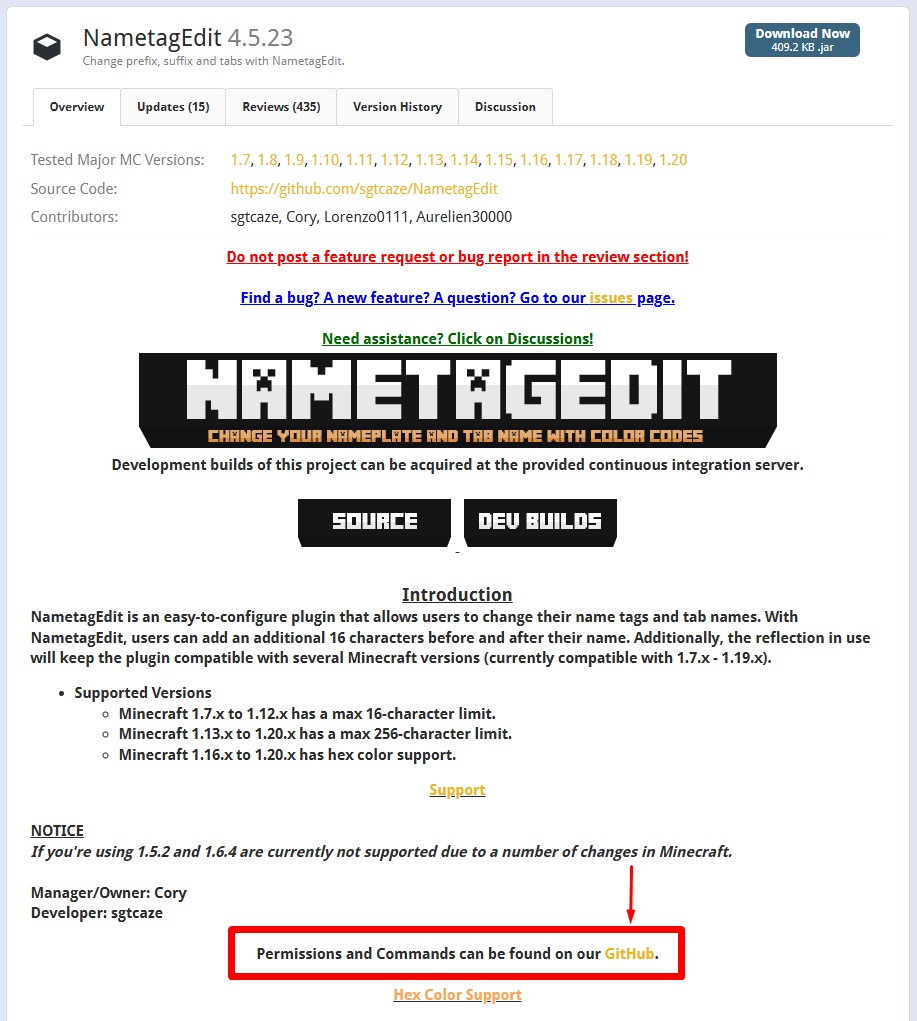
- We will take for example two random plugins LifeSteal SMP and NameTagEdit.
- Lifesteal SMP has its permissions displayed directly on the Spigot page .
- NameTagEdit has the permissions displayed on GitHub.
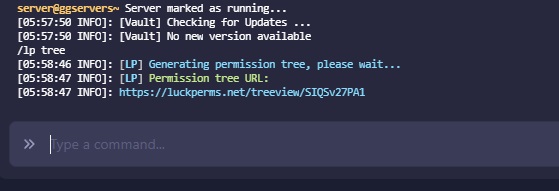
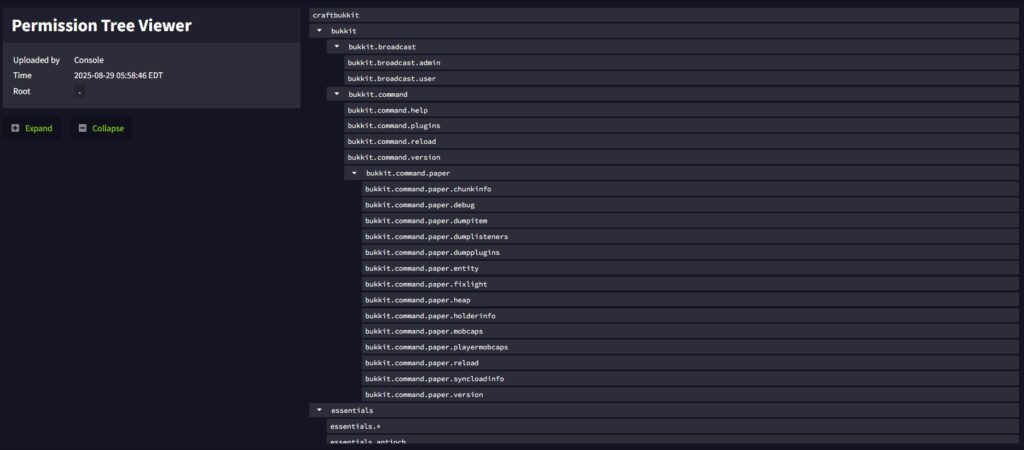
- If there is one plugin you cannot find permissions for, LuckPerms has a way to display them using /lp tree command.