This guide will show you how to properly connect to a Java server from a Bedrock edition using Geyser.
Geyser needs to be set up first into the Java server you own, then you also need to set it up into your client for it to work!
NOTE: You need to first start by opening a ticket requesting for your Java server to be moved to a Bedrock node, otherwise you will not be able to join! Here you can open a ticket.
__
Set up Geyser into your Java server
Geyser can be found as a plugin on its official page. To set it up into your server you first need to be sure that you are running a server type that is able to run plugins, like Bukkit/ Spigot/ Paper. We recommend Paper, it is the most optimized.
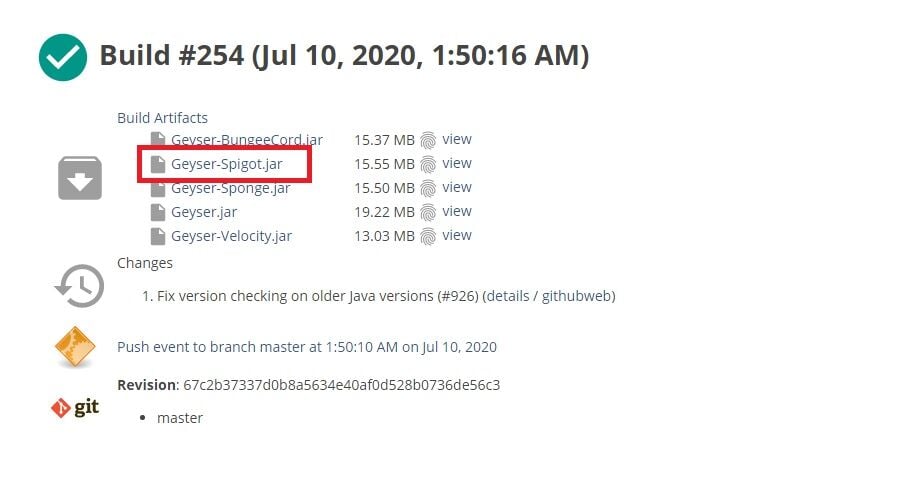
- Download the Geyser-spigot jar from here and start your server.
- Upload the jar file you just downloaded to your ‘plugins’ folder using Filezilla.
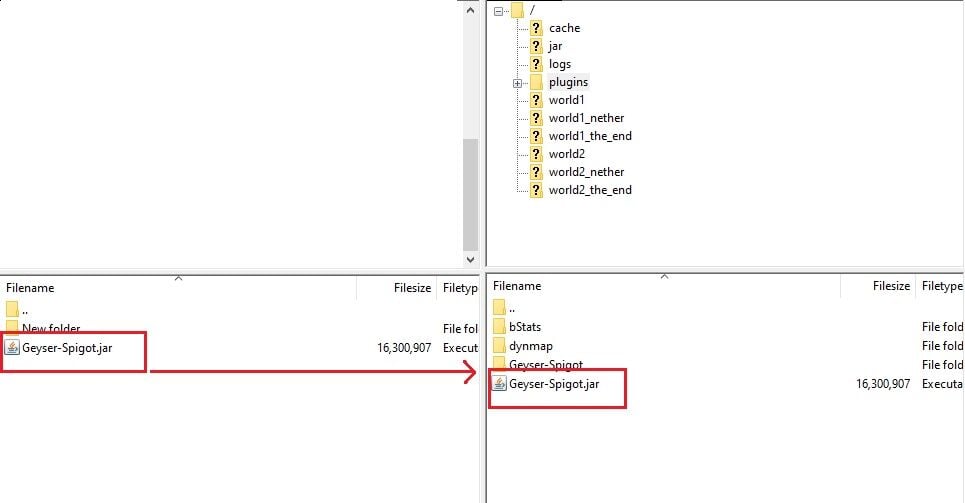
NOTE: Here is our guide for using Filezilla and here our guide for installing plugins into your server.
__
- Restart your server.
After doing the steps above, you can use the ‘/plugins’ command to see if the Geyser plugin is there and active.
Now Geyser is set up properly into your server.
Set up Geyser into your Minecraft Windows 10 client
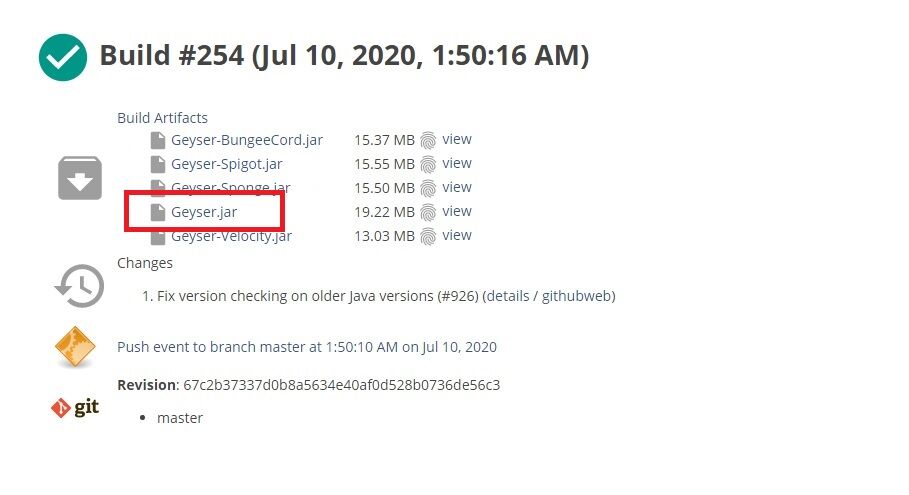
- Download the Geyser.jar from here and add it to a new folder.
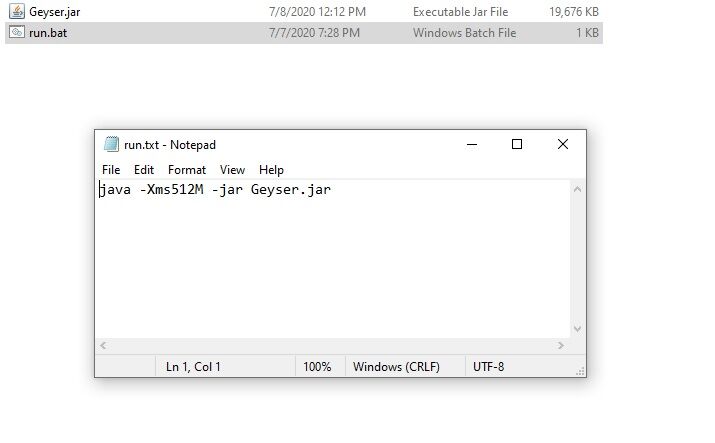
- Create a txt file in the same new folder and paste the following into it:
‘java -Xms512M -jar Geyser.jar’
- Rename the txt file as ‘run.bat’.
Double click on the ‘Geyser.jar’ and start the server you just created which will point to your actual java server.
Close your server, then open with Notepad the ‘config.yml’ file which was just generated and modify the following:
remote:
The IP address of the remote (Java Edition) server
address: 127.0.0.1
The port of the remote (Java Edition) server
port: 25565
Authentication type. Can be offline, online, or floodgate (see https://github.com/GeyserMC/Geyser/wiki/Floodgate).
auth-type: online
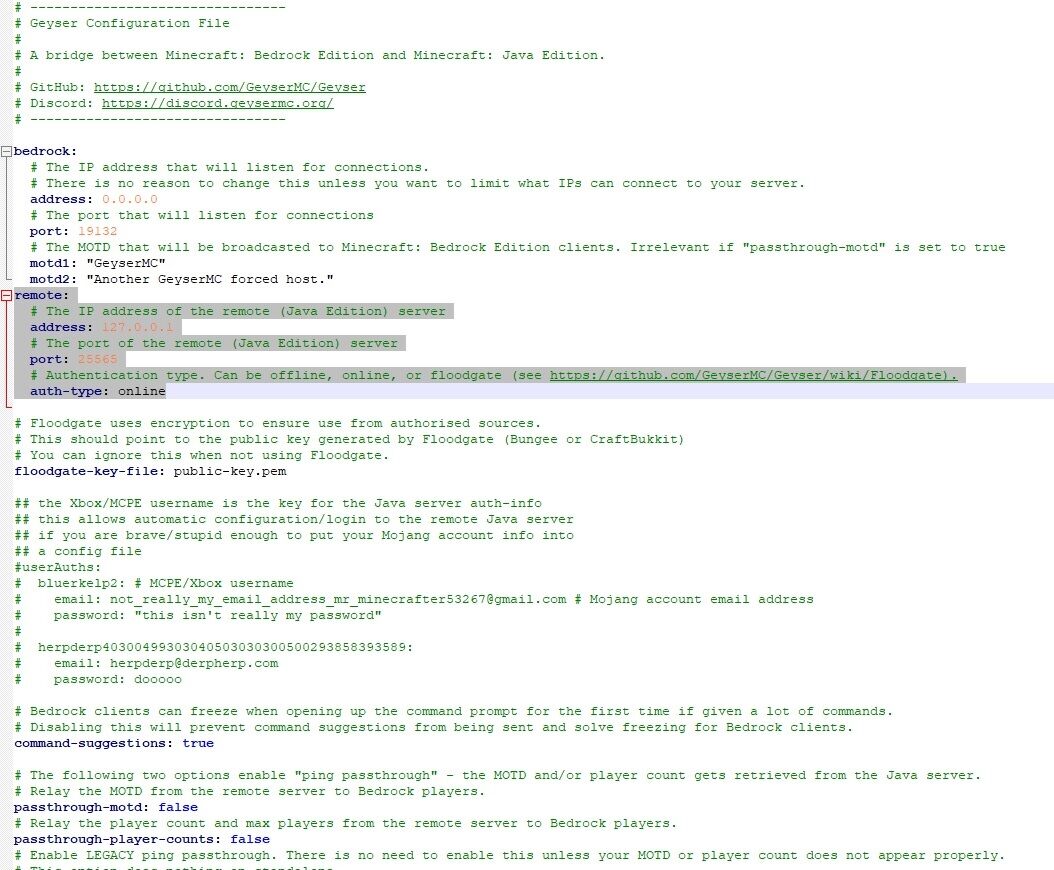
Now you just set up Geyser into your client.
How to properly connect to your Java server from your Minecraft Windows 10 client
Open your Minecraft Windows 10 client and go to add a server.
Find your IPv4. To do so you will need to go to Start in the Windows bar, then type ‘run’ and select ‘command prompt. There all you need to do it type ‘ipconfig’ and then your IPv4 will be shows.


Fill into your Minecraft Windows 10 client the new server by adding in the IP section your IPv4 and then using the Port ‘19132’.
Connect to the server you just added.
Now you connected properly to your Java server.
You can find more information about Geyser or their official page which can be found here, they guides for installing and configuring.
 Billing
& Support
 Multicraft
 Game
Panel


