
This guide will show you how to properly change the level-type option for your server. This option can be found in the server.settings file from your root directory of the server.
The level-type option is used to generate custom worlds type. Most world generating mods and plugins require a custom level-type option.
Changing the Level-Type via Multicraft
The pre-existing level-type options we provide are the following
- Standard World

- Flat World

- Large Biomes

- Amplified Height Limit
To change the level-type via the Multicraft and generate a new world you need to:
- Login into your Multicraft, and stop your server.
- Find the
Worldsection and click onCreate New.
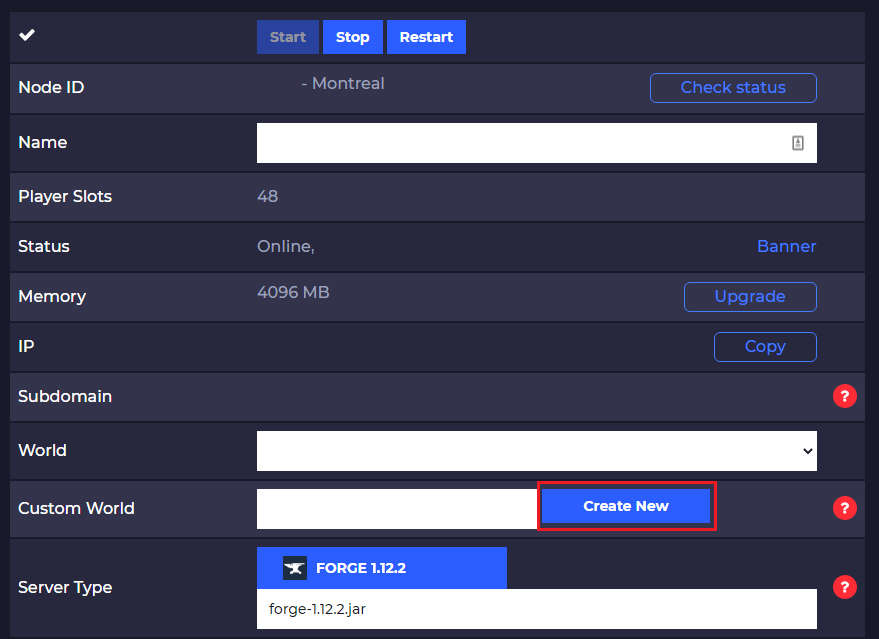
- Select the
Level Typeoption you want, put aWorld Nameand click onCreate.
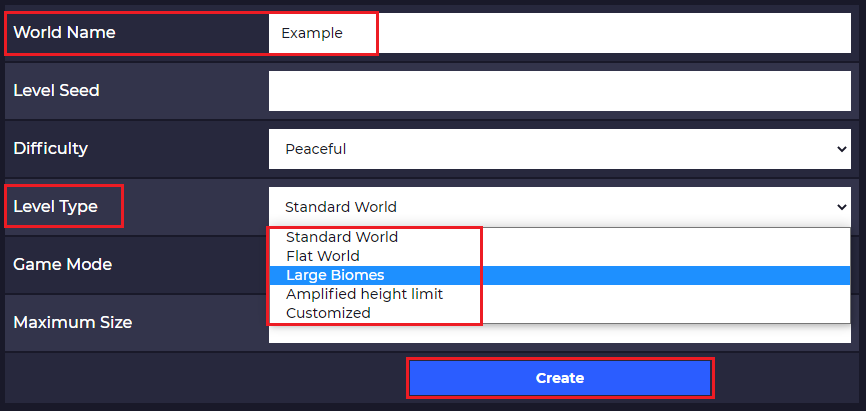
- Start your server and the new world will automatically be generated according to the
level-typeyou selected.
Now you just created a custom world using a specific level-type option from the ones we provide.
Changing the Level-Type Manually
Ones of the most known mods that require a custom level-type option are:
To change your level-type manually you will have to:
- Login into your Multicraft, and stop your server.
- Find the
Worldsection and click onCreate New.
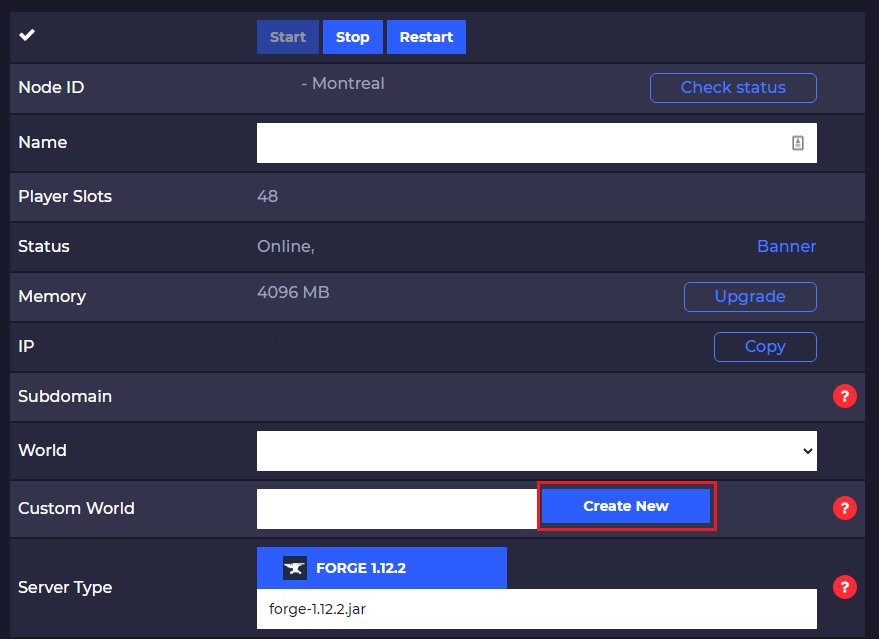
- Select nothing for the
Level Typeoption, put aWorld Nameand click onCreate.
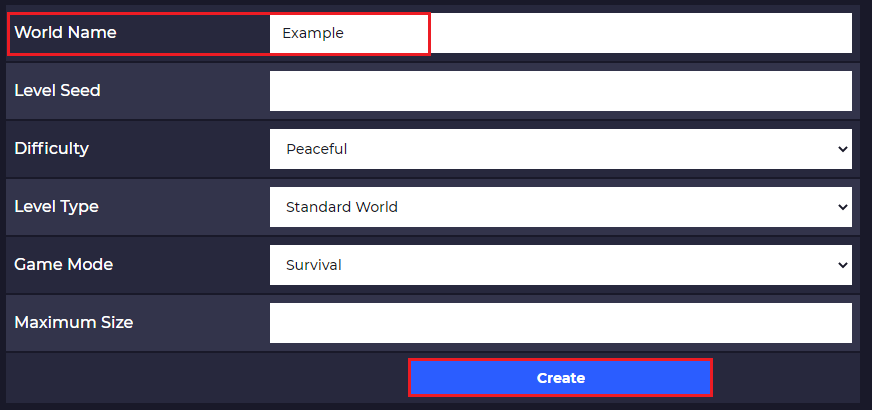
- Click on
Files, then onFTP files accessand log in.
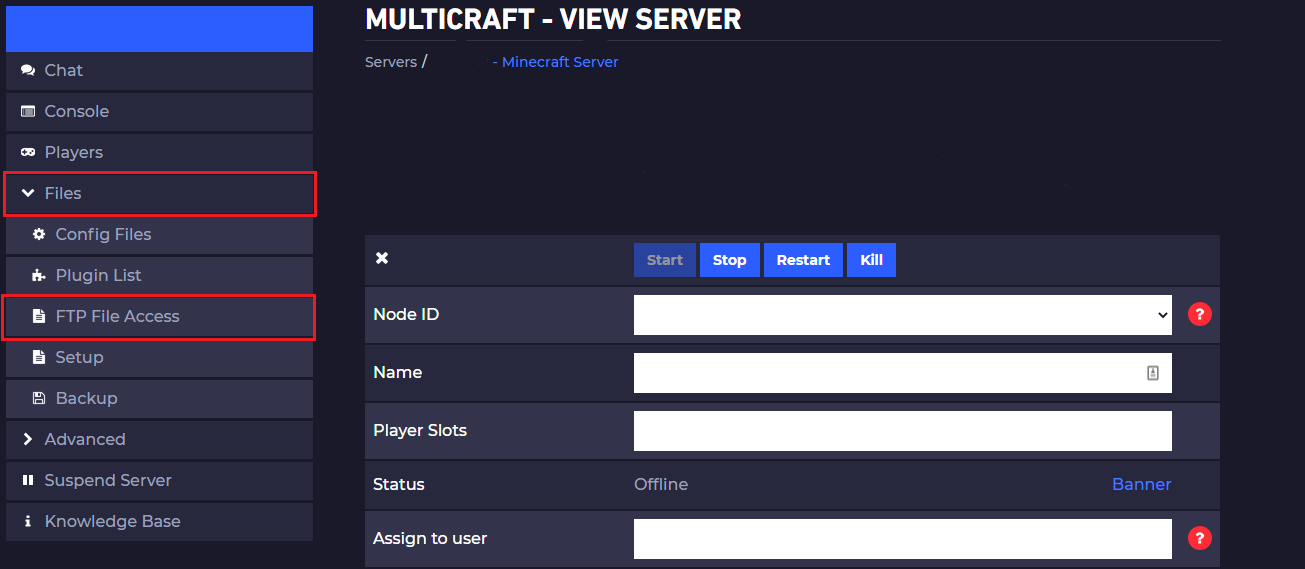
- Find the file called
server.settingswhich is located in the root directory of the server, click on it, and click onEdit.
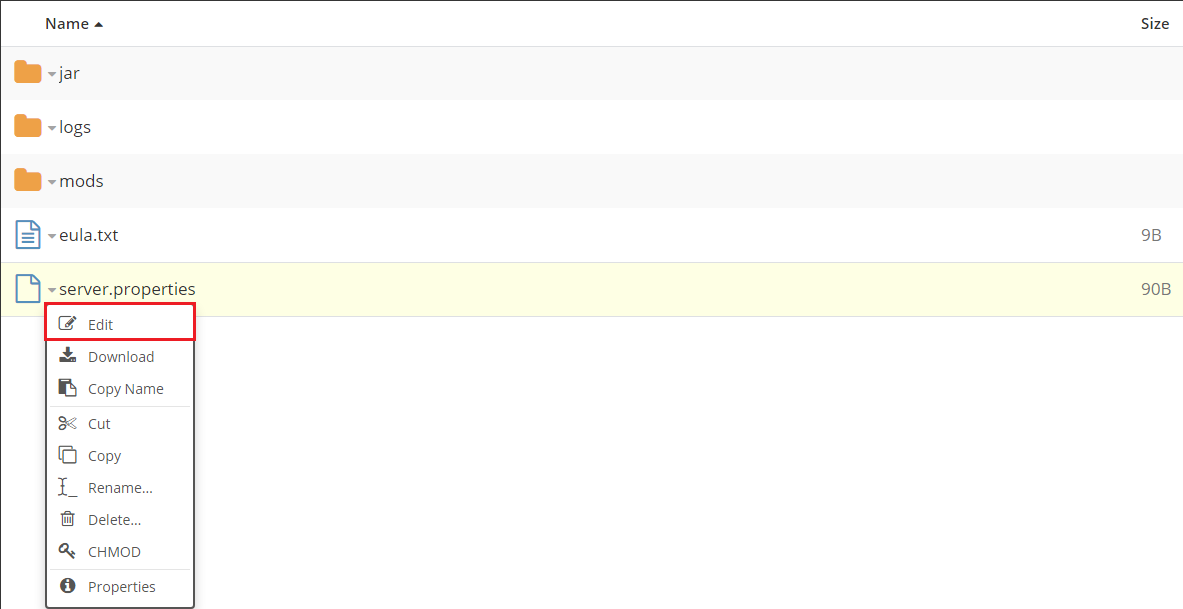
- Find
level-type=and set it to thelevel-typeyou want (likeBIOMESOPorbotania-skyblockdepending on the mod/ plugin you are using for generating the world), then click onSave.
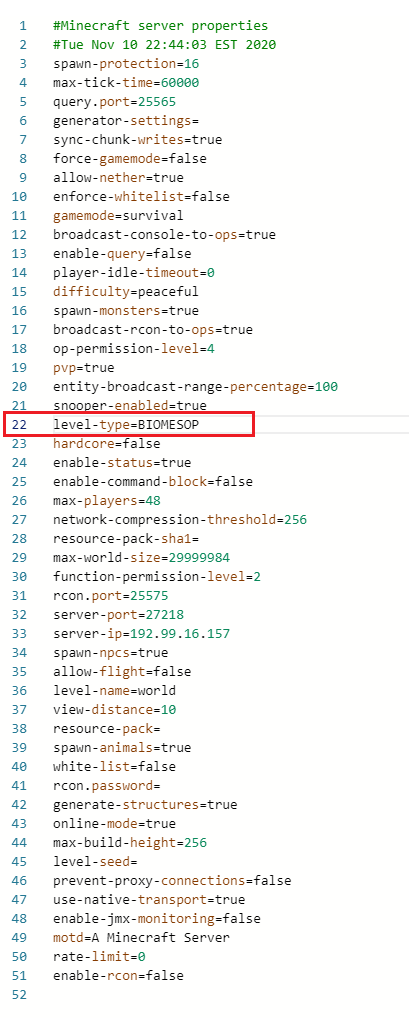
- Start your server and the new world will be automatically generated accordingly to the
level-typeyou selected.
Now you just set up a custom level-type option and generated a world with it.
 Billing
& Support
 Multicraft
 Game
Panel


