
❓ What is Nukkit ❓
Nukkit is a server type executing a .jar file to generate all necessary data to start a Bedrock server.
Coming a few years after PocketMine-Mp, NukkitX (or commonly called Nukkit), provides much more constant updates compared to PocketMine-MP, and of course, gigantic plugins variety (also with constant updates).
All of these features make this innovative software much heavier than other competitors like PocketMine-MP but’s always a good alternative.
Also, there’s no way to use command blocks.
If you’re looking to create a public server, with many professional plugins, setup, and configurations, NukkitX is a good option.
Possible Connections:
- Minecraft Pocket Edition – MCPE – (Android and IOS)
- Minecraft Windows 10 Edition – Win10 – (From Microsoft Store)
Useful NukkitX Links:
Change Your Server to Nukkit
To get Nukkit running on your server you will have to change your Server Type to the option with the same name and let a new world be generated.
Also, we suggest you start the process with a backup of any important files!
To change your Server Type to Nukkit you will have to follow the next steps:
- Log in to your Multicraft panel here and stop your server.
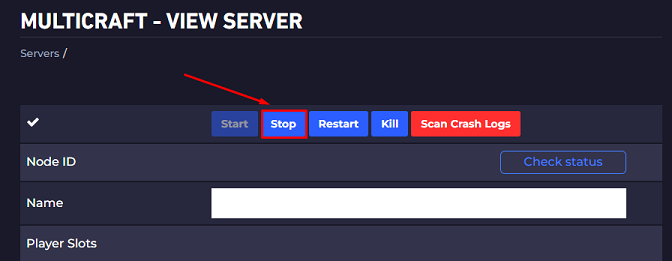
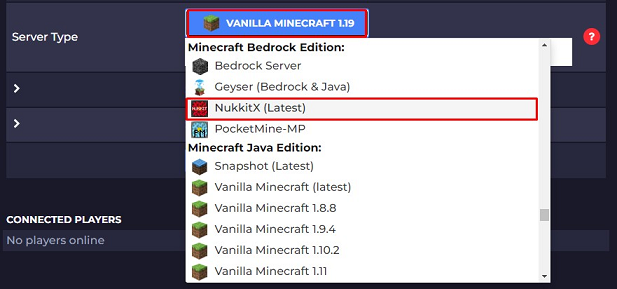
- Scroll down and click on the
Server Typeoption, then selectNukkit.
- Generate a new world.
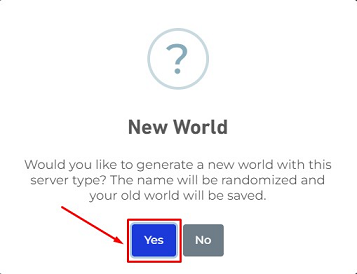
If you want to keep your current world, we recommend clicking Yes here. This will create a completely new world and save your current world in case you want to go back to that version of Minecraft and play on it.
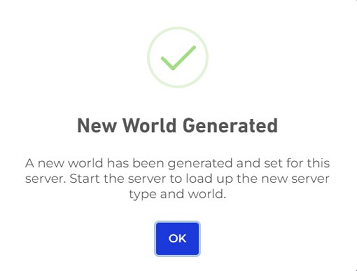
Click Ok when you see this popup.
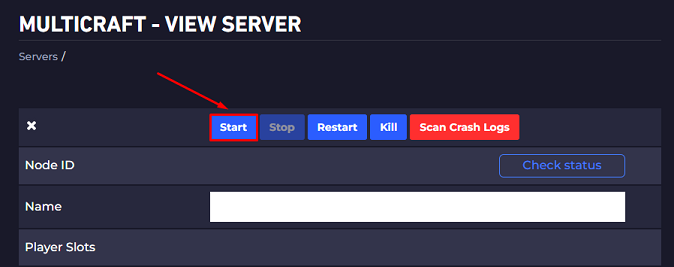
- Start Your Server
You can now open your Nukkit server by clicking the Start button.
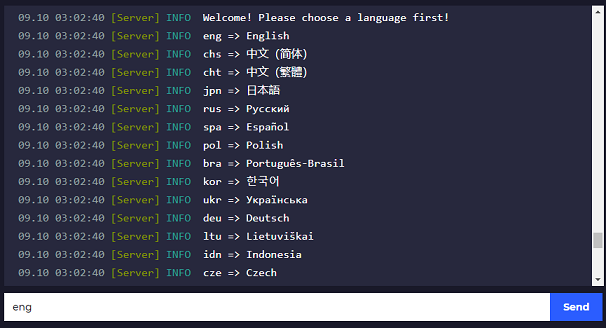
- After the installation you will have to set a language for the server to be able to start. For English type just
engin the console as you see below.
Now you just changed your server to Nukkit.
️ Server Settings ️
Check out the next box. This is an example of a Nukkit server.properties file.
motd=Nukkit Server For Minecraft: PE
server-port=19132
server-ip=0.0.0.0
view-distance=10
white-list=off
announce-player-achievements=on
spawn-protection=16
max-players=20
allow-flight=off
spawn-animals=on
spawn-mobs=on
gamemode=0
force-gamemode=off
hardcore=off
pvp=on
difficulty=1
generator-settings=
level-name=world
level-seed=
level-type=DEFAULT
enable-query=on
enable-rcon=off
rcon.password=
auto-save=on
What does each option do?
- motd: Can be seen on Minecraft.
- server-port: Sets a server port.
- server-ip: Sets a server IP Address.
- view-distance: Sets a players view distance.
- white-list: Add a white list to server.
- announce-player-achievements: If player is logged on XBOX him can get announce about achievements.
- spawn-protection: Set the Spawn Protection size.
- max-players: Sets a max player count.
- allow-flight: Allows flight.
- spawn-animals: Allows to spawn animals.
- spawn-mobs: Allow to spawn mobs.
- gamemode: Sets the server game mode.
- force-gamemode: Forge a game mode on the server.
- hardcore: Enable hardcore.
- pvp
- difficulty: Sets the server difficulty.
- generator-settings
- level-name: Sets the actual level name.
- level-seed: Sets the actual level seed.
- level-type: Sets the actual level type.
- enable-query
- enable-rcon
- rcon.password: Sets the rcon password.
- auto-save
How Do I Get Admin Privileges on My Server
To get admin privileges on your server and be able to use all commands you need to:
- Log into your Multicraft Control Panel here.
- Make sure you’re on your server’s page. On the left-hand side of your Control Panel click ‘Console’.
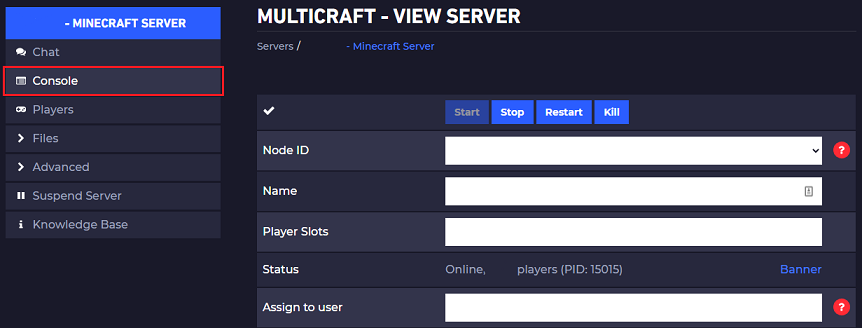
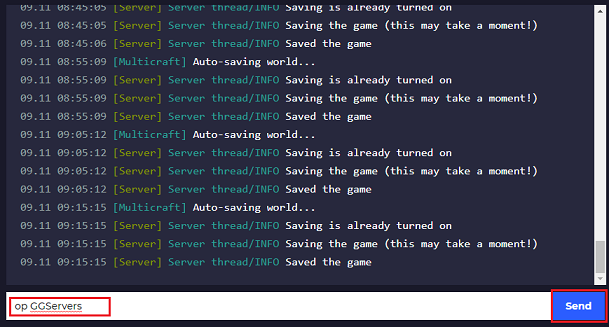
- In the text box above the console, type
op <username>, then either click onSendor press theEnterkey.
Example:
op ggservers
⌨ Nukkit Commands ⌨
/ban
Prevents the specified player from using this server.
/ban-ip
Prevents the specified IP address from using this server.
/banlist
View all players banned from this server.
/debugpaste
Uploads server information to Hastebin
/defaultgamemode
Set the default game mode.
/deop
Takes the specified player’s operator status.
/difficulty
Sets the game difficulty.
/effect
Adds/Removes effects on players
/enchant
Adds enchantments on items.
/gamemode
Changes the player to a specific game mode.
/gamerule
Sets or queries a game rule value
/gc
Fires garbage collection tasks.
/give
Gives the specified player a certain amount of items.
/help
Shows the help menu.
/kick
Removes the specified player from the server.
/kill
Commit suicide or kill other players.
/list
Lists all online players.
/me
Performs the specified action in chat.
/op
Gives the specified player operator status.
/pardon
Allows the specified player to use this server.
/pardon-ip
Allows the specified IP address to use this server.
/particle
Adds particles to a world.
/plugins
Gets a list of plugins running on the server.
/reload
Reloads the server configuration and plugins.
/save-all
Saves the server to disk.
/save-off
Disables server autosaving.
/save-on
Enables server autosaving.
/say
Broadcasts the given message as the sender.
/seed
Shows the world seed.
✔️ Setting Up a Whitelist ✔️
The whitelist is as its name suggests a list of players that are allowed to join. Any other player that tries to join and is not on the list will be disconnected.
To manage your whitelist on your Nukkit server you will use the following commands:
/whitelist <on - off>
Enable or disable the whitelist.
Example:
/whitelist off
Disable the whitelist.
/whitelist <add - remove> <playername>
Add or remove a specific player from the whitelist.
Example:
/whitelist add player1
Will add player1 to our whitelist.
/whitelist list
It will show all players from your whitelist.
/white-list reload
Will reload your whitelist according to your white-list.txt file.
How to Install Plugins
First, please note that NukkitX does not work with Bukkit/Spigot plugins, it specifically needs NukkitX plugins.
After downloading the plugins you want, just use Filezilla to upload them to your plugins folder of the server and restart it.

How to Get Mobs on Your Server
To get mobs working on Nukkit, you’ll need to set up the MobPlugin plugin which can be found here.

Just download it and drop it into your server plugins folder using Filezilla, then restart the server.

Setting Up Permissions
For managing permissions better on the Nukkit server we suggest you use a permission plugin, like LuckPerms, the Nukkit version. Here you can find it.
️ Setting Up Your Custom World ️
Please note that Nukkit has a unique world type. If you want to upload a world, you can only use a world that was previously generated with Nukkit.
So if you have a world that was generated previously via Nukkit you can upload it to your server files as our guide explains here.
 Billing
& Support
 Multicraft
 Game
Panel


