Would you like to install WordPress in your website?
Well, that’s a very simple task for cPanel’s WordPress Toolkit!
And this guide will help you on how you can do so!
- Login at https://web.ggservers.com:2083 using the credentials we’ve emailed you shortly after the purchasing process.
- Scroll down a bit, find the ” Applications ” section and click on ” WordPress Toolkit “.

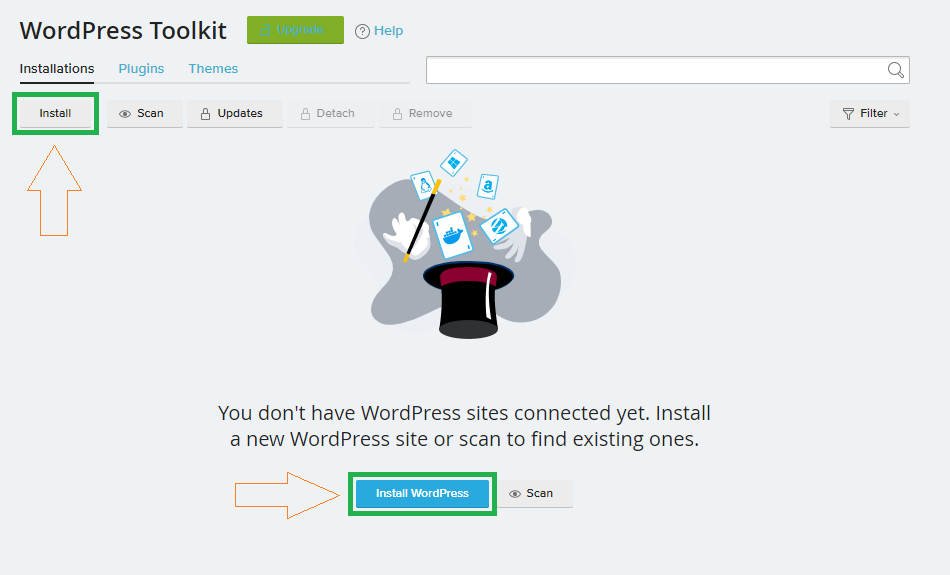
- Click on either ” Install ” or ” Install WordPress “.

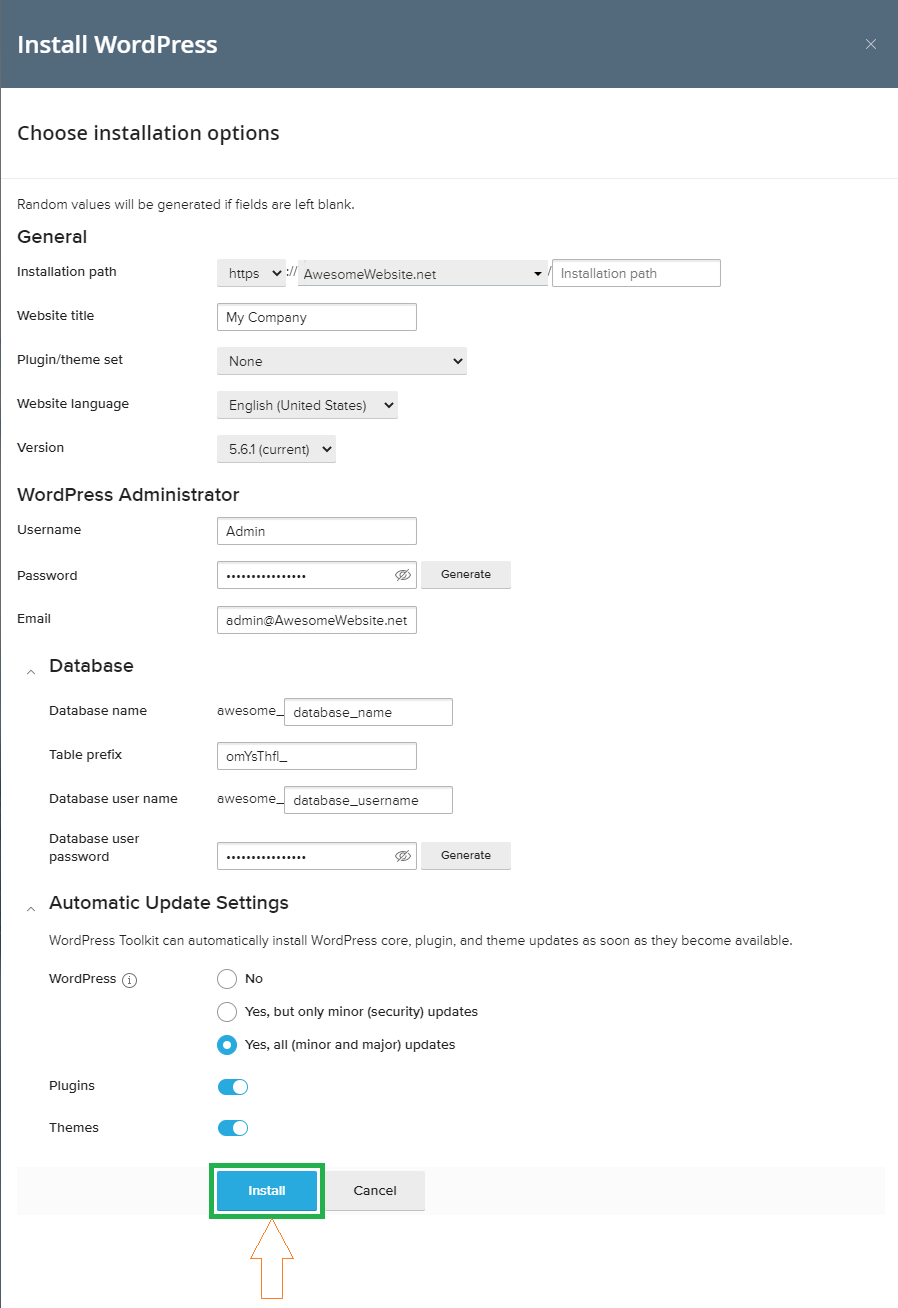
- Change the settings to meet your desired setup.
- Click on ” Install “.

- Done!
That’s it!
You’ll see a notification on the bottom right of your page about the installation progress.
 Billing
& Support
 Multicraft
 Game
Panel


