
This guide will help you with converting your Bedrock world to a Java Edition one.
As you know, at the moment Minecraft has two editions:
- Java Edition – the usual one, that you can run only on PC
- Bedrock Edition – the one made for consoles, like phones, XBOX, PS4, etc.
The two editions are fully separate and they have their way to store your world. You will not be able to run a Bedrock world on a Java Edition or the other way around as they are not compatible.
If you are playing on a Bedrock server, you may decide at a point that you want to switch to a Java Edition server as it provides a lot more features and is more updated (lots of plugins and mods provide a version only for the Java Edition). The issue with this change is that you would have to use a new world, without being able to carry your progress.
Chunker made it possible to convert a Bedrock world to a Java Edition one very easily!
❓ How to Export Your Bedrock World Files ❓
The first step in the process is to get a copy of your Bedrock world. Your world can be either a single-player one or the one from your Bedrock server.
Single-Player World
To get a copy of your single-player Bedrock world you need to:
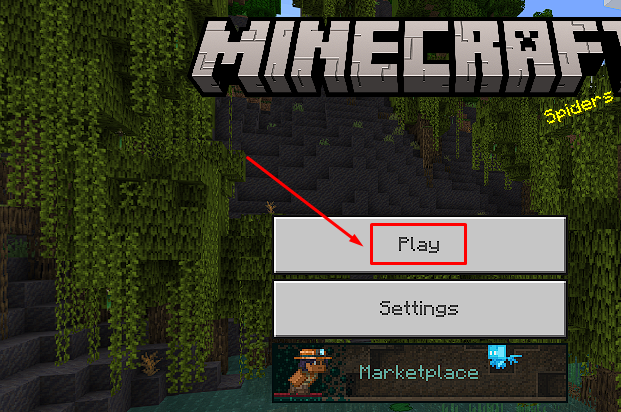
- Launch your Minecraft Bedrock edition on your device and click on
Play.
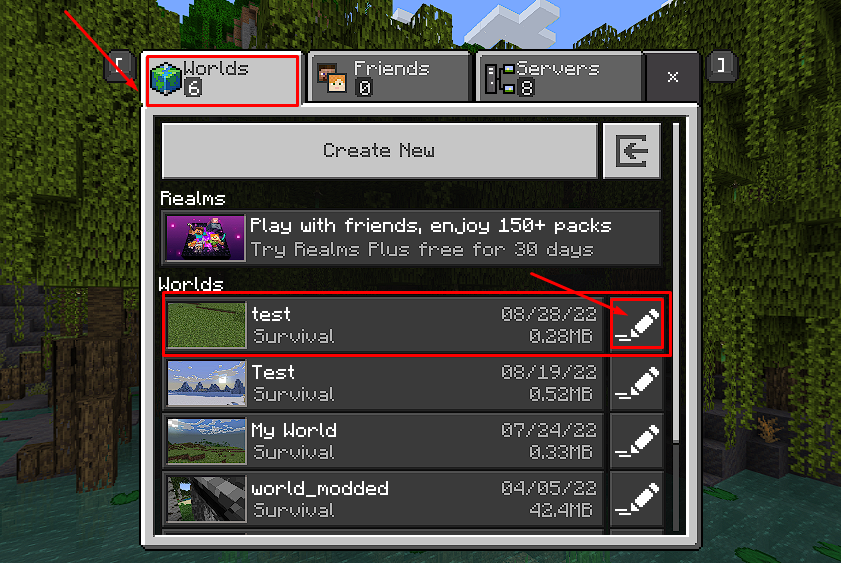
- Click on
Worlds, then find the world you need, and click on theEditbutton at the end of that line.
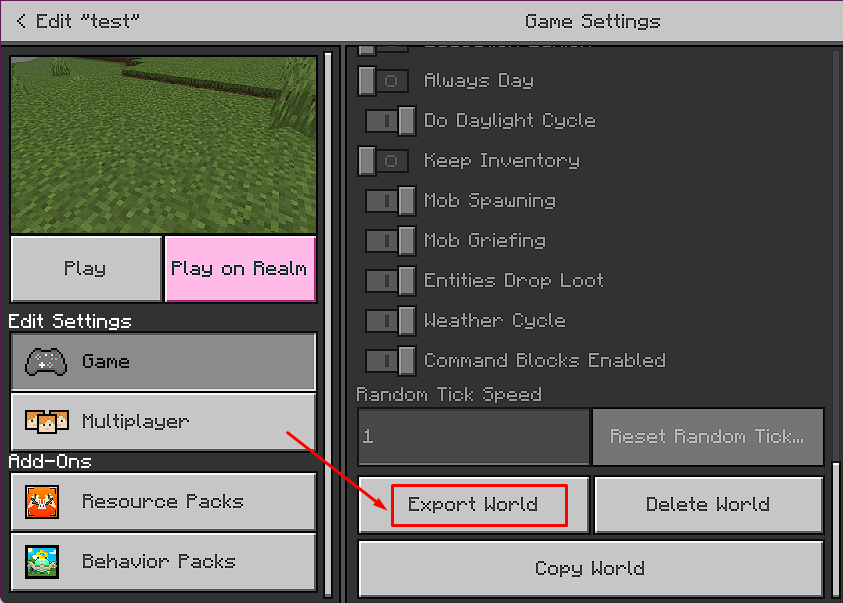
- Scroll down until you see the
Export Worldbutton and press it.
- Choose the location your copy of the world will be saved.
Server World
- Log in to your Multicraft panel here.
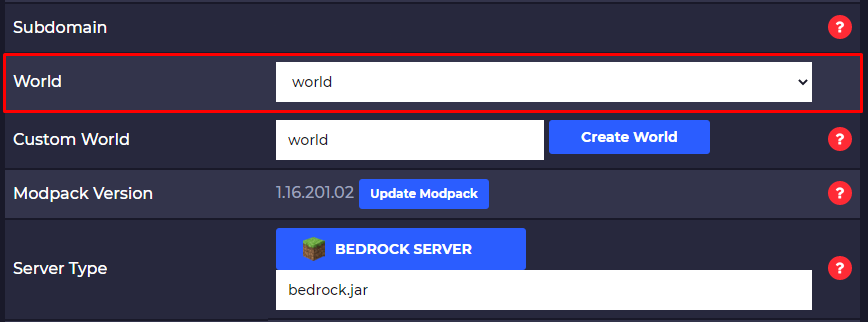
- Note the content of the box titled
Worldbecause that is your world folder name. The default name isworld.
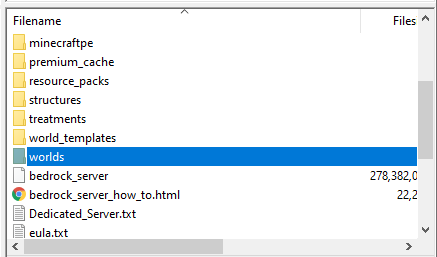
- Connect via FileZilla to your server and download your world.

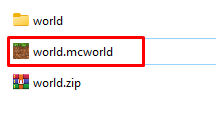
- Right-click on the world folder you downloaded and add it to an archive. Then, rename it by changing the
.zipat the end to.mcworld.
️ How to Convert Your World ️
Now that you have a copy of your Bedrock world we can proceed with converting it into a Java Edition one. To do that, follow the next steps:
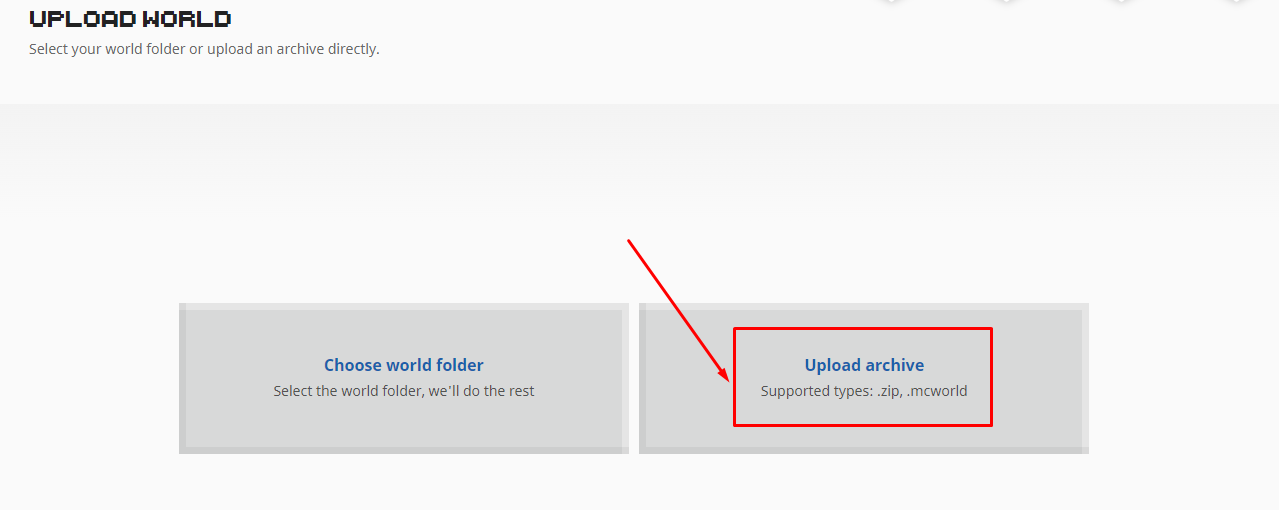
- Go here and press the
Upload Archivebutton.
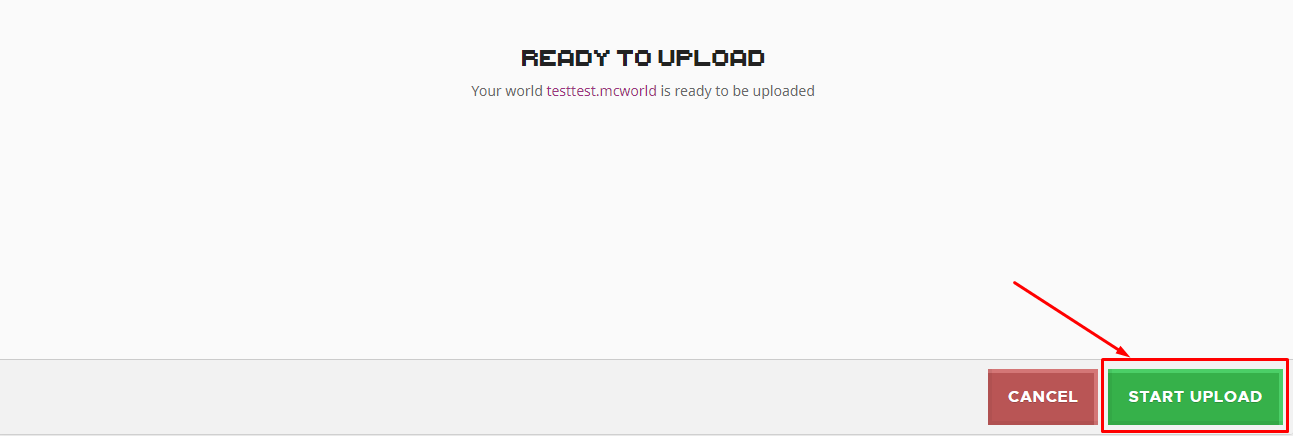
- Select the Bedrock world file you prepared and press the
START UPLOADbutton.
- Select the Java Edition version you want the world to be converted to.

- Click on
CONVERT & DOWNLOAD.

- Click on
DOWNLOADand save the ZIP file.

- Open the ZIP file you just downloaded and copy the content into a new folder.
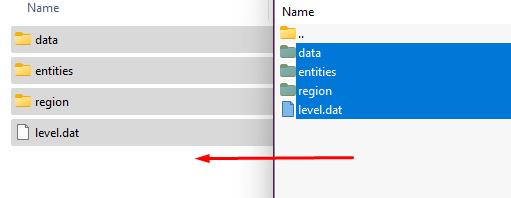
Now you just got the Java Edition world folder for the world you select that you can use either on your client or on your server.
Importing Your World
Now, all that’s left is to import the world into your Java Edition client or your server.
Import to Your Client
To import the world to your Java Edition client, you need to:
- Press the Windows button and type
run, then pressEnter.
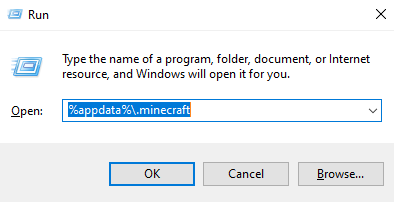
- Type in the box that appears the following, then press
Enter:%appdata%.minecraft
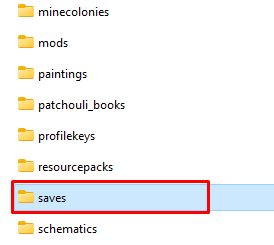
- Open the
savesfolder and paste the world folder that you prepared there.
- Start your Minecraft client. Your world will pop up in the saves section and you will be able to select it and play.
Import to Your Server
To import the world to your Java Edition server, you need to:
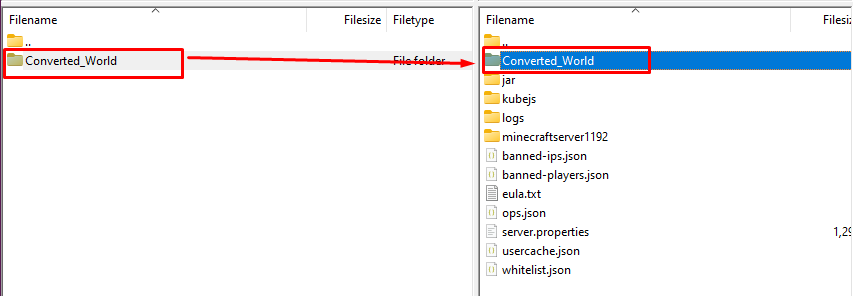
- Use Filezilla to upload the new world folder to your server, meaning inside the root directory of the server.
- Find the
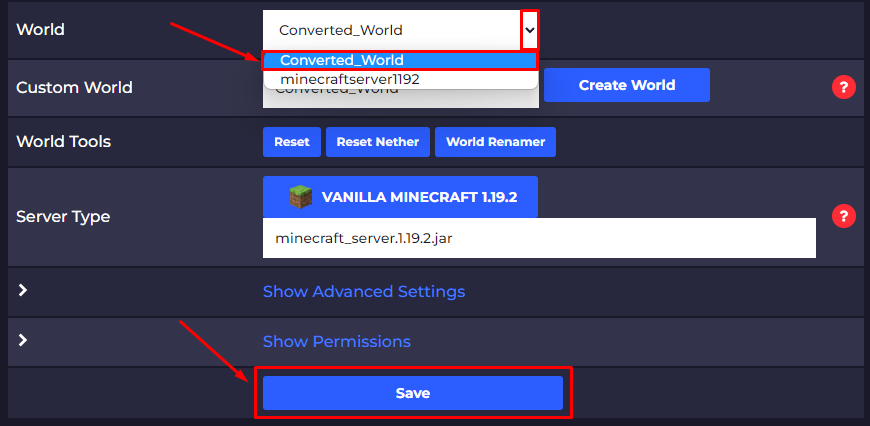
Worldsection in your main Multicraft page, then select the new world folder you just added in the drop-down list, then click onSave.
- Restart your server.
Now you just uploaded your converted world to your Java Edition server.
 Billing
& Support
 Multicraft
 Game
Panel


