 Billing
& Support
Billing
& Support Multicraft
 Game
Panel
Game
Panel


FileZilla is a free FTP software program. This amazing software allows you to transfer files from your local computer to your server and vice-versa. It’s simple and fast.
This tutorial will be separated into four parts:
- Downloading and Installing Filezilla
- Setting a Password for Filezilla
- Connecting to The Server Files
- How to Use Filezilla
Downloading and Installing Filezilla
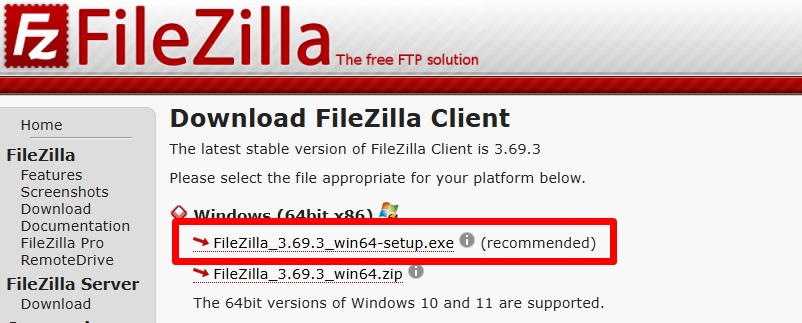
- First, access this link and download the client version.
Versions for Mac and Linux are available as well on their site.
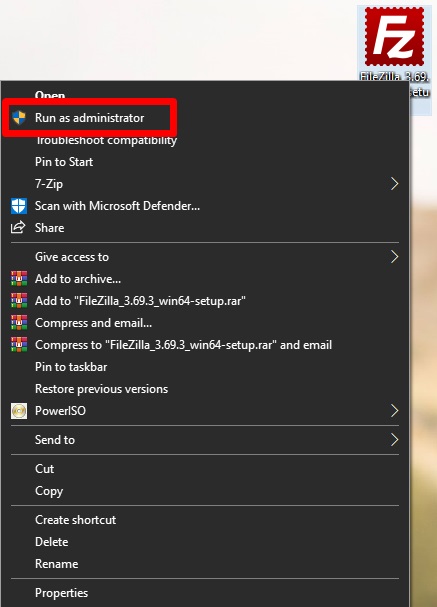
- Once downloaded, press right click on it and run it as administrator.
- In setup click “I agree” then “Install for all users” and “next” until you see the “install” button.
- We also have a video tutorial below:
Setting a Password For Filezilla
- First, you will need to set a password for SFTP connection.
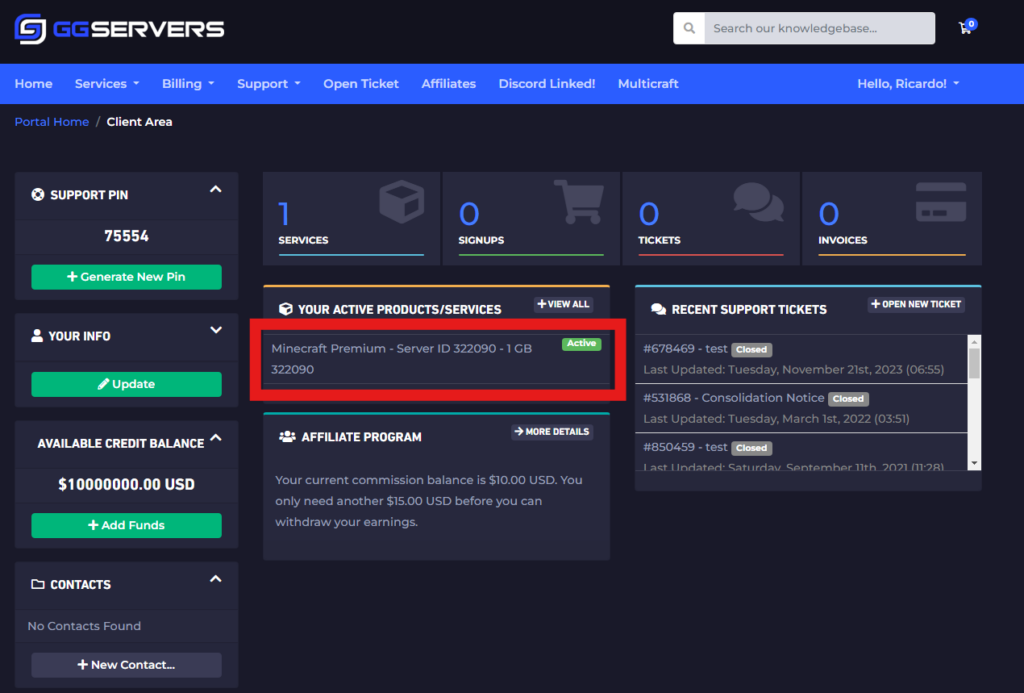
- Login at https://ggservers.com/billing
- Select your service.
- Click on
Change Password.
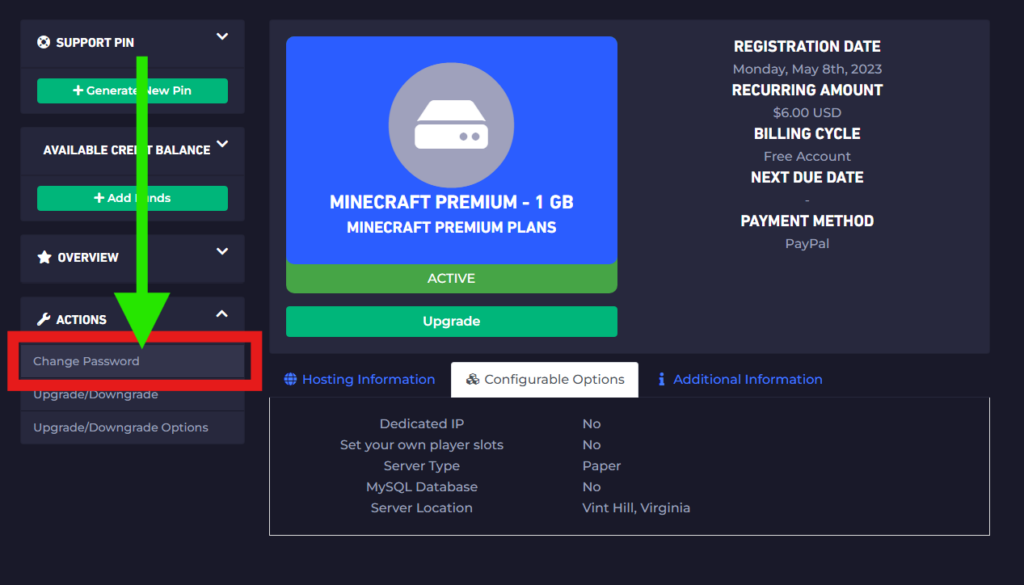
- Set a safe password and click on
Save Changes.
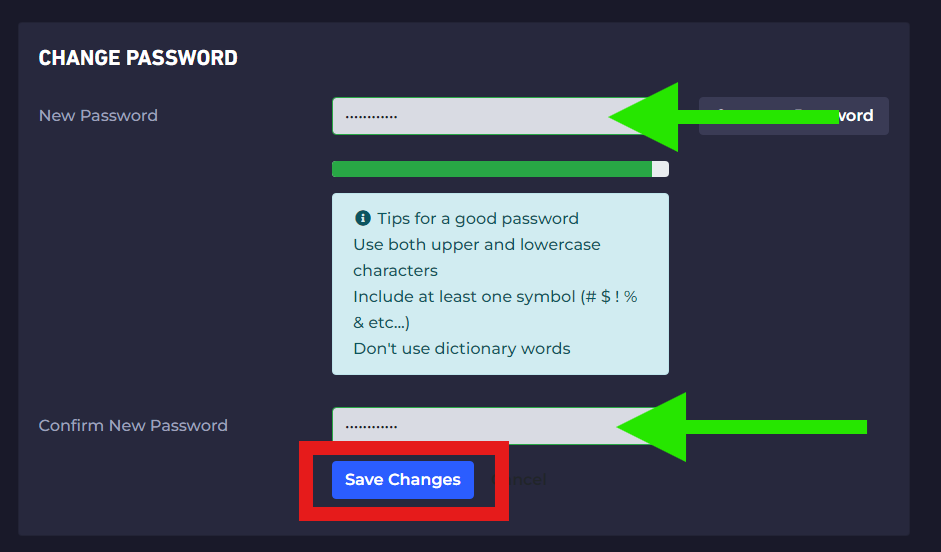
- Save this password! You will use it later.
Connecting to The Server Files
- Access your Pterodactyl Control Panel.
- Click on “Dashboard” on the left side menu.
- On the right side you can see your connection info under “SFTP Details”
Example below:
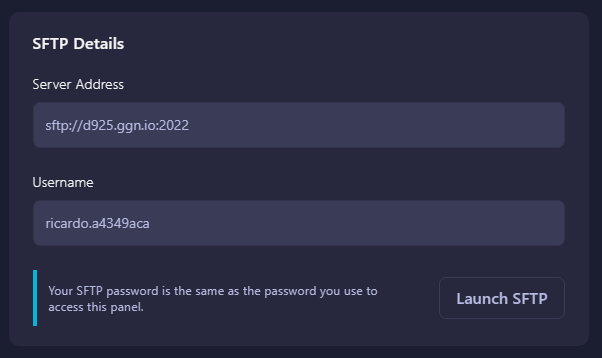
- Using the info, fill up the host and username, then add the password you just set. Leave the port blank, it will be automatically filled.
- Then, press “Quickconnect”

- We also have a video tutorial here:
How To Use Filezilla
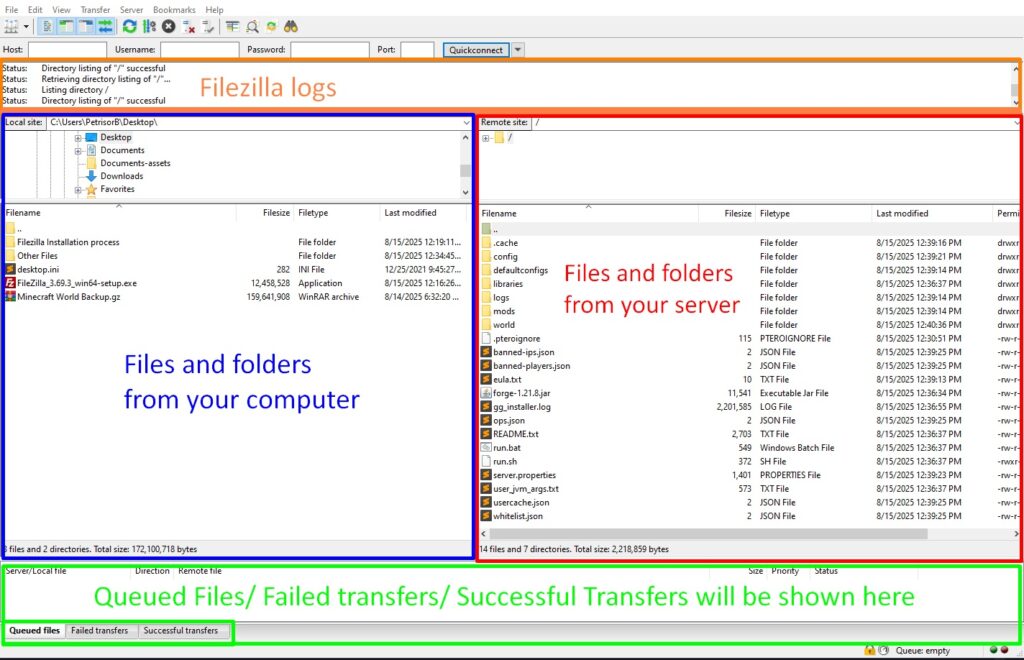
Things may seem confusing, but using Filezilla is really simple:
- On the left side, you have access to the files from your Computer.
- On the right side, you have access to the files from your Server.
A visualization is provided in the next picture:
- To upload/download files or folders, you can either right click on the file and press upload/download or simply drag and drop the file from your computer to the server or vice-versa.
- Multiple files can be selected as well using Ctrl + Left Click