 Billing
& Support
Billing
& Support Multicraft
 Game
Panel
Game
Panel


If you want to set a custom icon for your server on the in-game server list, but don’t know-how, you’re in the right place.
Preparing Your Icon
Please note that your icon has to meet up the following requirements:
- It needs to be 64×64 pixels in size
- It needs to be a
.pngfile extension - It needs to be called
server-icon.png
To prepare your icon you need to:
- Save the picture you want to use, then open the following page.
- Click on
Browseand select your image, then click onUpload Image.
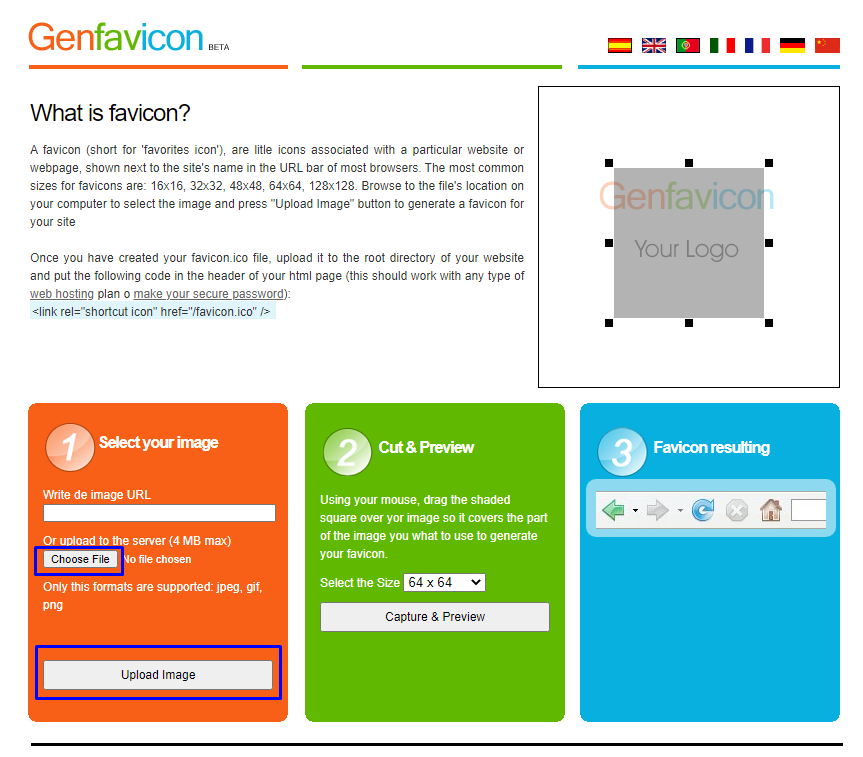
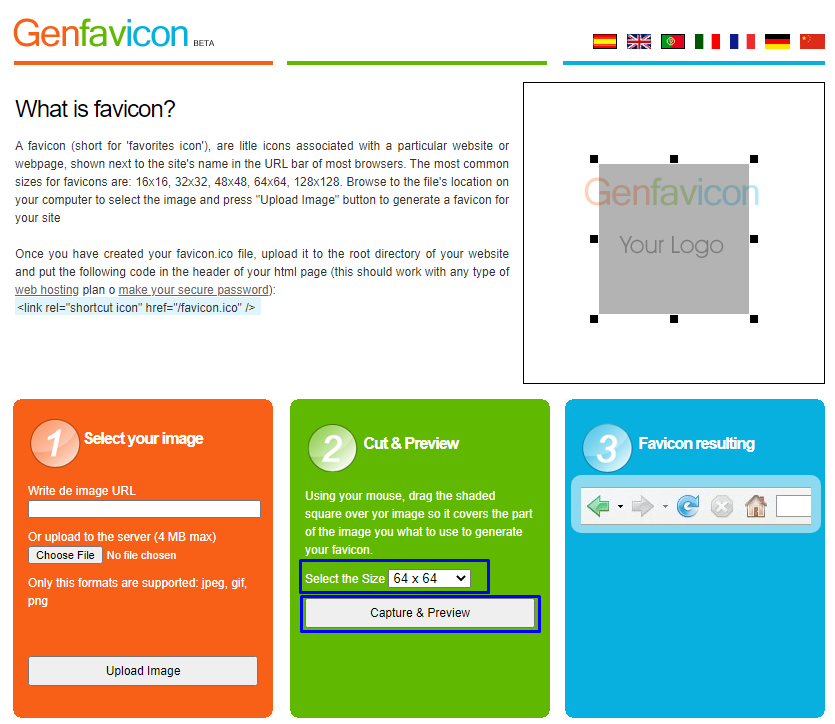
- Select
64 x 64at theSelect in Sizecampus, then click onCapture & Preview.
- Download your new PNG icon and rename it to
server-icon.png.
️ Setting Up Your Icon ️
- Log in to your Pterodactyl panel here and stop your server.
- Click on
Files, and then on the “Upload” button.
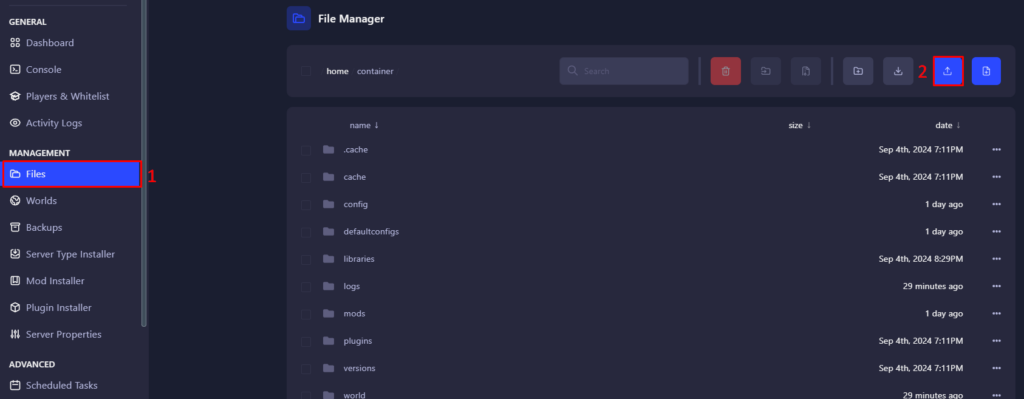
- Select the icon and upload it.
- Start the server.