
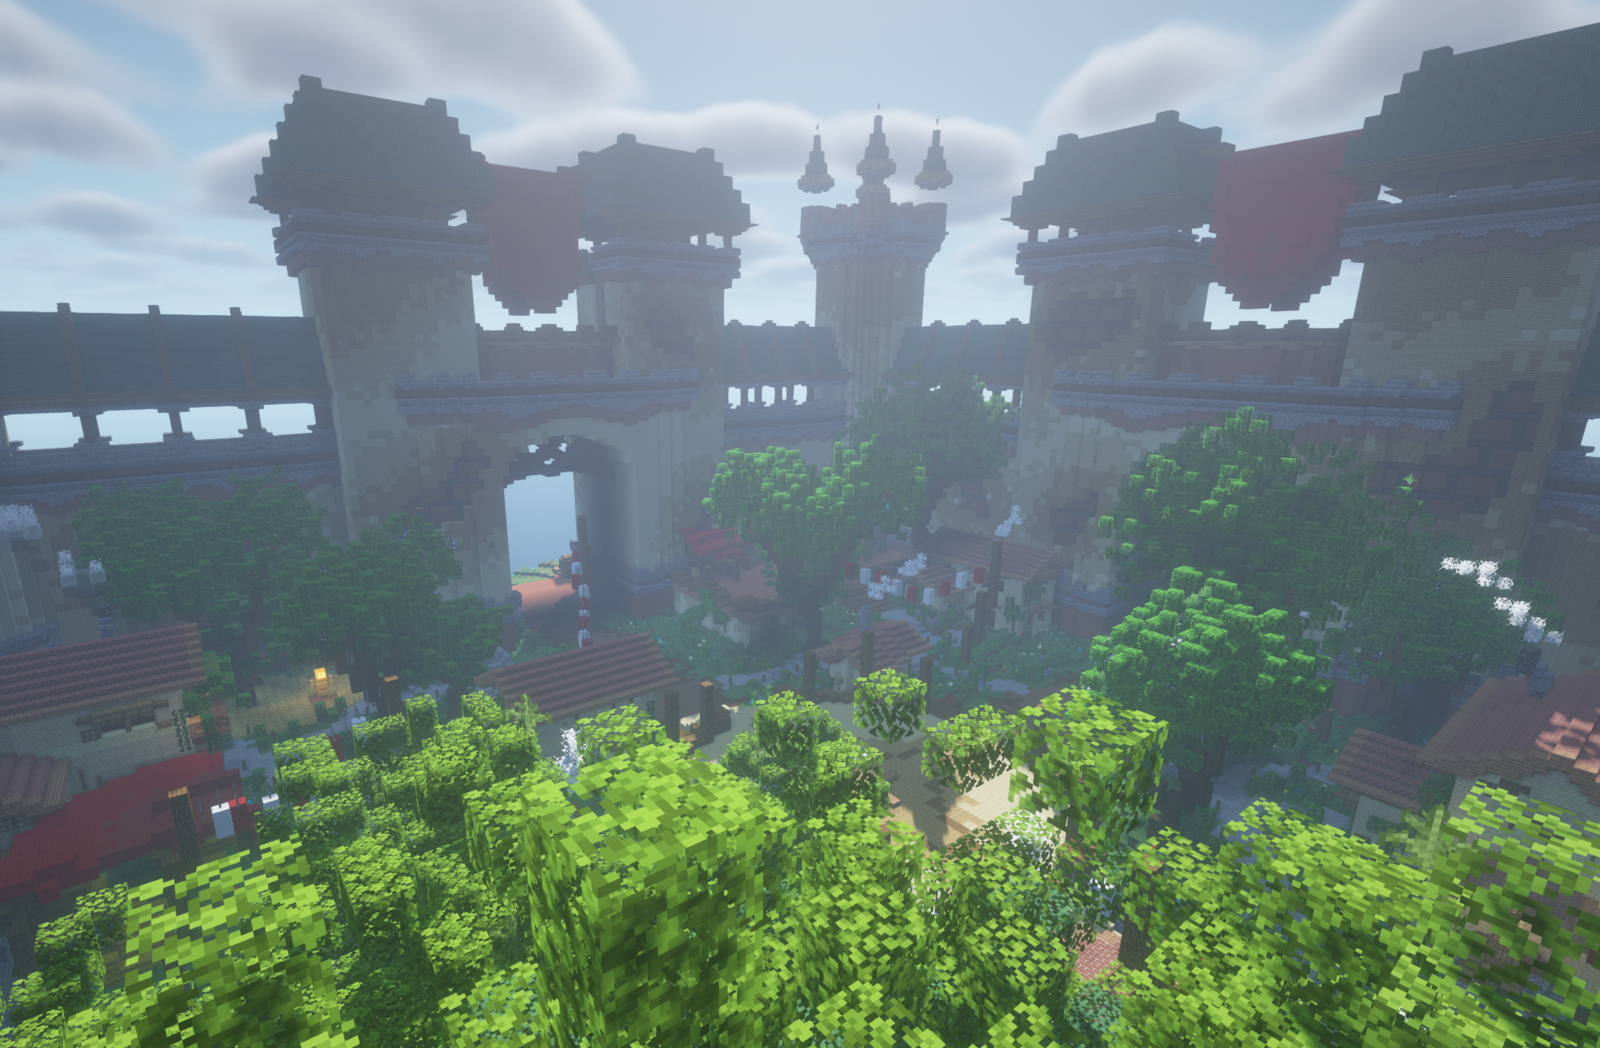
With the templates we offer, everyone can have fun without thinking about the boring tasks like installing plugins and configuring them, that’s time consuming. Still, there’s things you would want to change about the server or learn how to use certain features about it. Here’s where we teach you how to ^-^
TO BEGIN WITH
Giving yourself the OP role in-game
By default, you won’t have access to all the commands. To fix that you will have to OP yourself from your Multicraft console. Once there, just type the following command:
op <username>
For example: op Notch
The username is case-sensitive so make sure to write your exact username. You can also set your rank to “Owner” by using the following command in-game after you OP’d yourself:
/lp user <username> parent set owner
We’ll talk more about the ranks later in this article
USEFUL COMMANDS AND INFORMATION
FOR USERS
/warp – This command will show you a list of warps (locations) on the server that you can teleport to. Simply clicking on one will allow you to teleport to it.
/f create <name> – This is the command that you will need to use if you want to create a new faction.
/f desc <desc> – This command will set a description for your faction.
/f invite <name> – This will invite a player to your faction.
/f kick <name> – This will kick a player from your faction.
/f sethome – This command will set the home location of your faction.
/f home – This will teleport you to the home location of your faction.
/f claim – Use this command to claim the chunk that you are standing on for your faction.
/f unclaim – Use this command to unclaim the chunk that you are standing on for your faction.
/f top <criteria> – This will show you a list with the top factions depending on what criteria you have selected. You can use money, land, members and power as criteria.
/f map – Use this command to show you the surrounding area. You can click on chunks on the map to claim them.
/ah – Open an auction menu where you can sell your items to other players.
/shop – See a list with the top islands on the server.
/tpa <name> This will send a teleportation request to the user you want. If they accept it, you will be shortly teleported to them.
/pay <username> <amount> – This command will let you send money to other players.
/sethome – Sets your home location to the block you are standing on.
/home – Teleports you to your home.
/f help – More helpful information regarding the Factions plugin.
FOR OPERATORS/OWNERS
/setspawn – Sets the location where the players will teleport when they join or die.
/setwarp <name> – Sets a warp to your location.
/delwarp <name> – Removes a warp.
/tps – This command will show you the TPS value of your server. If the value is 20, that means that the server has perfect performance and that it is running fine. Anything above 18 should be good performance, if you have less than that, your server might be experiencing lag.
/si show – This will open an inventory that contains all the custom items that were implemented in this plugin pack. Left click to get one item, and shift + left click to get a stack.
/mute <username> – This command will prevent the username from writing in chat.
/ban <username> – This command will prevent the username from joining the server.
/banip <username> – This command will prevent any username with the IP of the specified username from joining the server.
Plugin List
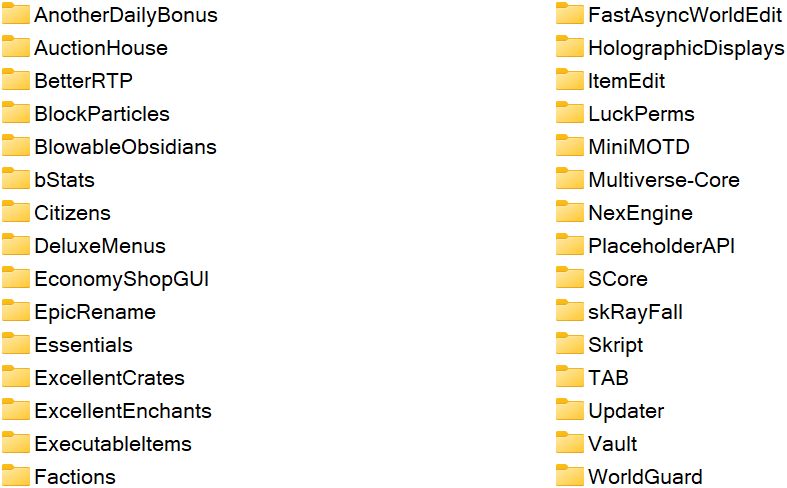
Here is a screenshot of all the plugins that the server is using, you can easily type ” PluginName Minecraft Plugin ” in your Google Search box and you will find all the details about that plugin, documentation and so on in case we miss something as we will include only the most important things.
Editing your MOTD (Server Description)
By default, you server description will look like this:

The plugin pack is using the MiniMOTD plugin to display that description. It’s one of the best plugins for editing your MOTD as it offers support for tons of colors as well as gradients. To change how it looks you will have to go to the plugins folder and then inside the MiniMOTD folder where you will find a main.conf file. The line1 and line2 options is what you need to change:

If you find MiniMOTD hard to use, you can remove the plugin file for it and use the default Minecraft MOTD feature. We have an article on how to do that here:
MOTD Tutorial – How to Change Your MOTD
You can also use this website to create a default MOTD for Minecraft. This will not work with the MiniMOTD plugin, just with the MOTD option inside your server settings:
https://mctools.org/motd-creator
Editing your Tab and Scoreboard
${color}[#0080ff](Plugin Link:) https://www.mc-market.org/resources/20631/
By default, your Tab and Scoreboard will look like this:
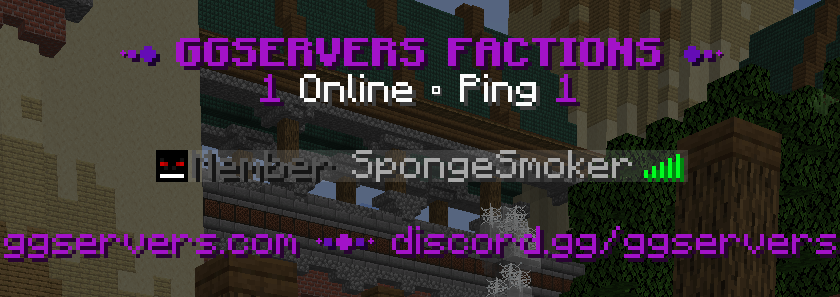
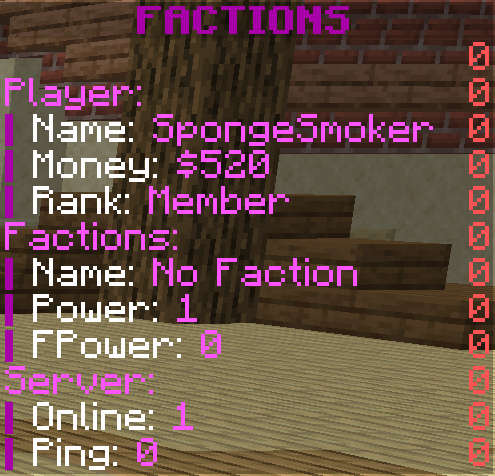
Now, you will need to go to the same “plugins” folder but this time to the “TAB” folder. There you need to edit the config.yml file.
- You can change the TAB configuration in this section:

- As for the scoreboard, you can change it in this section:
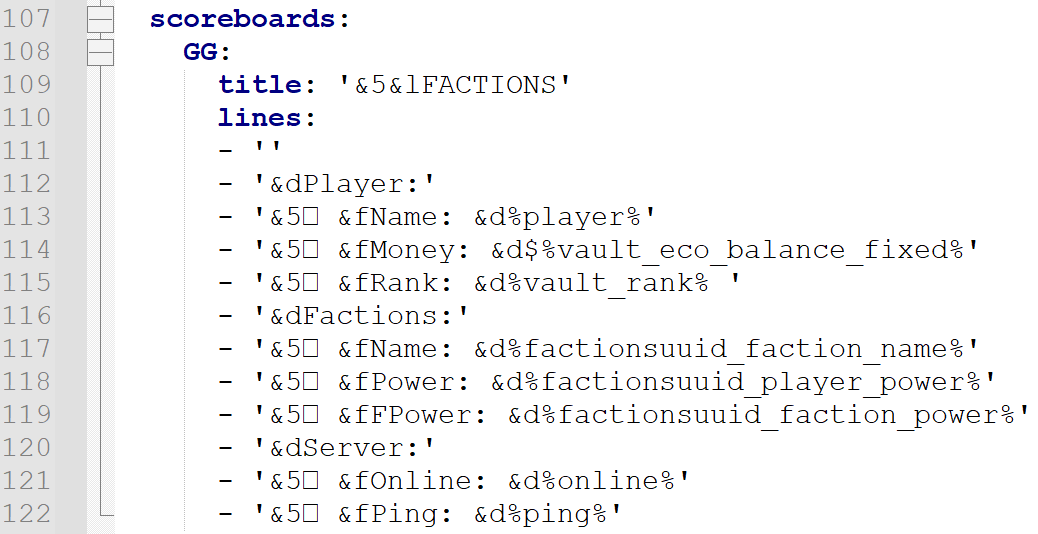
For the full documentation and all the commands regarding this plugin, please have a look on their Wiki Page:
Editing your Holograms
${color}[#0080ff](Plugin Link:) https://dev.bukkit.org/projects/holographic-displays
When you join the server, the first thing you see is this hologram which by default looks like this:
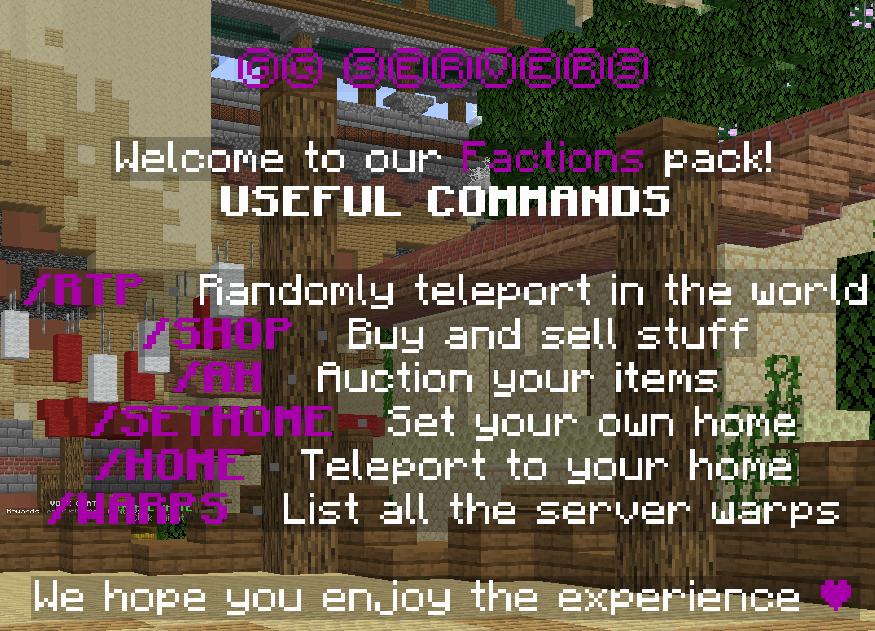
If you want to change it or other holograms, you need to go to the “plugins” folder and then access the HolographicDisplays directory. There, edit the database.yml file to your liking:
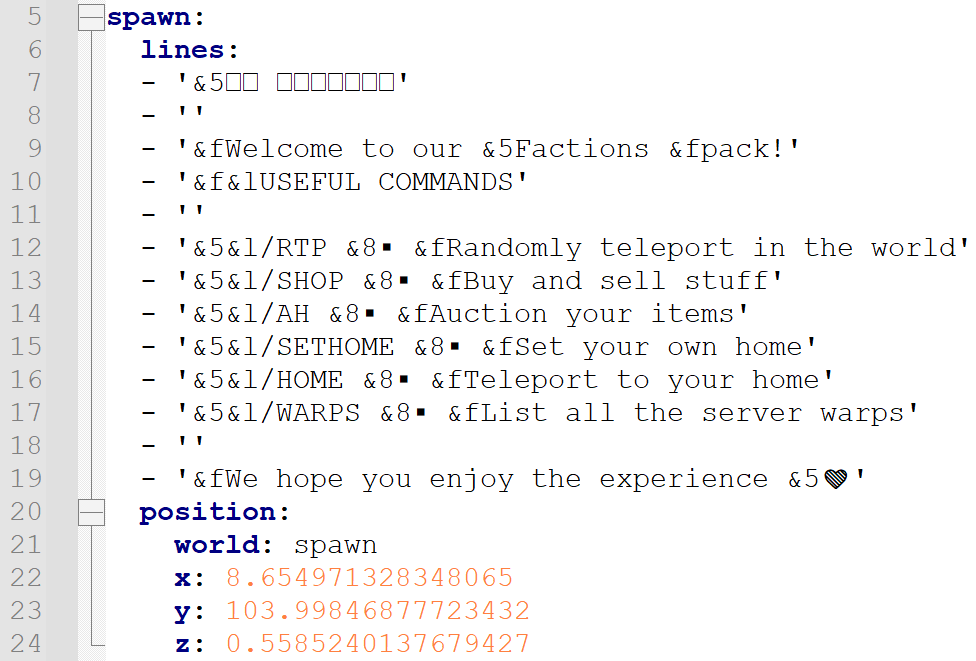
To learn more about this plugin, for example, how to move holograms to your location, how to remove certain holograms and so on, please have a look on their documentation page:
The Factions Plugin (SaberFactions)
The plugin the server is using for the Factions experience is SaberFactions. The plugin is really well made and has a ton of positive reviews. It’s pretty much plug & play, there’s not really that much you have to configure about it by default but in case you want to, you can go to the plugins/Factions and edit the .json and .yml files there
The Shop Plugin (EconomyShopGUI)
The plugin that we are using for the shop is called EconomyShopGUI. It’s a really well made plugin that you can use to customize your shop however you want. You can add or remove items, change prices and much more!
Here is a list of useful commands that you can use to manage the plugin:
/shop (Open the main shop)
/shop <section> (Open a shop section directly from the command instead of typing /shop and choosing a shop section)
/sreload (Reloads the plugin)
/editshop additem <section> <material> <buy price> <sell price> (This command will add any item from the shop)
/editshop edititem <section> <item> <action> <key> <value> (This command will edit any item from the shop)
/editshop deleteitem <section> <item> (This command will remove any item from the shop)
/editshop addhanditem <section> <buy price> <sell price> (With this oommand you can add items from your hand to the shop)
/editshop addsection <section> <material> <displayname> <place> (Used to add empty shop sections to shop)
/editshop editsection <section> <action> <key> <value> (Used to edit existing shop sections)
/editshop deletesection <section> (Used to delete shop sections from the sections.yml config)
You can edit shops using the commands above or by editing the config.yml/shops.yml/sections.yml files inside the EconomyShopGUI directory that’s in your plugins folder.
If you want more info regarding the plugin I suggest having a look over their wiki here:
EconomyShopGUI Wiki
Ranks & Permissions Plugin (LuckPerms)
${color}[#0080ff](Plugin Link:) https://luckperms.net/
From the plugin link, the Bukkit/Spigot one is the one we are using and the one that the server supports. For this plugin, we already have an active article which you can check here:
Luckperms Article
To change the ranks easily, you need to use the command /lp editor and then access the link you are given. There, select the rank you want to edit and rename the text that is inside the red square:
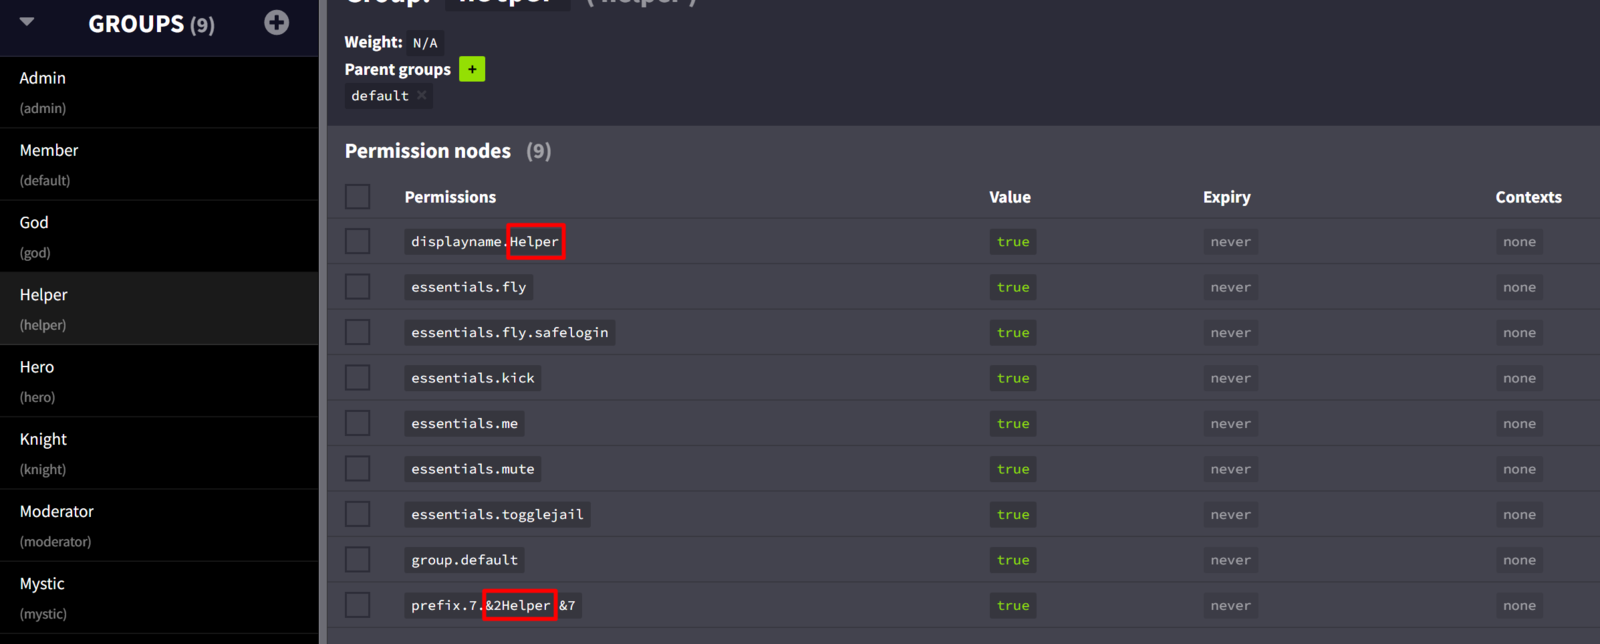
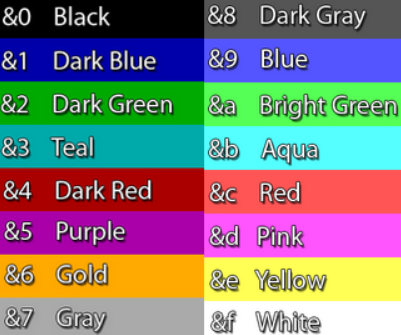
Change “Helper” to whatever you want. but make sure not to change anything else, except the sybmols like ${color}#008000 or ${color}#c0c0c0 which are basically color formatting codes.
After you have changed that, enter the following command in-game:
/lp group Helper rename <new-name>
For help regarding color codes and formatting, here’s a photo to help you understand what every symbol does:
 Billing
& Support
 Multicraft
 Game
Panel


