
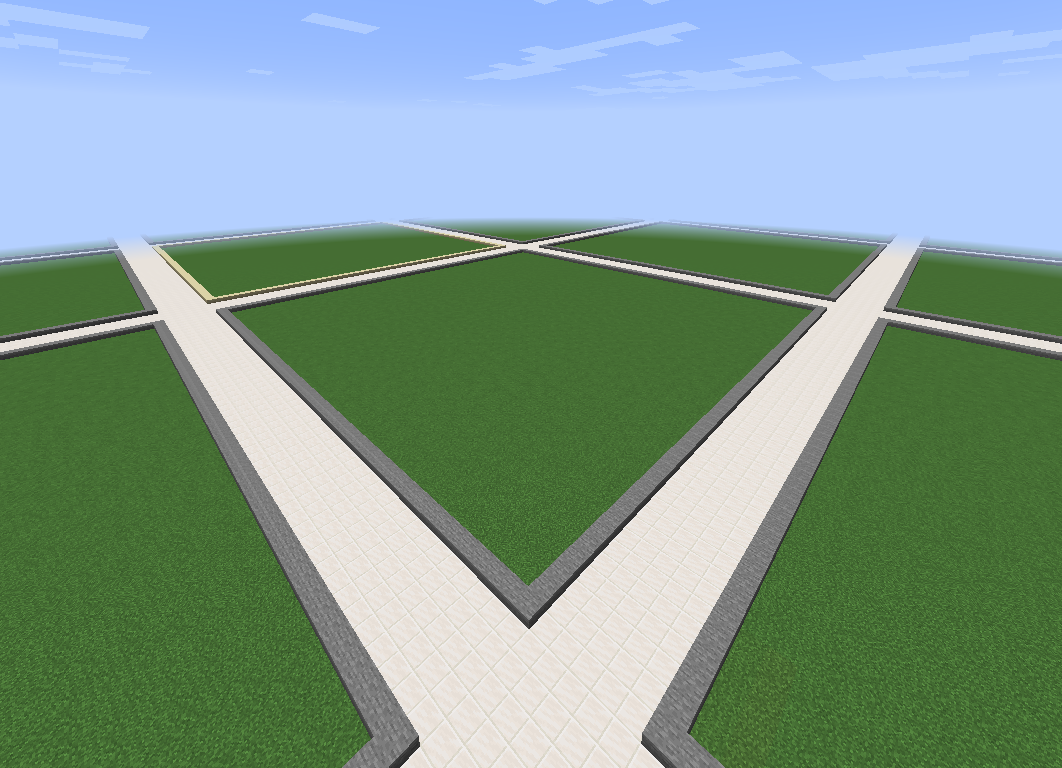
With the templates we offer, everyone can have fun without thinking about the boring tasks like installing plugins and configuring them, that’s time consuming. Still, there’s things you would want to change about the server or learn how to use certain features about it. Here’s where we teach you how to ^-^
TO BEGIN WITH
Giving yourself the OP role in-game
By default, you won’t have access to all the commands. To fix that you will have to OP yourself from your Multicraft console. Once there, just type the following command:
op <username>
For example: op Notch
The username is case-sensitive so make sure to write your exact username. You can also set your rank to “Owner” by using the following command in-game after you OP’d yourself:
/lp user <username> parent set owner
We’ll talk more about the ranks later in this article
Plugin List
Here is a screenshot of all the plugins that the server is using, you can easily type ” PluginName Minecraft Plugin ” in your Google Search box and you will find all the details about that plugin, documentation and so on in case we miss something as we will include only the most important things.

Editing your MOTD (Server Description)
${color}[#0080ff](Plugin Link:) https://www.spigotmc.org/resources/serverlistplus.241/
By default, you server description will look like this:

If you want to change it, you need to go to your server files and access the “plugins” folder and then open the “ServerListPlus” directory. Once there, you need to edit the ServerListPlus.yml file. You only need to edit line 38 and 39 to your liking and that’s all.

You can use the following website to create a custom description and it also has an option for ServerListPlus!
https://mctools.org/motd-creator
Also, for a much better documentation regarding this plugins, please have a look over their wiki page:
Editing your Tab, Join Titles and your Scoreboard
${color}[#0080ff](Plugin Link:) https://www.spigotmc.org/resources/titlemanager.1049/
By default, your Tab and Scoreboard will look like this:
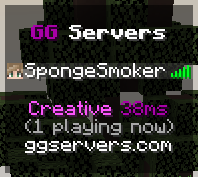
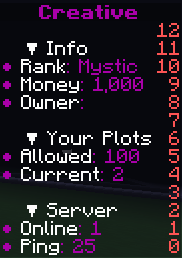
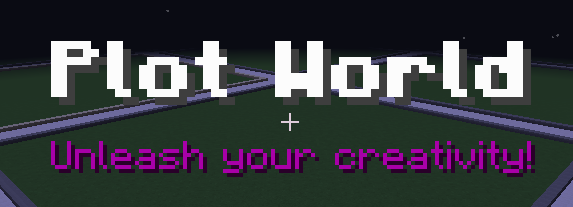
Now, you will need to go to the same “plugins” folder but this time to the “TitleManager” folder. There you need to edit the config.yml file.
- You can change the TAB configuration in this section, just what’s between the apostrophes:
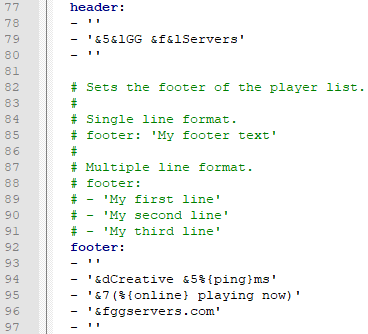
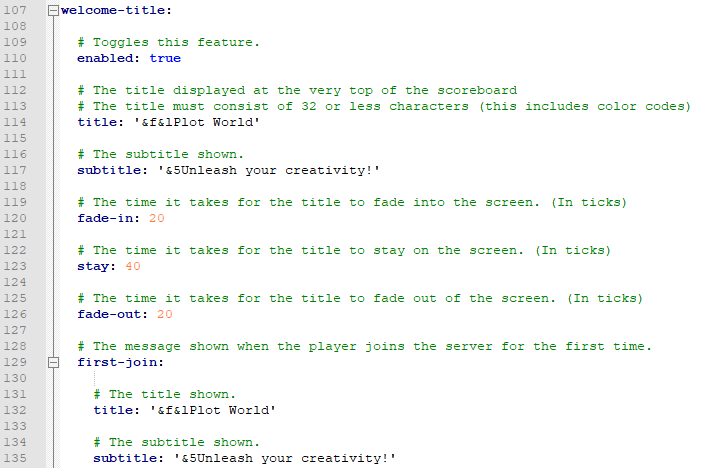
- Then, you can change the welcome titles in this section, just make sure that what you type is as well between the apostrophes:
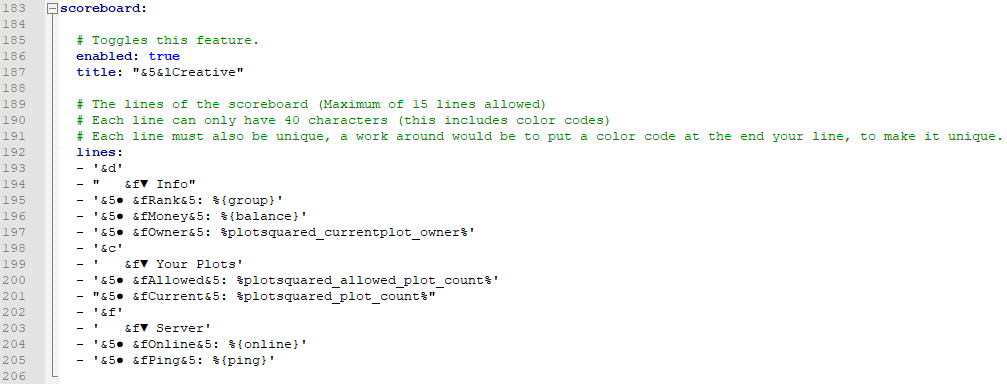
- And finally, you can change the scoreboard in this section, making sure that everything that you write is also between apostrophes:
For the full documentation and all the commands regarding this plugin, please have a look on their Wiki Page:
Editing your Holograms
${color}[#0080ff](Plugin Link:) https://dev.bukkit.org/projects/holographic-displays
When you join the server, the first thing you see is this hologram which by default looks like this:
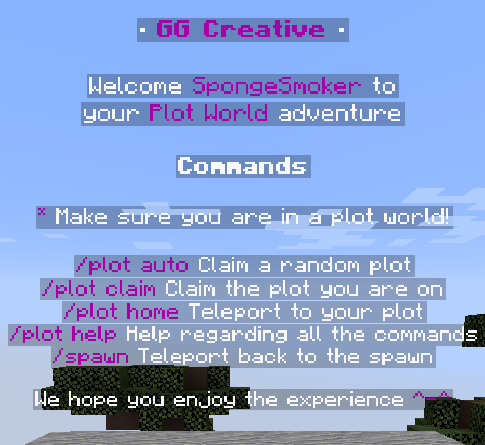
If you want to change it or other holograms, you need to go to the “plugins” folder and then access the HolographicDisplays directory. There, edit the database.yml file to your liking:
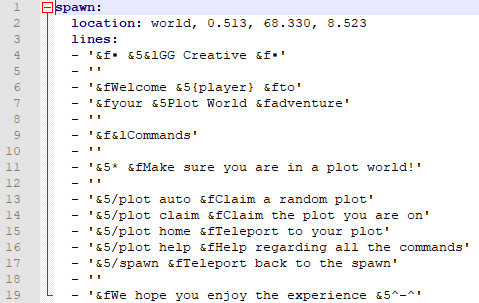
To learn more about this plugin, for example, how to move holograms to your location, how to remove certain holograms and so on, please have a look on their documentation page:
The Creative Plugin (PlotSquared)
${color}[#0080ff](Plugin Link:) https://www.spigotmc.org/resources/plotsquared.1177/
The plugin the server is using for the Creative experience is PlotSquared. It’s a plug & play plugin, there’s not really that much you have to configure about it but in case you want to, they have a great wiki page that contains details and help about everything that the plugin offers
PlotSquared Wiki
Ranks & Permissions Plugin (LuckPerms)
${color}[#0080ff](Plugin Link:) https://luckperms.net/
From the plugin link, the Bukkit/Spigot one is the one we are using and the one that the server supports. For this plugin, we already have an active article which you can check here:
Luckperms Article
To change the ranks easily, you need to use the command /lp editor and then access the link you are given. There, select the rank you want to edit and rename the text that is inside the red square:
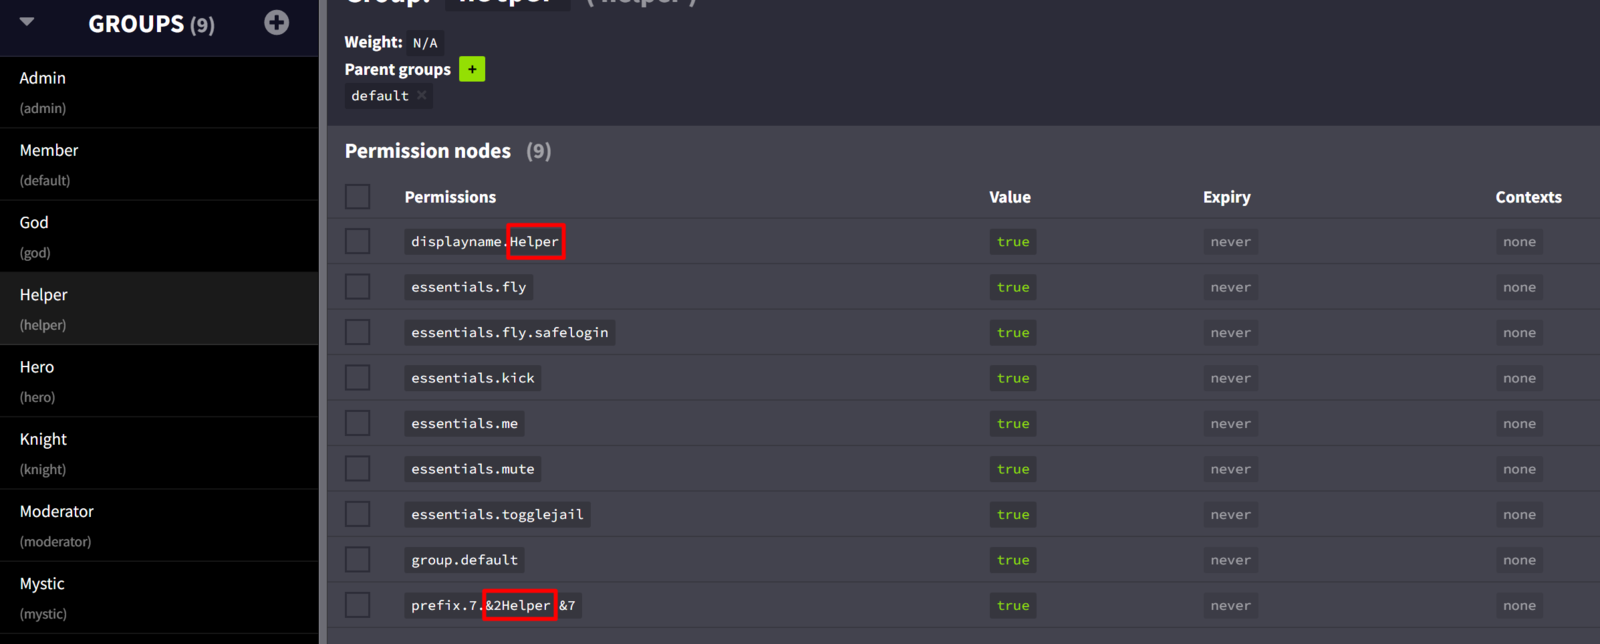
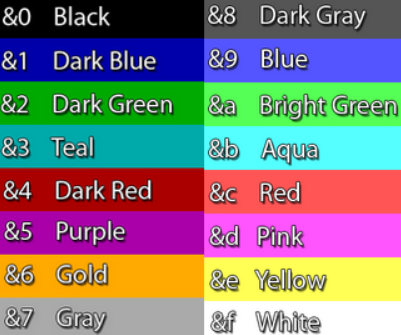
Change “Helper” to whatever you want. but make sure not to change anything else, except the sybmols like ${color}#008000 or ${color}#c0c0c0 which are basically color formatting codes.
After you have changed that, enter the following command in-game:
/lp group Helper rename <new-name>
For help regarding color codes and formatting, here’s a photo to help you understand what every symbol does:
Useful Administering Commands
/setspawn Sets the location where the players will teleport when they join or die.
/setwarp <name> Sets a warp to your location.
/delwarp <name> Removes a warp.
/lag Gives you information about the server performance.
/lagg clear Clears the items in the world that it’s executed.
 Billing
& Support
 Multicraft
 Game
Panel


