 Billing
& Support
Billing
& Support Multicraft
 Game
Panel
Game
Panel


Hytale Workbench Guide: How to Craft and Use Your First Work Station
Hytale is officially live, and while the “Pocket Crafting” system is great for basic survival tools, you will quickly find that more advanced items require a dedicated space to build. In Hytale, the Workbench is your gateway to mid-tier progression, allowing you to craft better armor, weapons, and decorative blocks that aren’t available in your standard inventory menu. This guide covers everything you need to know about crafting and placing your first Workbench.
Step 1: Gather the Required Materials
To construct a Workbench, you need to collect raw resources from the environment. The recipe requires 4 Tree Trunks and 3 Stones. While you can technically gather these by hand, it is incredibly slow. We highly recommend crafting a Crude Hatchet and a Crude Pickaxe first to speed up the process. If you haven’t made those yet, check out our previous guide:
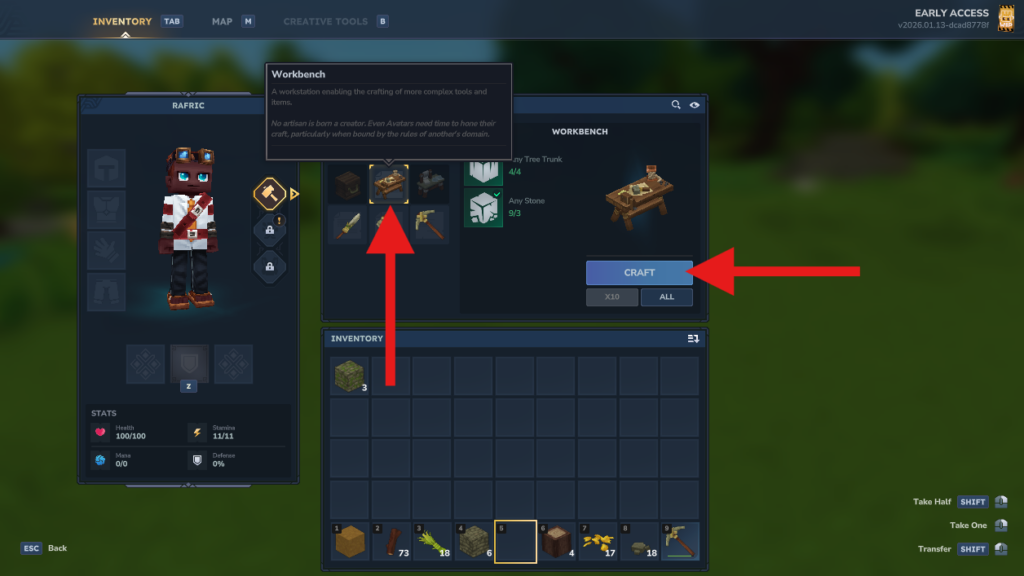
Step 2: Use Pocket Crafting to Create the Workbench
Once you have 4 Tree Trunks and 4 Stones in your inventory, press TAB to open your character menu. On the right-hand crafting panel, locate the Workbench icon. Since you have the necessary materials, simply click the Craft button to assemble the station.
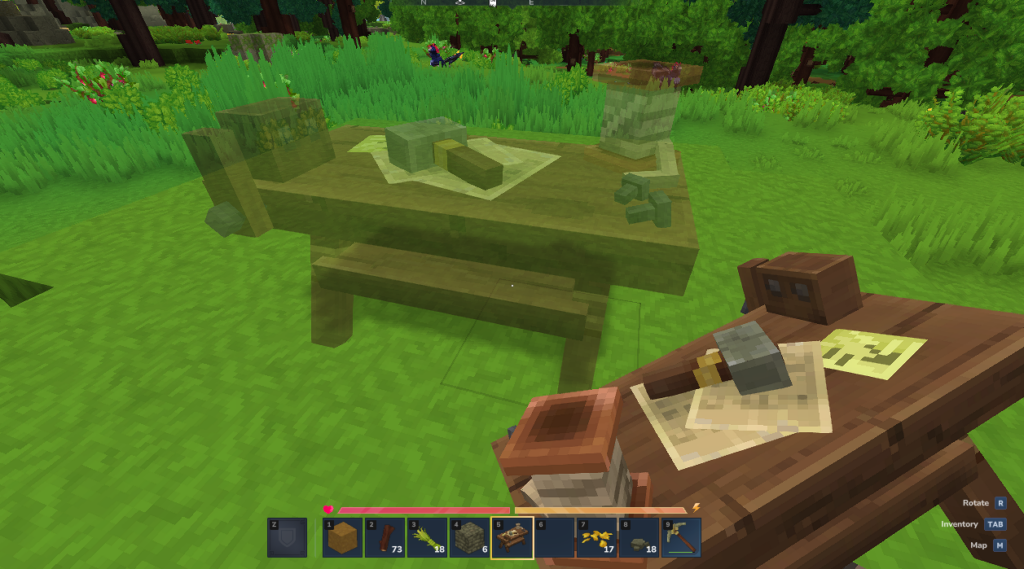
Step 3: Choose a Placement Location
With the Workbench now in your hotbar, select it and look at the ground where you wish to place it. Hytale features a “ghosting” preview that shows you exactly where the block will sit and its orientation before you commit to the placement.
Step 4: Place the Workbench
Once you are happy with the location, Right-Click (or your secondary action key) to place the Workbench into the world. Unlike Minecraft’s single-block crafting table, the Hytale Workbench has a distinct, 3D model that adds a great aesthetic to your starter base.
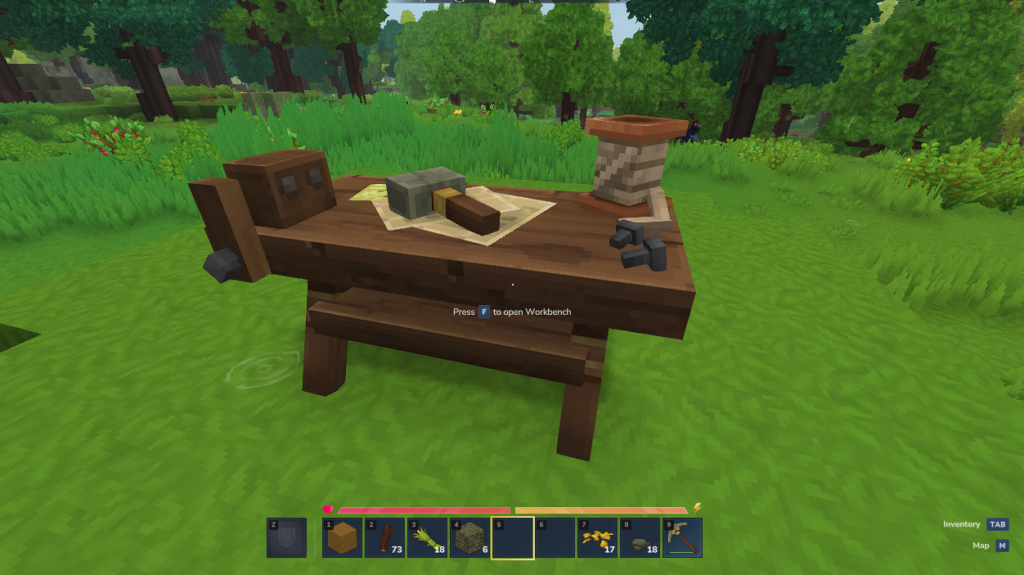
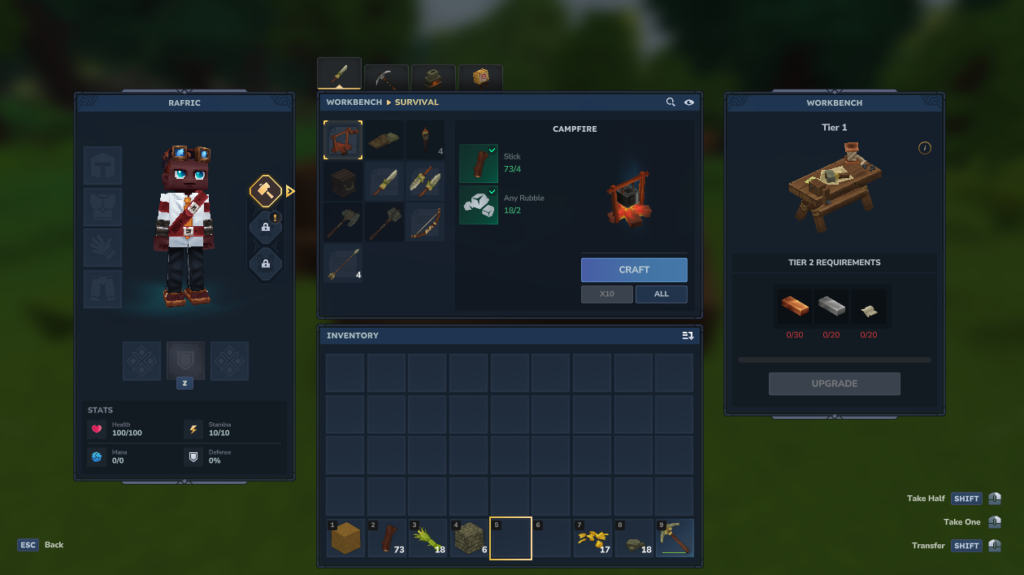
Step 5: Interact to Access Advanced Recipes
To use the station, walk up to it and press F (the default interact key). This will open a new, expanded crafting UI. You will notice that many recipes previously grayed out in your pocket crafting menu are now available for assembly here!
Building a massive Hytale city is much more fun with a team! To ensure your world stays online 24/7 with lightning-fast speeds, get your Hytale Server Hosting at GGServers today. Experience Orbis without the lag and manage your community with ease using our custom control panel.