 Billing
& Support
Billing
& Support Multicraft
 Game
Panel
Game
Panel


How to Change the Default Map on Your Black Mesa Server
In Black Mesa, the Default Map setting determines which environment loads automatically when the server starts up or rotates. Whether you want to host a classic deathmatch in dm_stack or explore other research facility sectors, changing the map is a foundational part of server customization. Follow the steps below to update your starting map using the GGServers panel.
Step 1: Access the Panel
Log in to your GGServers Control Panel and select your Black Mesa server. This dashboard is where you manage all technical map rotations and world settings.
Step 2: Stop Your Server
To ensure the Source engine initializes the correct level upon boot, you must first stop the server. Click the red Stop button on the main console. Wait for the status indicator to confirm the server is “Offline” before moving to the settings.

Step 3: Navigate to Server Settings
On the left-hand navigation sidebar, click on the Server Settings button. This menu provides access to the primary configuration categories for your Black Mesa instance.

Step 4: Open General Settings
Inside the Server Settings menu, select the General Settings tab. This section contains the core identity and execution parameters for your server.

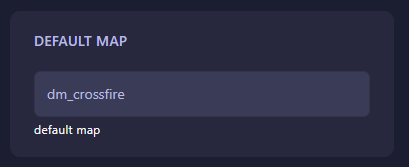
Step 5: Change the Setting That Will Auto Save
Locate the box labeled Default Map. Enter the filename of the map you wish to set as the default (e.g., dm_stack). The GGServers panel features an automatic save function, so your changes are recorded as soon as you finish typing. Ensure the map name is entered exactly as it appears in your server’s map files.
Step 6: That is it!
Your map configuration is updated! Return to the main dashboard and click Start. Your Black Mesa server will now load into the new default map automatically, ready for combat.
Revolutionize your deathmatch with Black Mesa server hosting at GGServers. Our high-speed NVMe storage ensures near-instant map loads for a seamless multiplayer experience!