 Billing
& Support
Billing
& Support Multicraft
 Game
Panel
Game
Panel


General Info
Uploading a custom world to your 7 Days to Die server allows for a more personalized and immersive gameplay experience.
Whether you’re using a pre-generated map or a completely custom world, this guide walks you through each step from preparing your files to successfully uploading and launching the world on your server.
There process is different, depending on your world. The world can be a RWG (Random World Generation) or a Navezgane world.
In this article you will find steps to upload any of them.
Randomly Generated World – RWG
- First, access your Control Panel and stop the server.

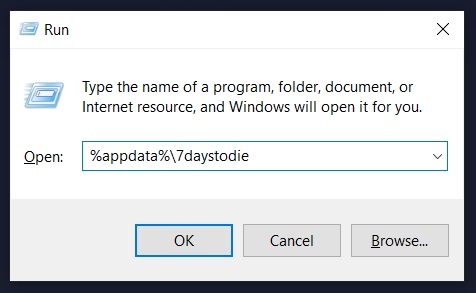
- Locate your RWG world by pressing Windows + R key to open the “Run” tab.
- Type
%appdata%\7daystodieand press enter.
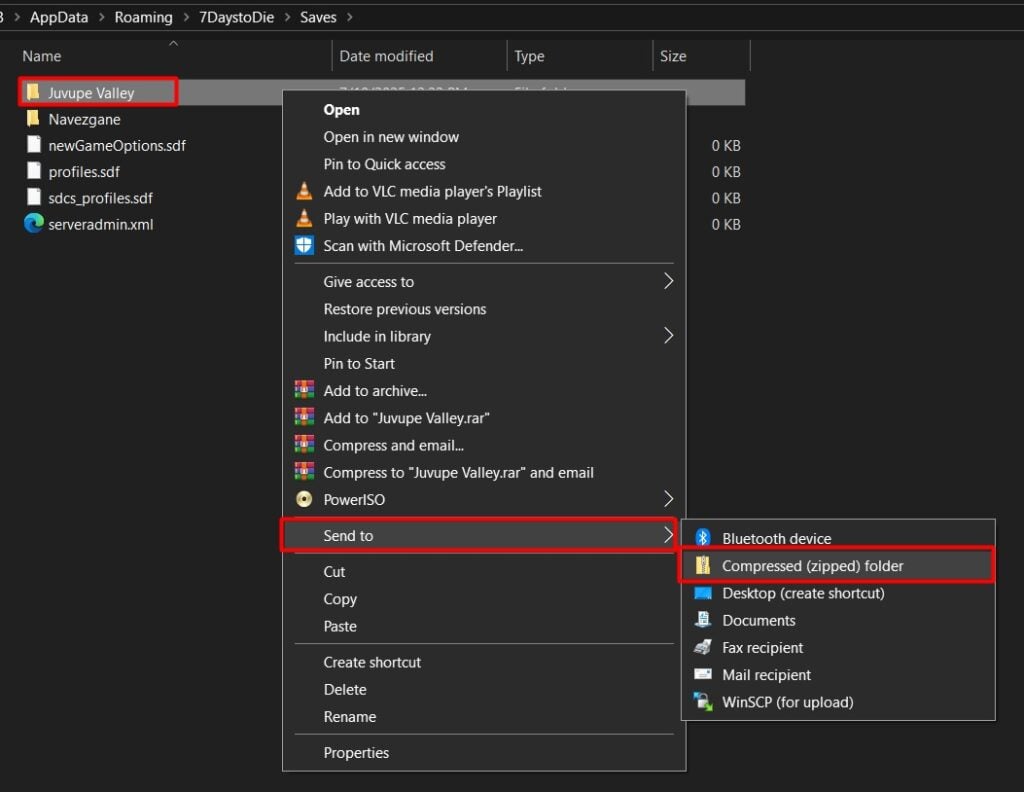
- Access the
Savesfolder and .zip your world. (In this example is Juvupe Valley)
- Minimize the window and access the control panel again.
- Then click on
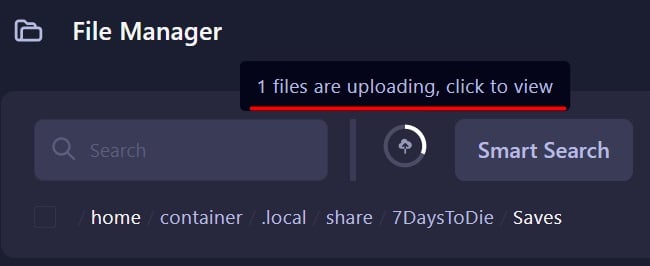
Filesand go to .home/container/.local/share/7DaysToDie/Saves - Upload your zipped world by dragging and dropping it to the panel or using the “Upload” button.
- Wait for the file to upload, once it’s done, you should see it between the server files.
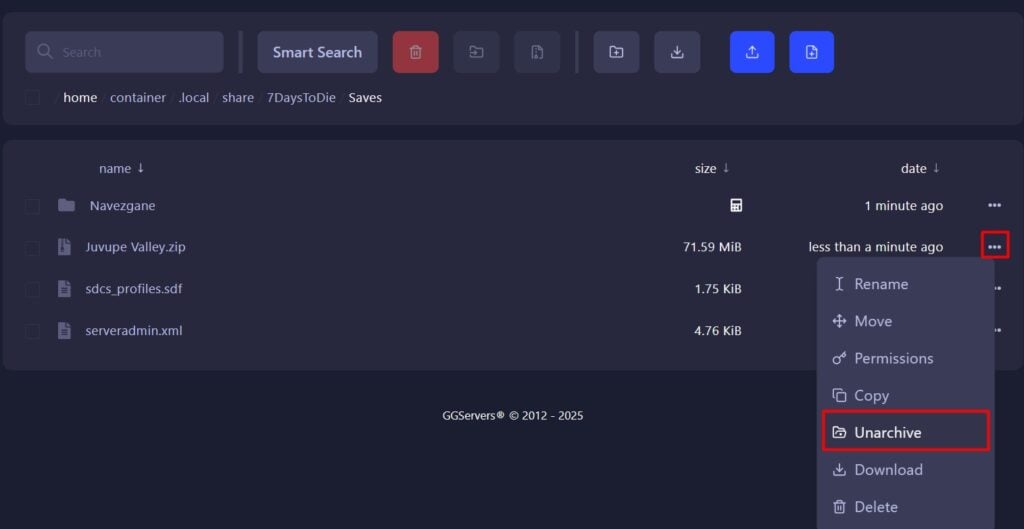
- Unzip the world and delete the .zip file after that.
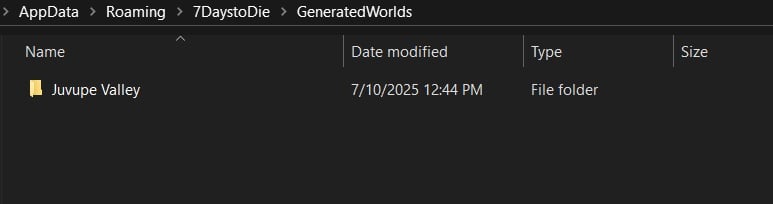
- Once this is done, go back and access
/home/container/Data/Worldson your panel.
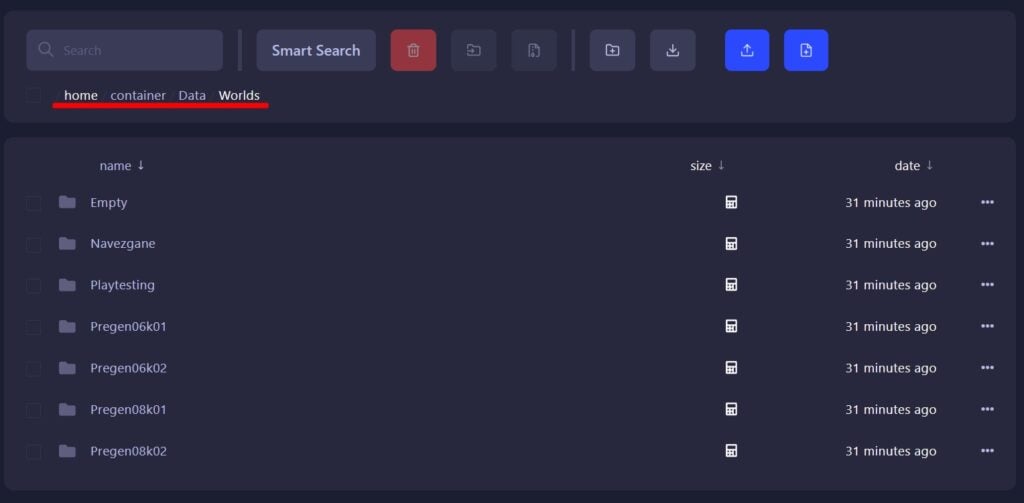
- As well as the
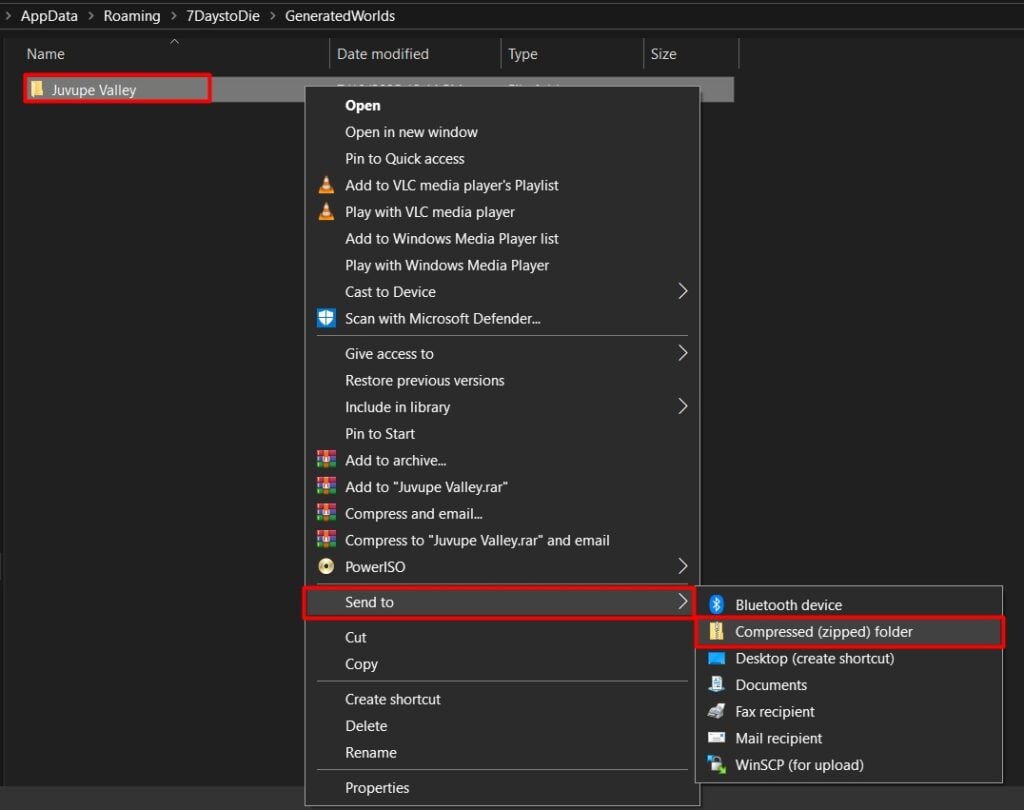
GeneratedWorldsfolder on your computer.
- Compress this folder as well, using the same method.
- Upload the .zip file to the server, unzip it, and delete the .zip file so that only the folder remains.
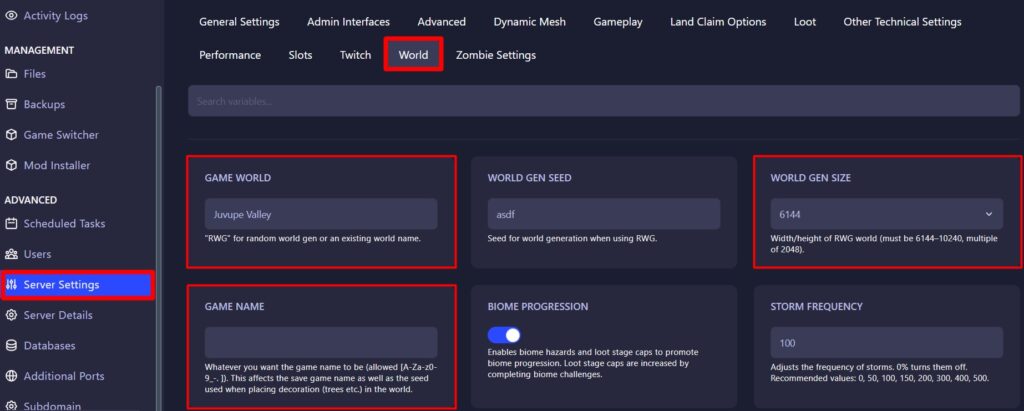
- To make sure the server loads the correct world, access “Server Settings” then “World”
Change the “Game World” setting to match the name of your world as well as the “Game Name”. And make sure the “World Gen Size” is the same value as it is on the world you just uploaded.
- Finally, start the server!
Navezgane World
- First, access your Control Panel and stop the server.
- Locate your Saves folder by pressing Windows + R key to open the “Run” tab.
- Type
%appdata%\7daystodieand press enter.
- Access the
Savesfolder and then theNavezganeone. Inside you will see all your Navezgane saves.
Zip the world you want to upload. In this example, the name is “GreatWorld”
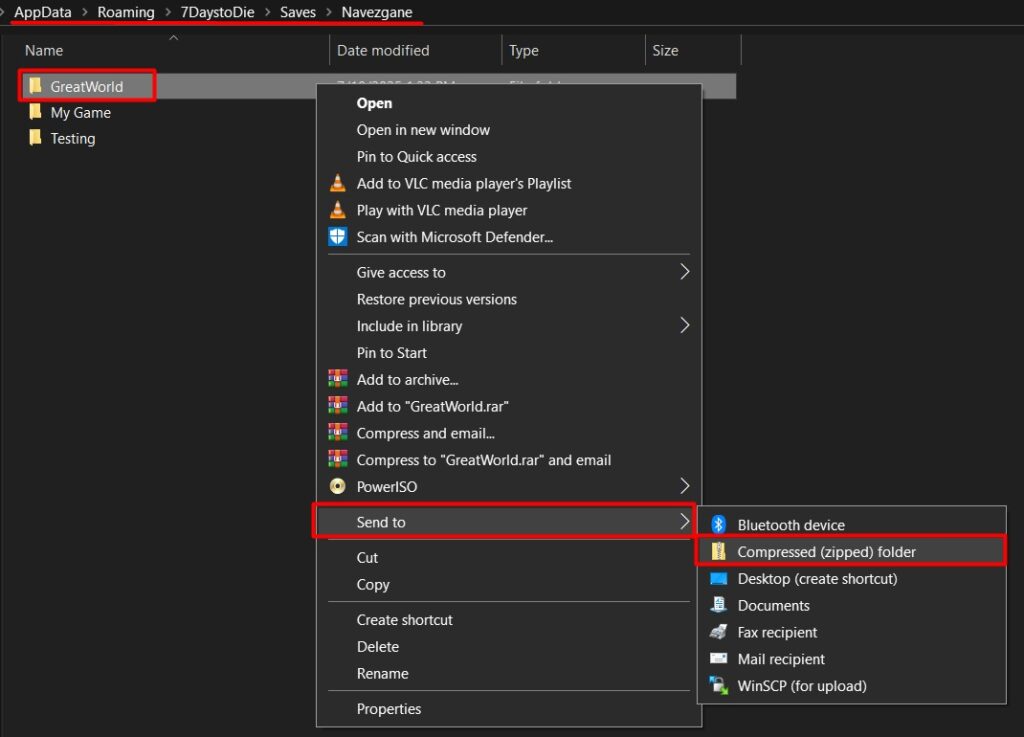
- Minimize the window and access the control panel again.
- Then click on
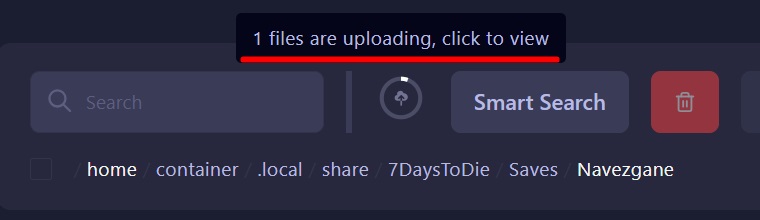
Filesand go to .home/container/.local/share/7DaysToDie/Saves/Navezgane - Upload your zipped world by dragging and dropping it to the panel or using the “Upload” button.
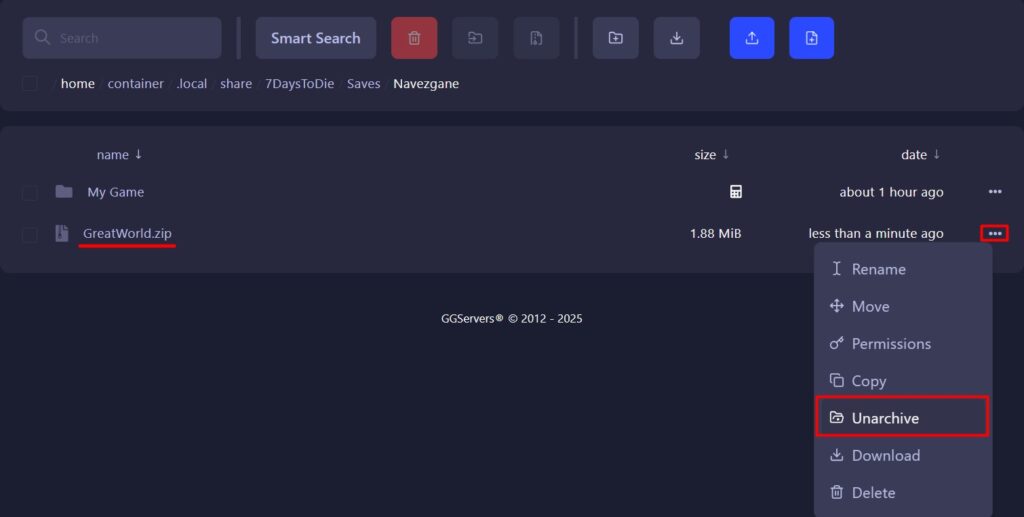
- Wait for the file to upload, once it’s done, you should see it between the server files.
- Unzip the world and delete the .zip file after that.
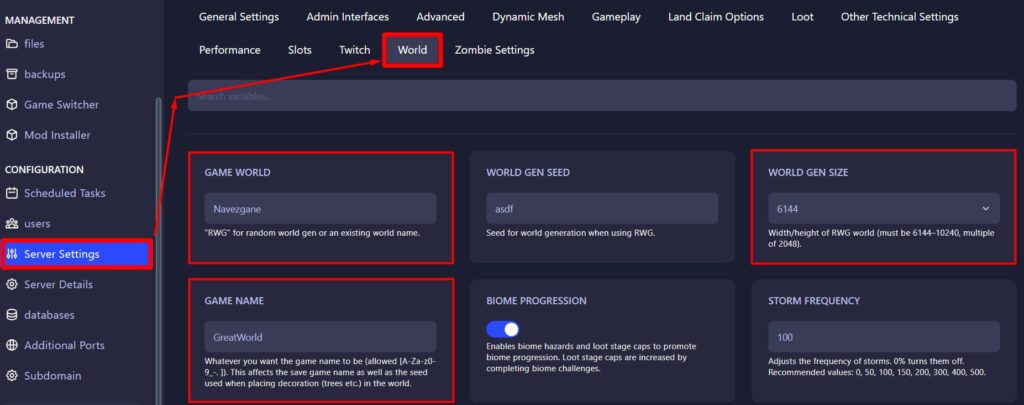
- To make sure the server loads the correct world, access “Server Settings” then “World”
Make sure the Game World is set to Navezgane and Game Name to the one you just uploaded, in our case is GreatWorld.
Also, check the World Gen Size to match the value your world was created with.
- Finally, start the server!
Frequently Asked Questions – FAQ
- Can I upload any custom world to my 7 Days to Die server?
Yes, you can upload any custom or pre-generated world to the server. - How do I ensure the server loads the correct world?
After uploading your world, go to Server Settings > World (or serverconfig.xml) and set the “Game World” and “Game Name” to match your uploaded world. Also, check that the “World Gen Size” matches the size of the world you uploaded. - Can I upload both Randomly Generated World (RWG) and Navezgane worlds?
Absolutely! The upload process is similar, but you need to place them in their respective directories on the server. - What if my world doesn’t load correctly after uploading?
Double-check that the “Game World” and “Game Name” settings in the server control panel exactly match your uploaded world folder names and that the “World Gen Size” is correct.