 Billing
& Support
Billing
& Support Multicraft
 Game
Panel
Game
Panel


If you want players to start in a specific town or area when they join your Project Zomboid server, you can change the server’s spawn settings to control where they appear. This guide will show you how to adjust the spawn location using your server files.
How Spawn Points Work
- Fixed Spawn: Everyone spawns in the same exact place, no options given. Great for roleplay, custom bases, or controlled gameplay.
- Custom Spawn Choices: Lets players pick between cities like Muldraugh, Riverside, or any spot you define.
Getting Coordinates for Your Spawn Location
Before changing the server settings, you’ll need to get the coordinates of where you want players to spawn.
Here’s how to get accurate coordinates using the official Project Zomboid map:
1. Go to the Project Zomboid World Map.
2. Select the map your server is using (like Knox County).
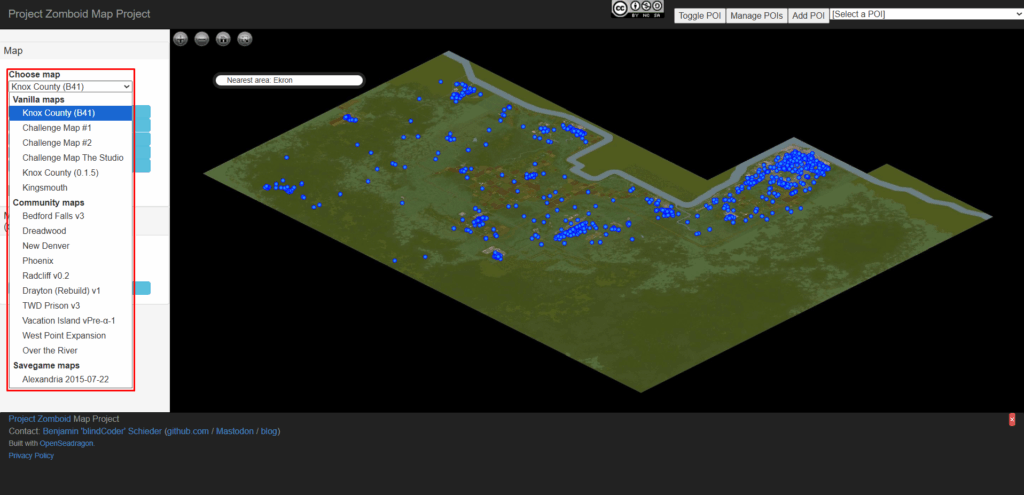
3. At the top, click the Map Coordinates tab.
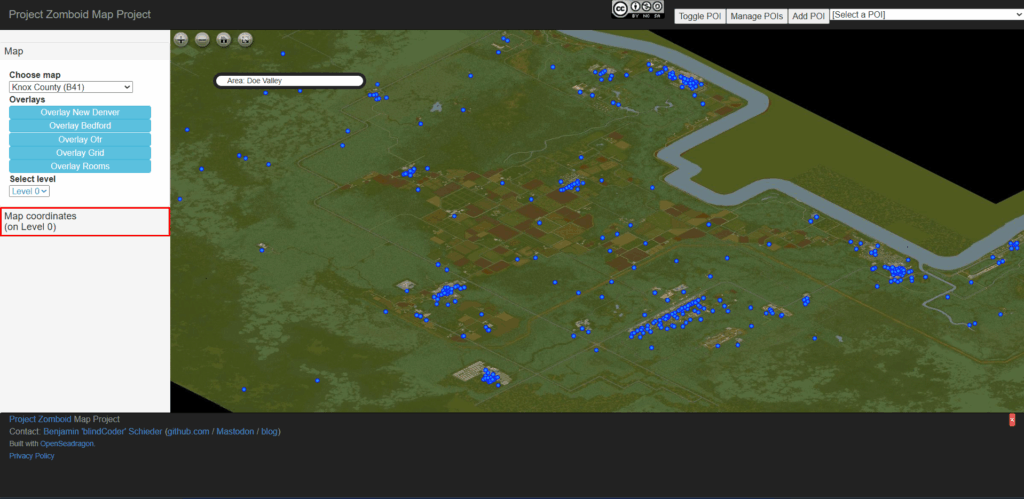
4. Press Lock Coords, then click anywhere on the map to mark your desired spawn spot.
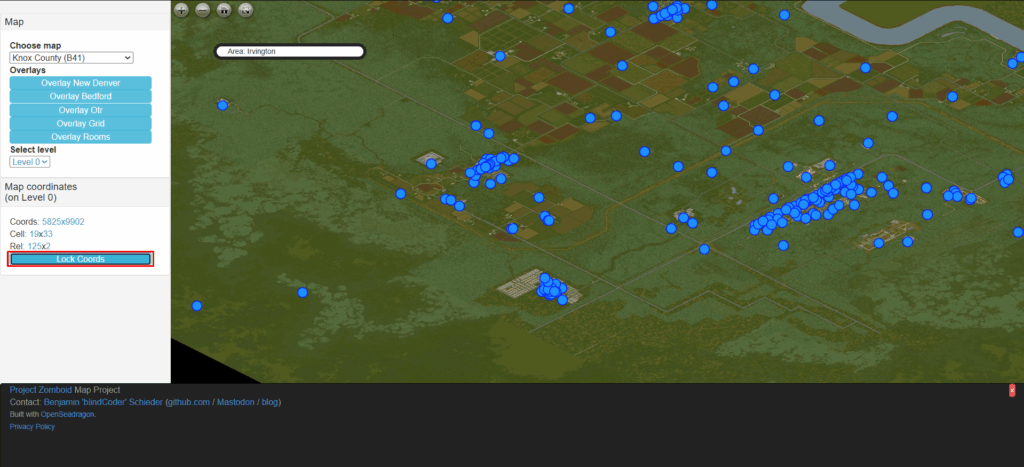
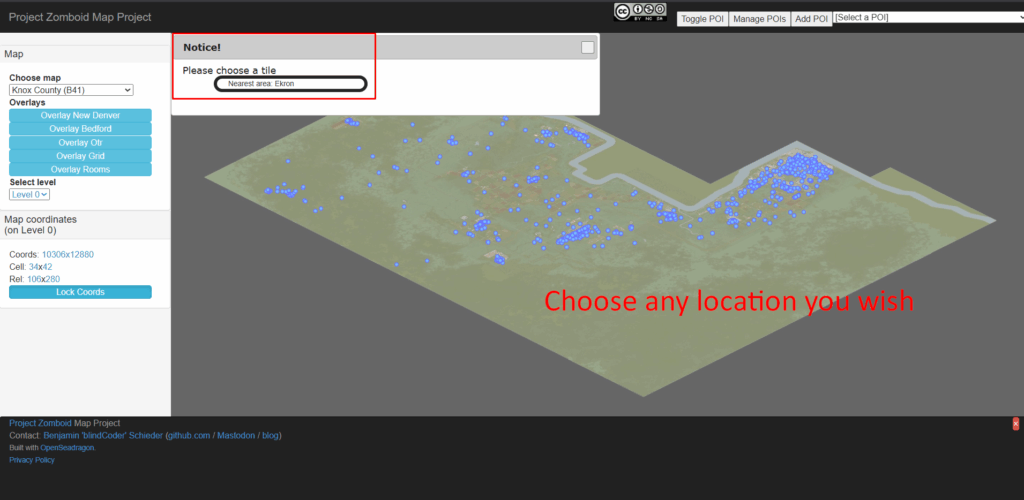
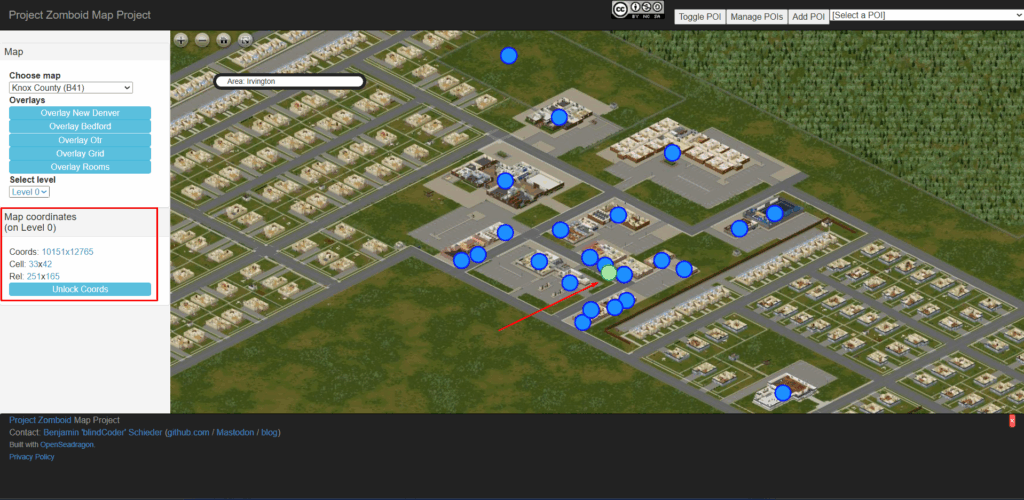
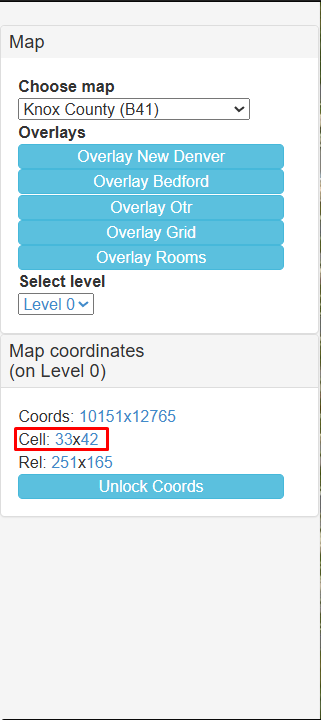
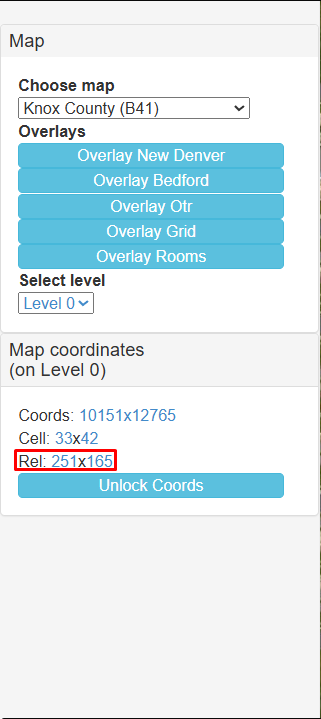
5. Take note of the following:
Cell (CelX, CelY) — grid cell on the map
Rel (RelX, RelY) — exact position inside that cell
Setting a Fixed Spawn Point (One Location for Everyone)
If you want all players to spawn in one specific location (with no spawn menu), follow these steps:
Note: The spawn coordinate has three values:
- X position
- Y position
- Z height (0 = ground, 1 = second floor, etc.)
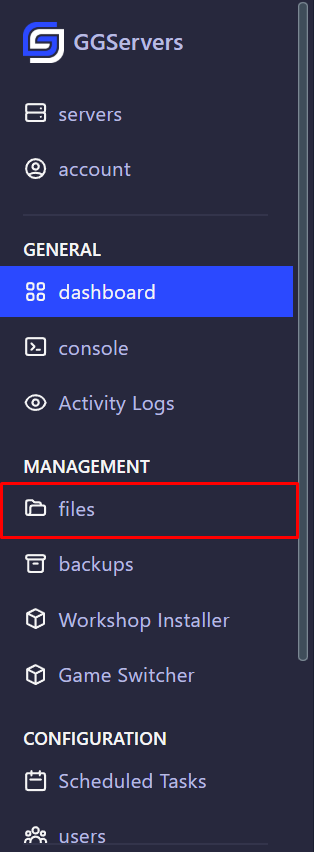
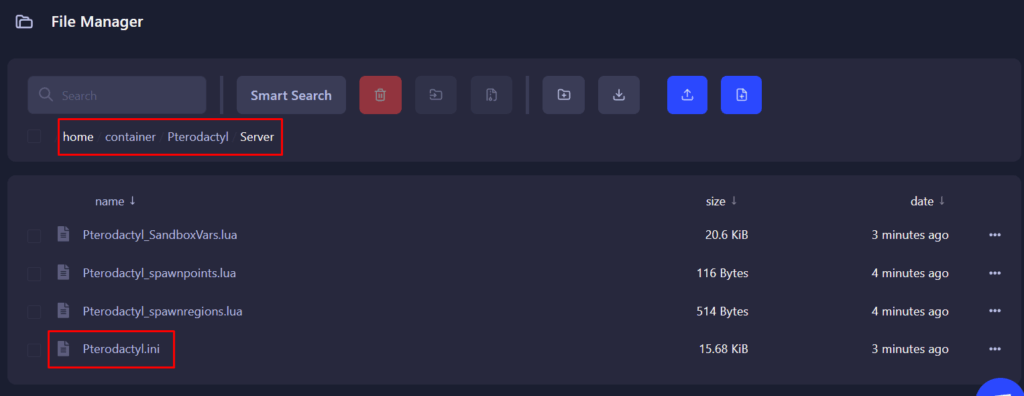
1. Login and stop your server from the panel. If you aren’t sure how to login and access your panel, we have a guide here.

2. Click on Files. Then go to and open: Pterodactyl/Server/Pterodactyl.ini
3. Find the line that says:
SpawnPoint=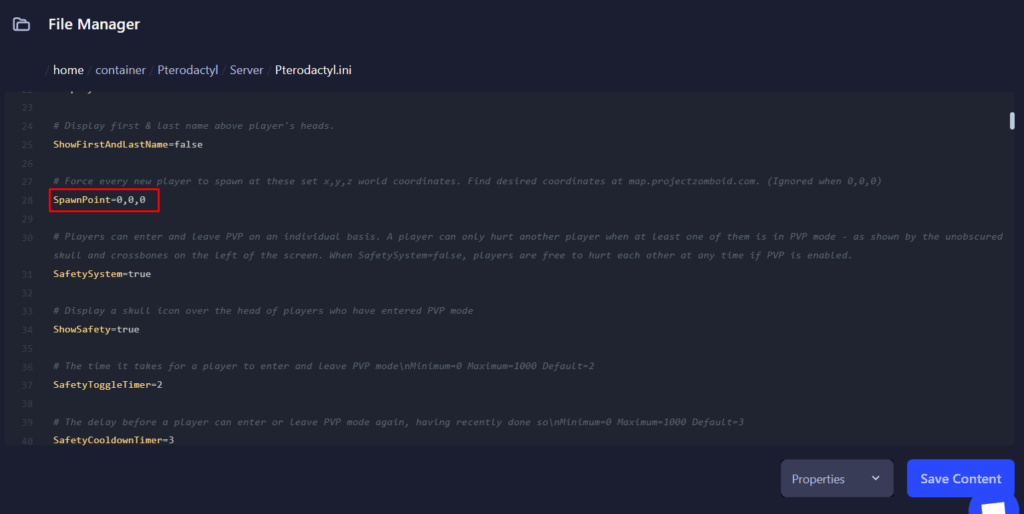
4. Fill in the master coordinates in this format:
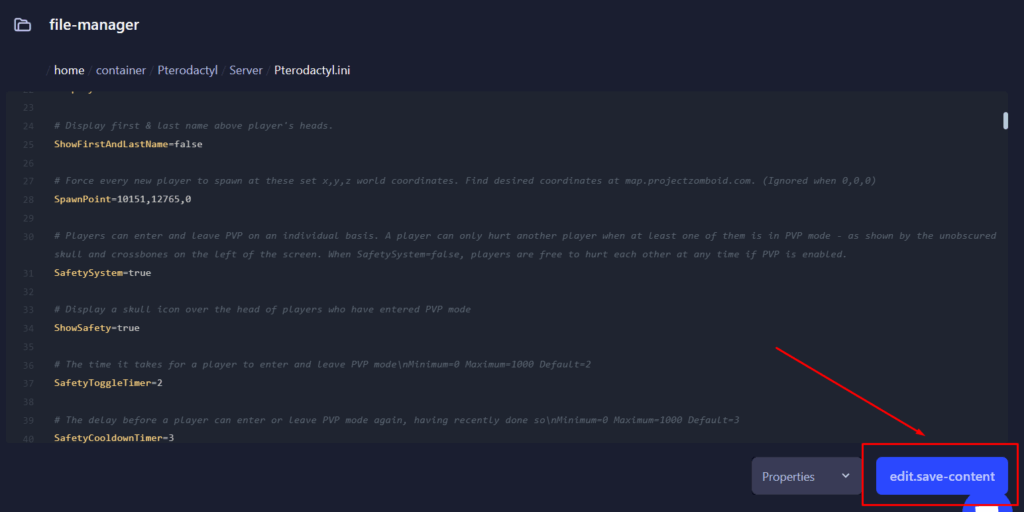
SpawnPoint=10619,9301,0Replace with the X, Y, and Z values of your chosen spot.
5. Click Save, then start your server again.

All done! All new and respawning players will now appear exactly at the coordinates you set.
If you have any issues, contact us via live chat or the ticket system.