 Billing
& Support
Billing
& Support Multicraft
 Game
Panel
Game
Panel


General Info
Installing mods on a DayZ server allows you to expand gameplay, add new features, and customize your server experience. Mods are usually downloaded from the Steam Workshop and must be uploaded and configured manually on your server.
This guide will show you how to install Workshop mods on a DayZ server, including downloading mods, uploading them, and enabling them in your server startup settings.
Download Mods from the Steam Workshop
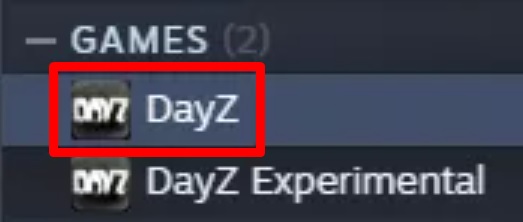
- Open your Steam Library and select DayZ (not Experimental).
- Go to the Workshop tab.
- Search for the mod you want and click Subscribe.
Prepare the Mod Files
- Launch DayZ after the mods finish downloading.
- Go to the Mods section.

- Select a mod, click the three dots, then choose Open Folder.
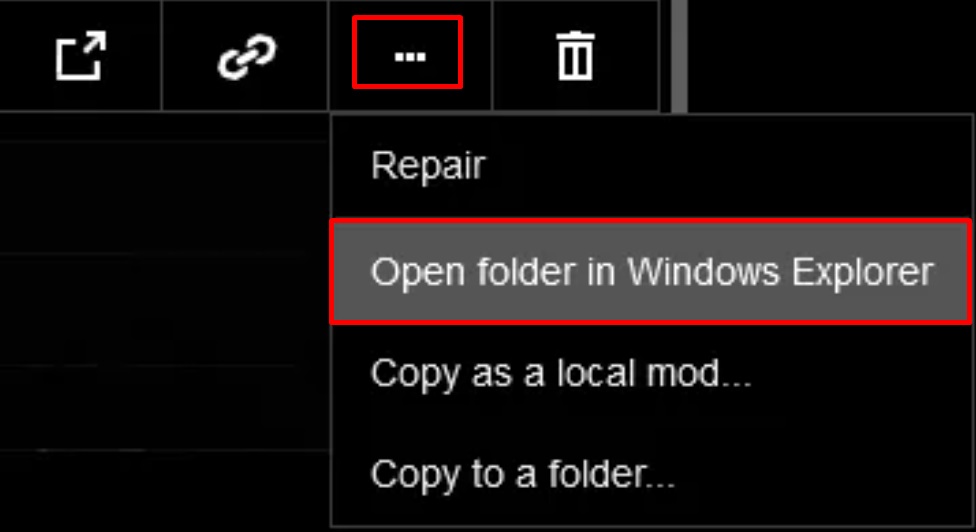
- Click I Understand if prompted.
- Compress the mod folder into a .zip file.
Upload Mods to Your Server
- Log in to your GGServers Control Panel.
- Stop the server.
- Go to the Files tab.
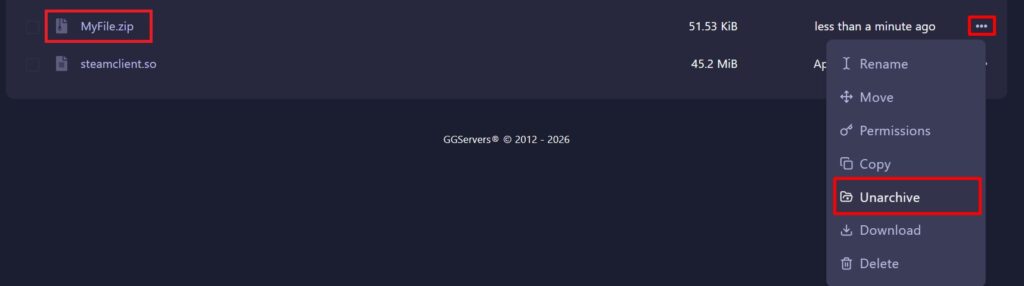
- Upload the .zip file you created earlier.

- Unarchive the uploaded file.
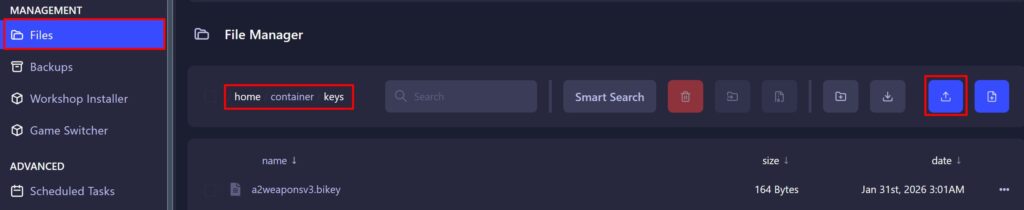
Install Bikey Files
- Open the mod folder on your computer and go to the Keys folder.
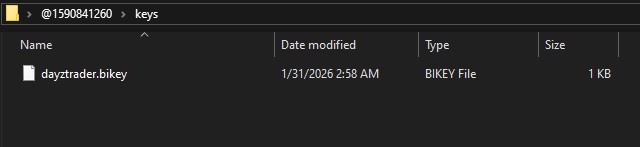
- Navigate to:
/home/container/keys - Upload the .bikey file(s) there.
Enable Mods on Your Server
- Go to the Server Settings tab then Mods.
- In Manual Mods or Server-Side Only Mods (depending on your needs), enter mod IDs separated by a semicolon (
;).

- Start the server.
FAQ
Why are my DayZ mods not working?
Make sure the mod names are correct, all dependencies are installed, and the bikey files are uploaded properly.
Do players need to install mods?
Yes, for mods listed under Manual Mods. Server-side mods do not require player installation.
What are .bikey files?
.bikey files are used for server security and must be placed in the keys folder to allow mods to work.
Can I install multiple mods?
Yes, simply separate each mod name with a semicolon in the startup settings.