

Plugin configuration files are files that allow the owner of a Minecraft server to edit certain features and settings that a plugin allows being changed.
Let’s use simple examples to make it easy to understand. In the following steps, we will use one of the most well-known plugins today, EssentialsX.
How to Edit Plugin Configuration Files via the Multicraft Panel
Let’s say that you’re looking to change the unique player announcement of EssentialsX through the Multicraft panel. To do that, you will have to:
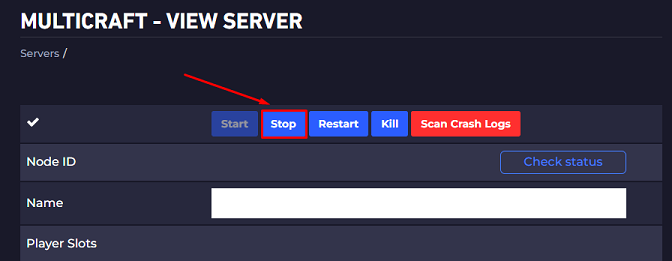
- Log in to your Multicraft panel here and stop your server.
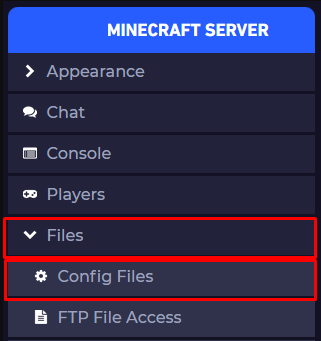
- Click on
Files, then onConfig Files.
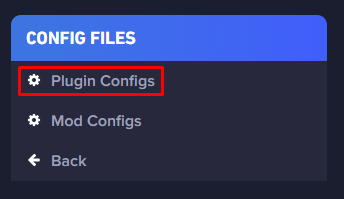
- Click on
Plugin Configs.
- Choose the plugin file you want to edit and click on it. In this example, we want to edit EssentialsX’s unique join announcement, so we must open the
config.ymlfile.

- Since we are looking to edit the unique player announcement, the option is called
announce-format:. You need to edit it to your own value and clickSave.

Once discovered, we must edit exactly as in the default configuration!
- What exactly does this mean?
Since it is a configuration file, we must follow the “format rules” so that nothing unwanted happens the moment the server starts up.
Let’s look at an example below:
As we wanted to edit the announce-format: to something else, we should use the following edit:
If the default file uses:
announce-format: '&dWelcome {DISPLAYNAME}&d to the server!'

When editing, we must use:
announce-format: 'Your message here!'

Examples of common errors:

❌ announce-format: 'Your message here!
❌ announce-format: Your message here!
❌ announce-format: 'Your 'message here!'
✅ announce-format: 'Your message here!'
No matter how small the error is, even if a space or character is added or removed by mistake, it might cause your server to crash!
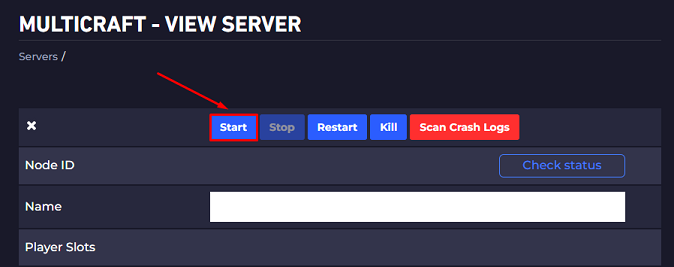
- Go back to your server control panel (Multicraft) and start your server.
In a few words, changing your server settings is easy and simple! Just be careful when editing the files correctly!
Whenever you need help, you can always find out more about a plugin’s settings on the same page where you can download it.
How to Edit Plugin Configuration Files Manually
Let’s say that you’re looking to change EssentialsX quit message. To do that, you will have to:
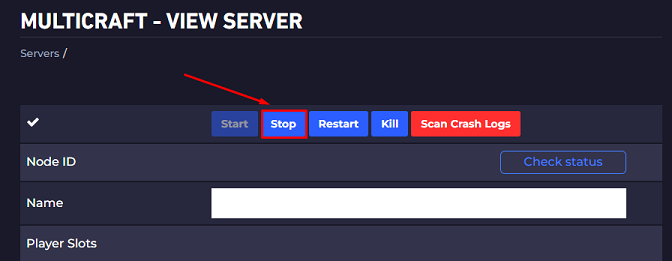
- Log in to your Multicraft panel here and stop your server.
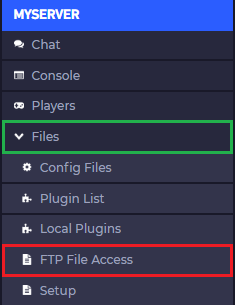
- Click on
Filesand then onFTP File Access. It’s where you’ll find all of your server’s files.
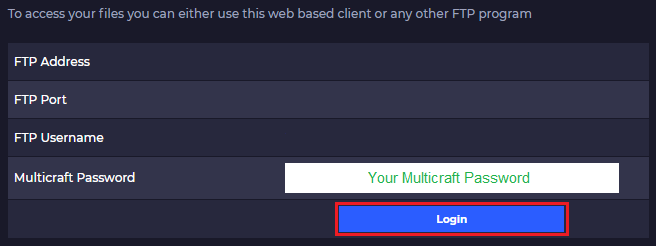
- Use your Multicraft credentials to log in.
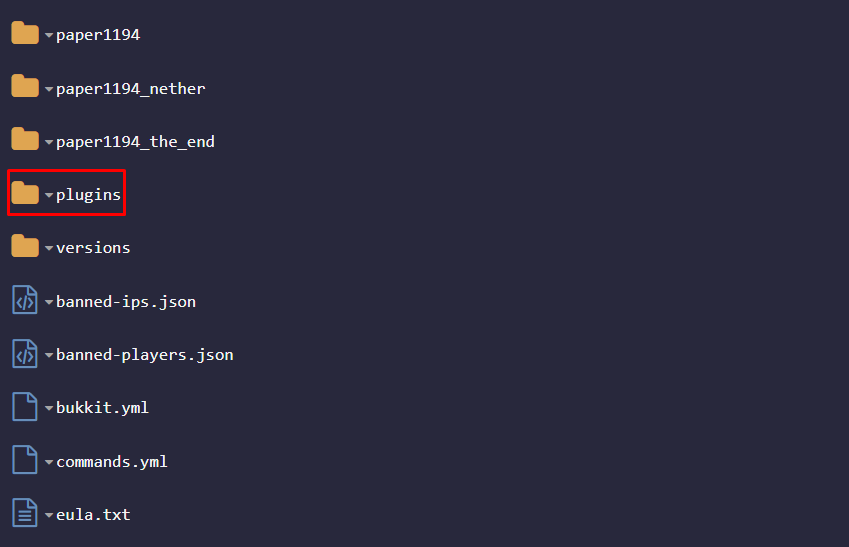
- Open your
pluginsfolder by clicking it.
- Open the folder with the name of the plugin that you want to edit. In our case, it’s Essentials with the
config.ymlfile.
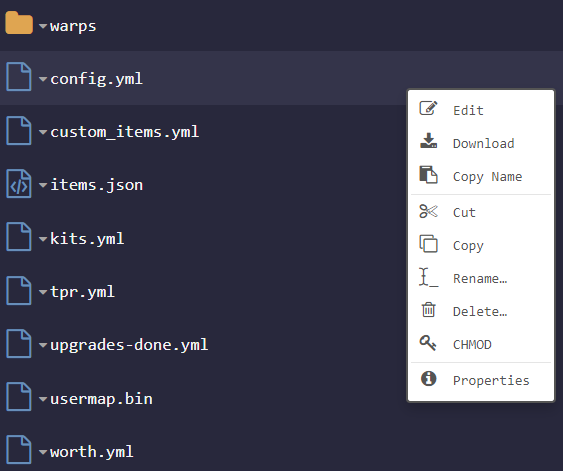
- As we are looking to edit the quit message, we must find the
custom-quit-message:option and edit it with our desired value, then click onSave.
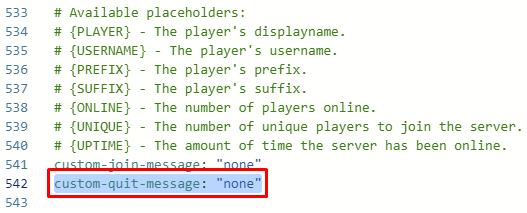
Once discovered, we must edit exactly as in the default configuration!
- What exactly does this mean?
Since it is a configuration file, we must follow the “format rules” so that nothing unwanted happens the moment the server starts up.
Let’s look at an example below:
As we wanted to edit format: to something else, we should use the following edit:
If the default file uses:
   custom-quit-message: "none"

When editing, we must make sure the option remains between quotes:
   custom-quit-message: "My custom message here"

Examples of common errors:

❌    custom-quit-message: "My custom message here
❌    custom-quit-message: My custom message here
❌    custom-quit-message: "My custom "message here"
❌  custom-quit-message: "My custom message here"
✅    custom-quit-message: "My custom message here"
No matter how small the error is, even if a space or character is added or removed by mistake, it might cause your server to crash!
- Go back to your server control panel (Multicraft) and start your server.

In a few words, changing your server settings is easy and simple! Just be careful when editing the files correctly!
Whenever you need help, you can always find out more about a plugin’s settings on the same page where you can download it.
If you find any issues editing your server plugin’s configuration files, contact us on live chat or via the ticket system.
 Billing
& Support
 Multicraft
 Game
Panel


