 Billing
& Support
Billing
& Support Multicraft
 Game
Panel
Game
Panel


General info
Learn how to customize zombie spawn rates on your Project Zomboid server with this step-by-step guide. Whether you want a lighter challenge or a true undead apocalypse, this tutorial will show you how to adjust settings for the perfect gameplay experience.
Changing Spawn Rates
- First, stop the server from your control panel

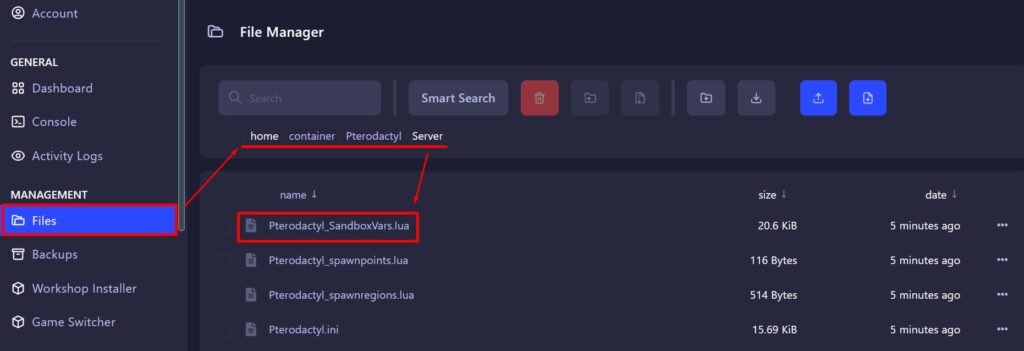
- Access Files tab on the left side menu
- Go to
home/container/Pterodactyl/Server - Open
Pterodactyl_SandboxVars.luafile
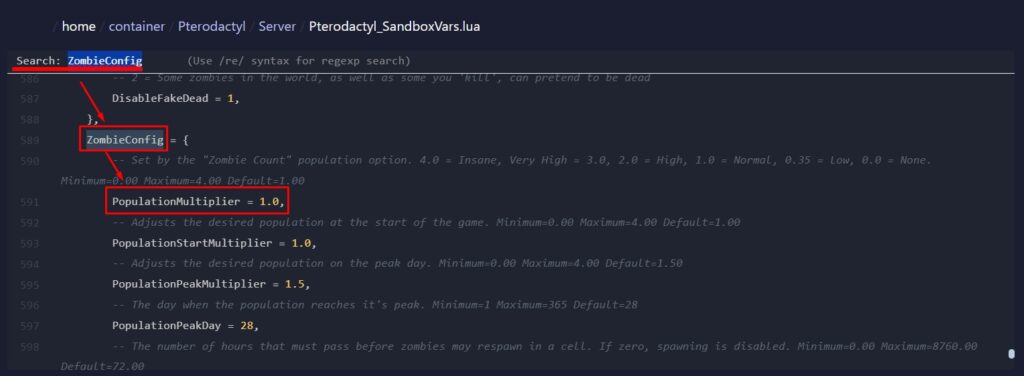
- Locate
ZombieConfig, usually at line 589 - Below, you will see
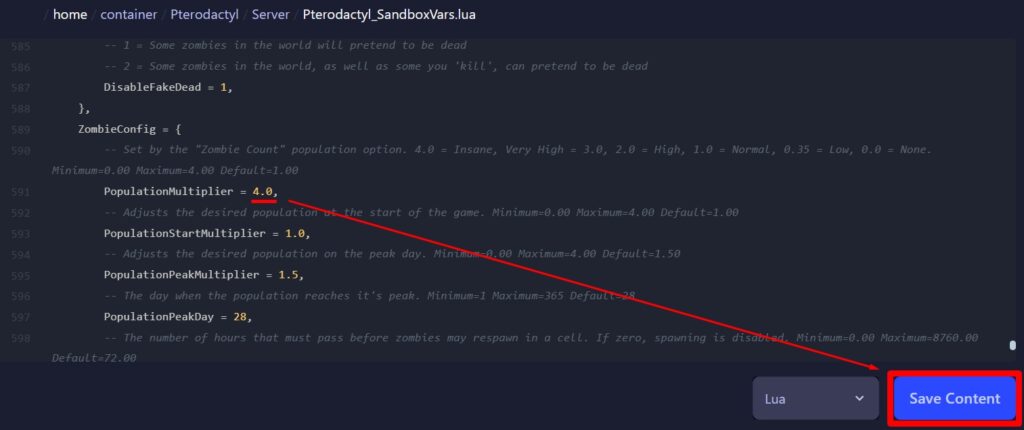
PopulationMultiplier. Change it to the desired value
- Click on
Save Contentand start the server.
Below you can see a table with all the values.
Values table
| 0.0 | None |
| 0.35 | Low |
| 1.0 | Normal (default value) |
| 2.0 | High |
| 3.0 | Very High |
| 4.0 | Insane |
FAQ – Zombie Spawn Rates
- What does the PopulationMultiplier setting do?
It controls the total zombie population in the world. Higher values mean more zombies. The default is 1.0. - Where can I find the Pterodactyl_SandboxVars.lua file?
Go tohome/container/Pterodactyl/Serverin the Files tab of your server control panel. - Can I change spawn rates while the server is running?
No, the server must be stopped before editing the config. Restart the server to apply the changes. - What are recommended values for different difficulties?
0.0– No zombies0.35– Low population1.0– Normal (default)2.0– High3.0+– Very high to insane
- Will this affect existing saves?
Yes, spawn rate changes will impact ongoing saves, adjusting population gradually during gameplay.