
Have you purchased your Discord Bot Hosting at GGServers? Then we’re ready to go! Let’s setup your powerful SinusBot!
GGServers offers full access to your Bot control panel, where you can manage everything that happens on your server!
Although this is not a “how to code a discord bot”, we’ll guide you through how to keep your very own SinusBot Discord bot up and running 24/7/365.
✔️ How Do I Find My Discord Bot Panel and Server Connection Details ✔️
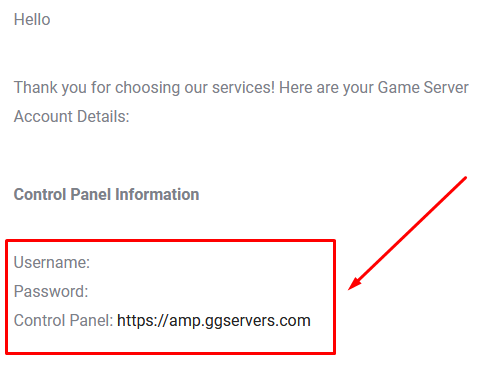
The credentials for your game server panel are located in the welcome email titled Your Game Server Details. You can also find this in the Email History option from your billing account, which we will show here.
To access your Discord Bot panel:
- Log in to your billing account here.
- Click on your profile button, then on
Email History

- Click on the email titled
Your Game Server Details, and you’ll see your server information and the Discord Bot panel credentials!
- Note your credentials and head over here to log in. You can find the Discord Bot panel link in the welcome email as well.
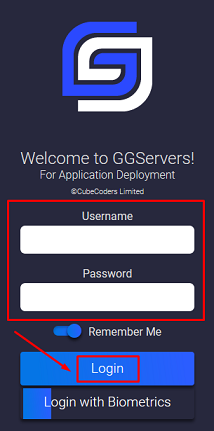
- Use the credentials from the last step and login.
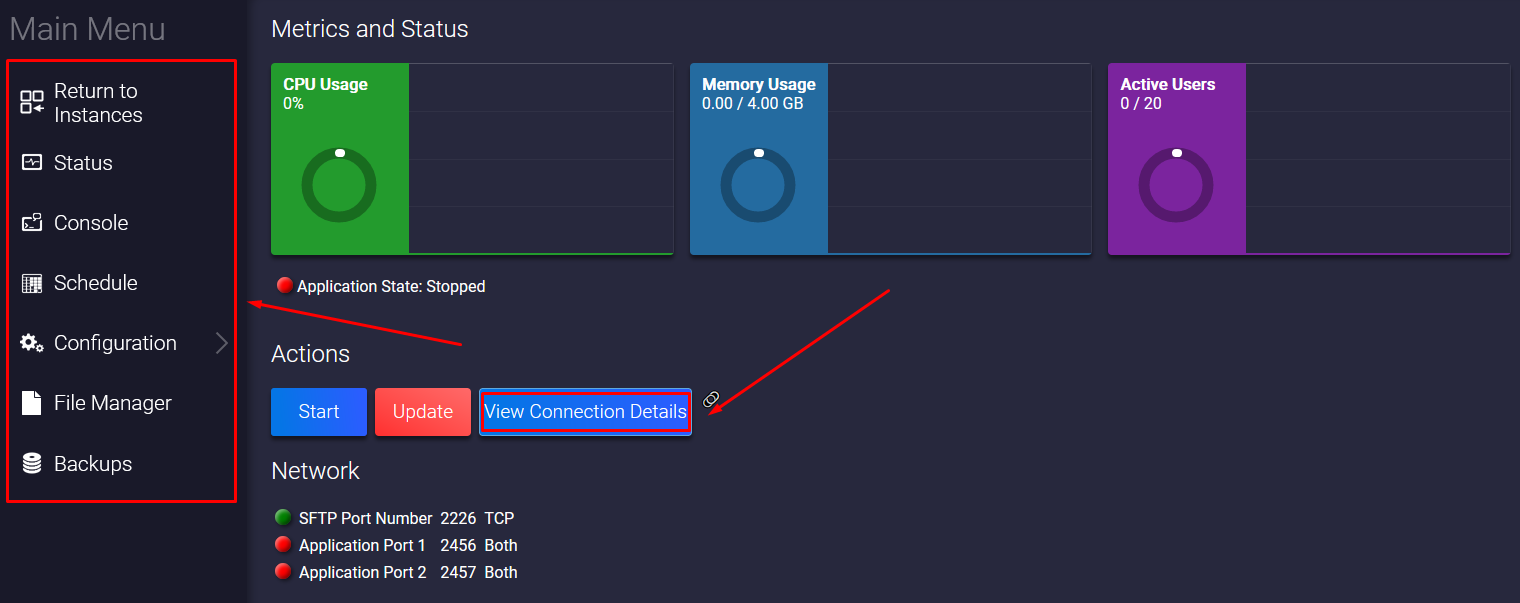
From here, you can see and manage your SinusBot Server.

From here, you can View Connection Details, access the Console, upload, download, modify, or delete files using the File Manager, modify the Configuration options, and more!
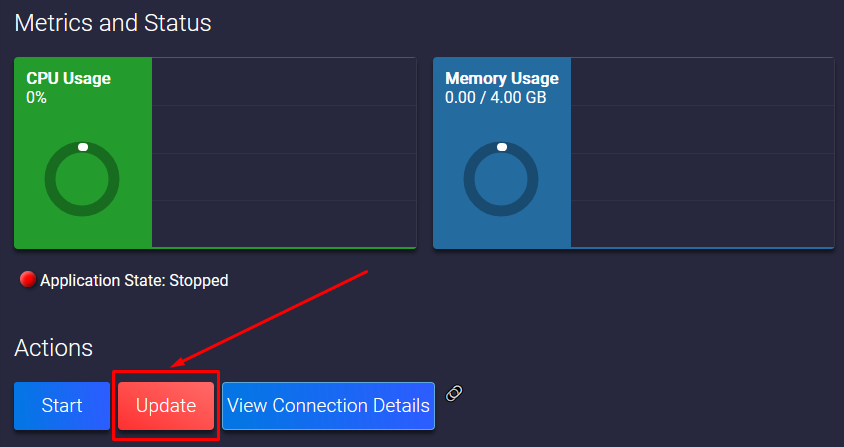
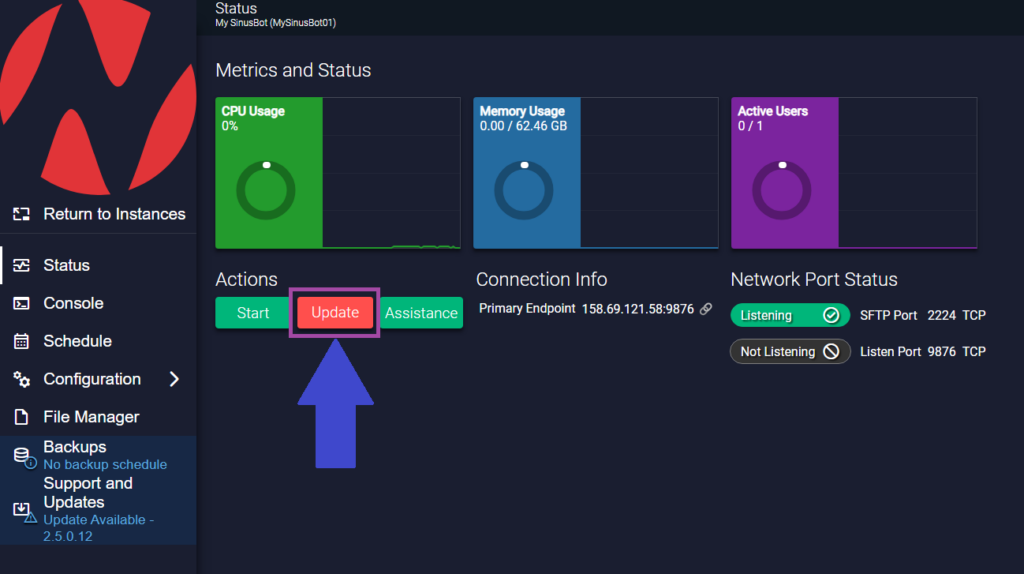
- Before you start playing around with your new SinusBot, you will need to click the
Updatebutton to install the latest server files.
What is SinusBot?
SinusBot is a music management and audio automation tool for TeamSpeak 3 and Discord, supporting multiple OS. It offers playlist management, music playback, automated announcements, a web interface, script support, multi-instance capability, and robust permissions management.
🚀 Setting up SinusBot
1. Update the bot to get the latest version
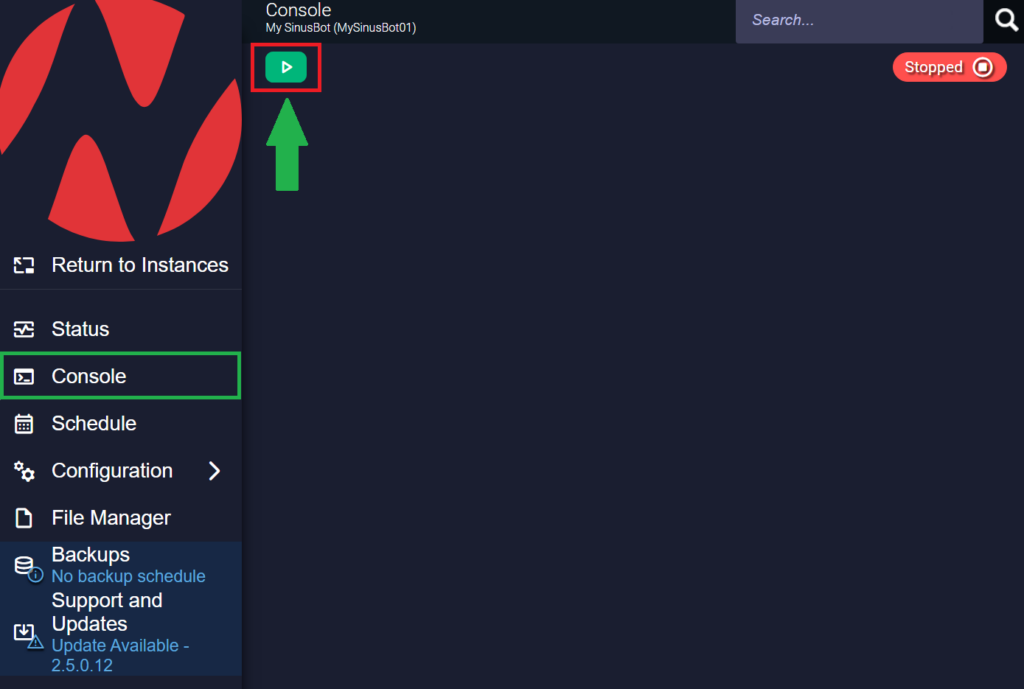
2. After you have updated, and all files are in, go to Console and start the server once.
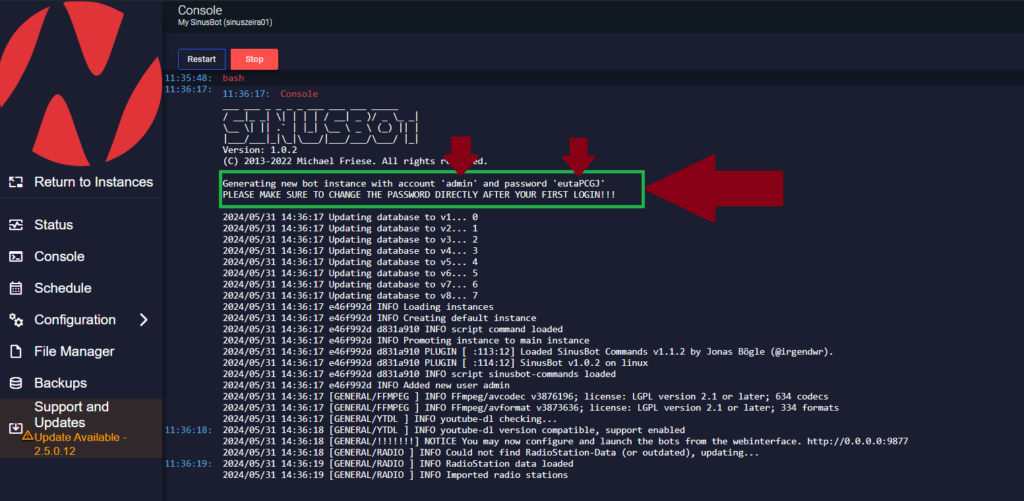
3. Save the credentials from the console! They are needed to control the bot.
4. Head back to the Status page, click here to copy the IP, and paste it into the browser.
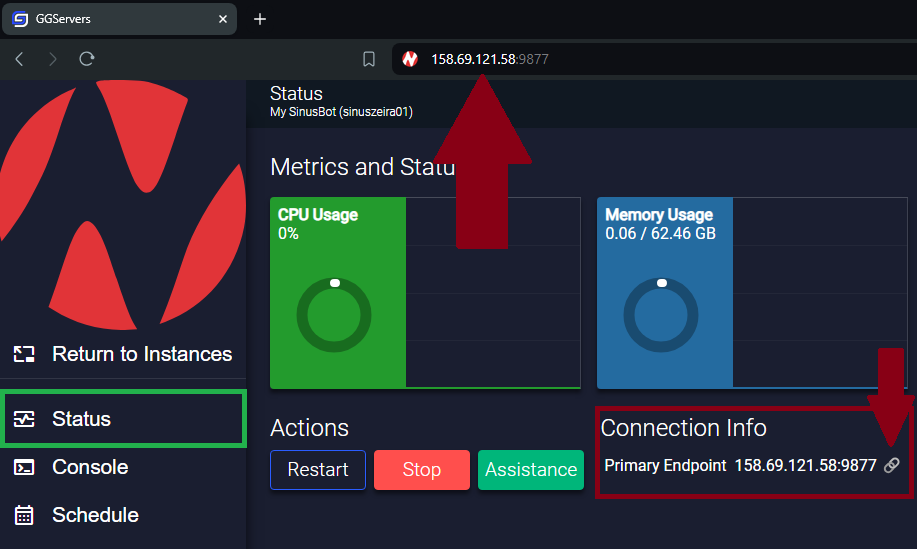
5. Use the credentials from the Console to login.
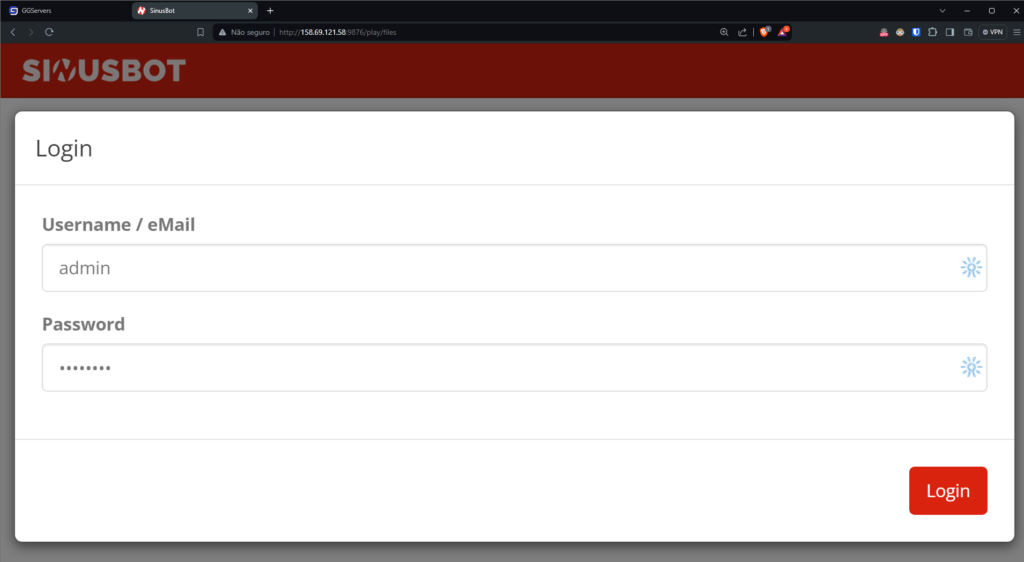
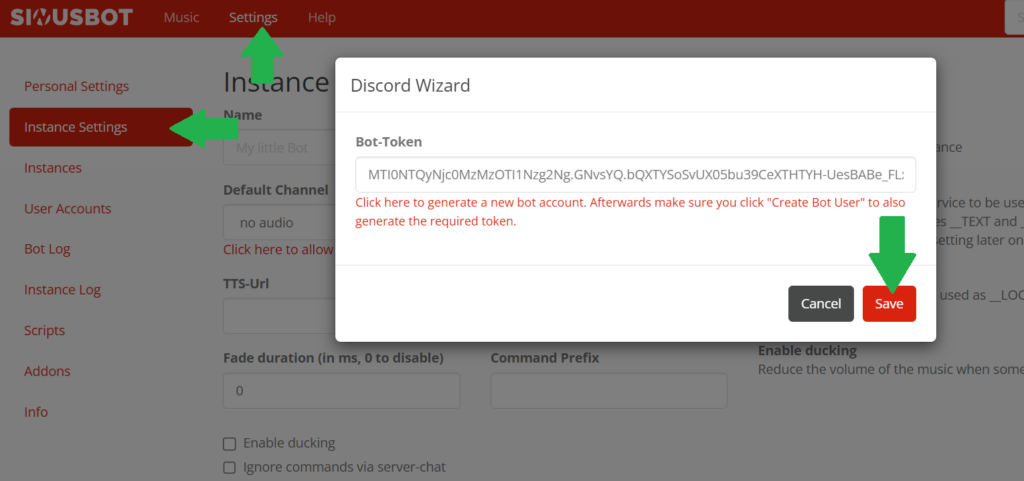
6. Go to Settings -> Instance Settings and place your Discord Bot Token here.
7. Go to Instances and click on the startup icon. Green, indicates the bot is online. If the color is orange, click on it to start up the bot.

✅ If the Discord Bot Token is right, the bot should come straight up online!

✅ Everything is set up!
If your Bot does not respond to any !commands , check if the options below are enabled in your Application Developer Portal.

🔌 Installing Addons/Plugins
SinusBot allows users to install multiple add-ons so the Discord Bot can handle multiple functions.
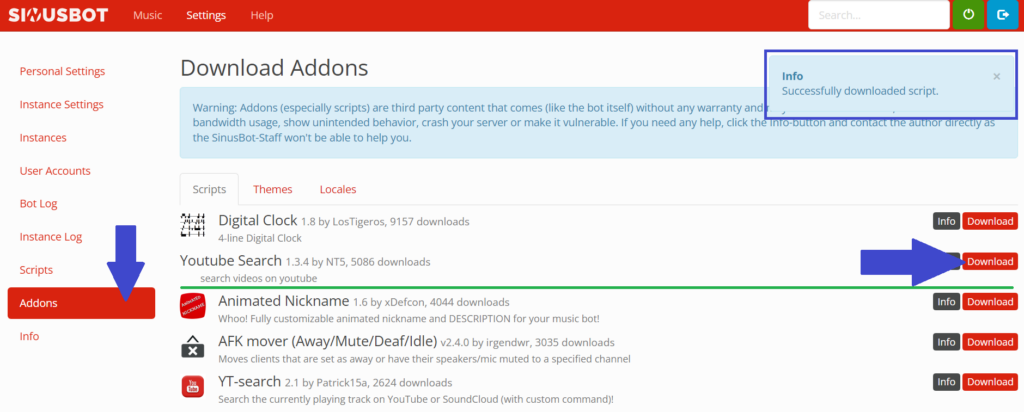
Let’s say for example, that you want to let the bot be able to search for YouTube Music using text instead of the direct link/URL.
For that, we can use the available YouTube Search add-on!
- Click on
Addons - Choose your desired Addon.
- Click on
Download
Once the download is complete, you will need to ⚠️ Restart your Bot ⚠️ through your AMP Control Panel or via the power button you have pressed earlier.
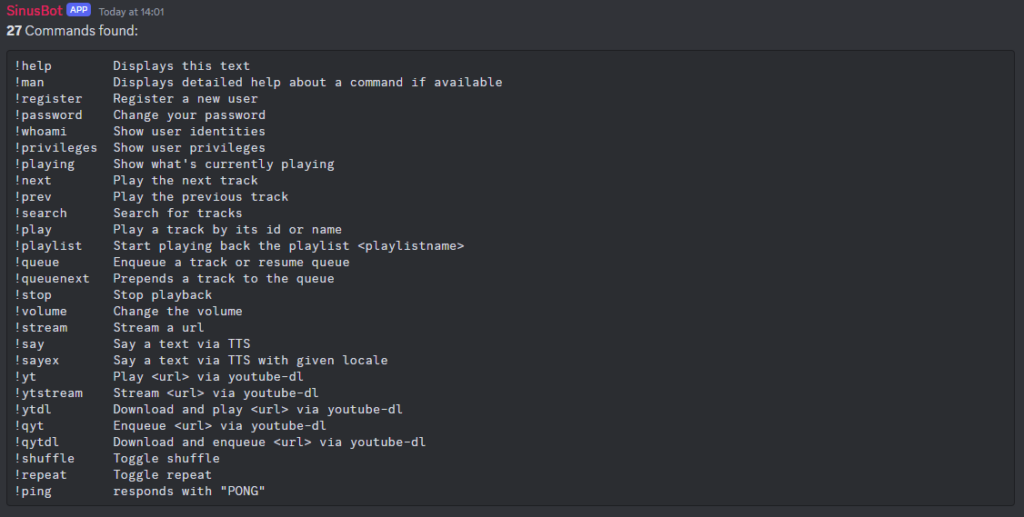
Those new addons ( if they do have commands on them ) will be displayed with the discord command !help with their respective descriptions.
🍬 Managing SinusBot permissions for users
To manage SinusBot’s permissions for users:

- Click on
User Accounts - Click on the user for whom you want to manage the permissions.
- Click on the permissions.
Green stands for allow/it will permit the user to complete that action.
Red stands for deny/it will prevent the user from completing that action.
If you have any issues, contact us via live chat or the ticket system.
 Billing
& Support
 Multicraft
 Game
Panel


