 Billing
& Support
Billing
& Support Multicraft
 Game
Panel
Game
Panel


Have you purchased your 7 Days to Die server at GGServers? Here’s how to get started!
First, GGServers offers full access to your game server control panel, where users can manage everything that happens on the server.
This article will show the first steps for joining your 7 Days to Die server and using the game server panel to manage your server.
✔️ How Do I Find My Game Server Panel and Server Connection Details ✔️
To access your game server panel, you need to follow the next steps:
- Log in to your billing account here.
- Click on your customer’s profile button, then on
Email History.
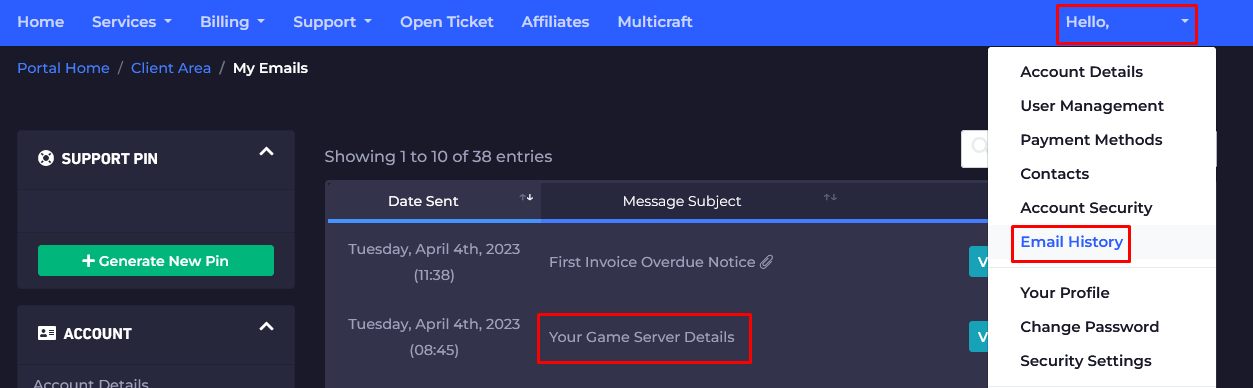
- Click on the first option,
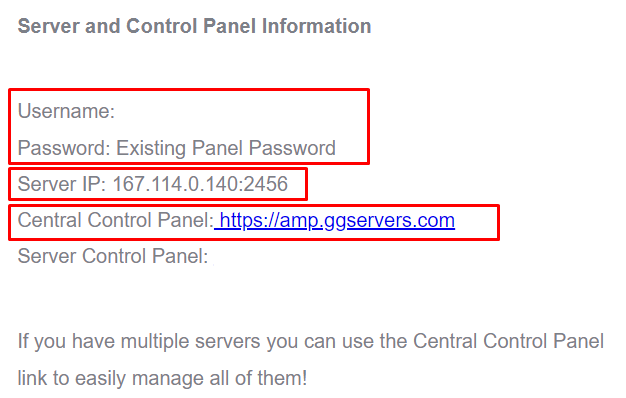
Your Game Server Details, and you’ll see your server information and the game server panel credentials as well.
- Note your panel credentials and server connection details, then go here to log in. You can find the game server panel link in the welcome email as well.
- Use the credentials from the last step and log in.
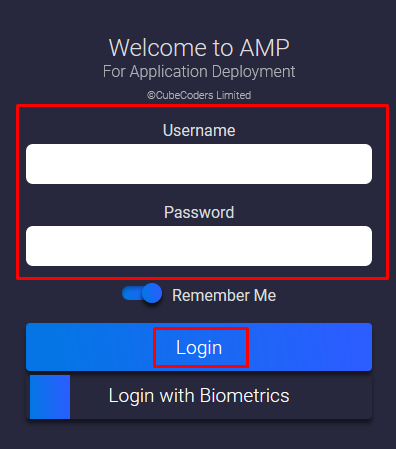
Now, you’ve just logged in to your 7 Days to Die game server control panel, where you can see and manage your server.
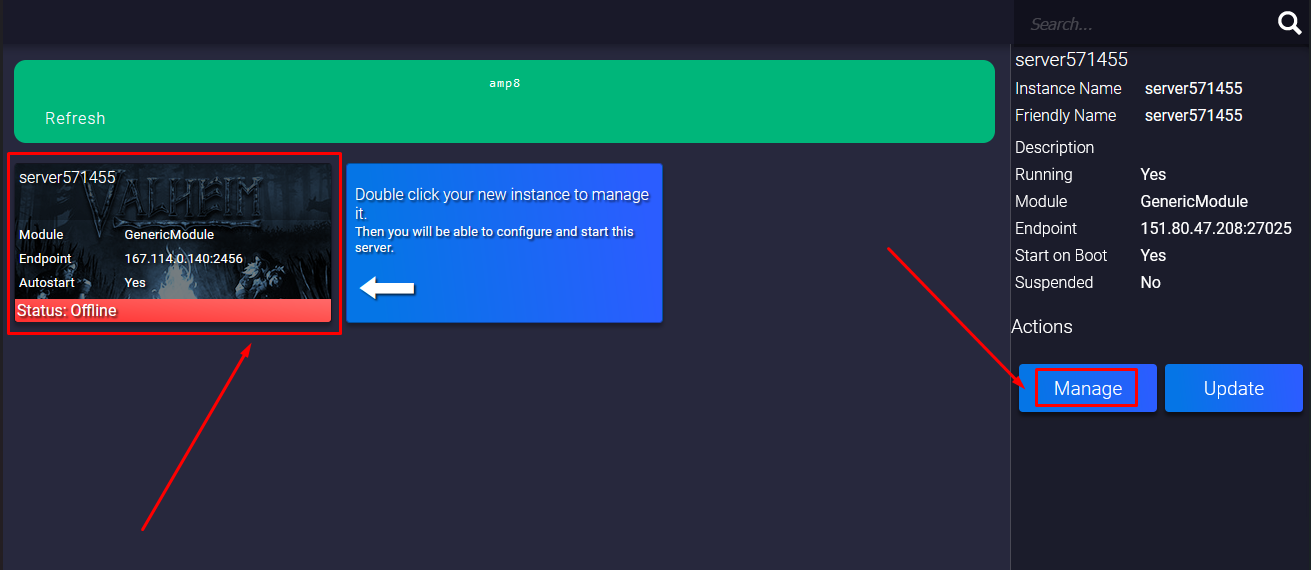
- After logging in, you will be able to find all your instances (game servers). Click on the
7 Days to Dieinstance to see the connection details or to start or stop it. You can also click onManageto customize and make changes to your server.
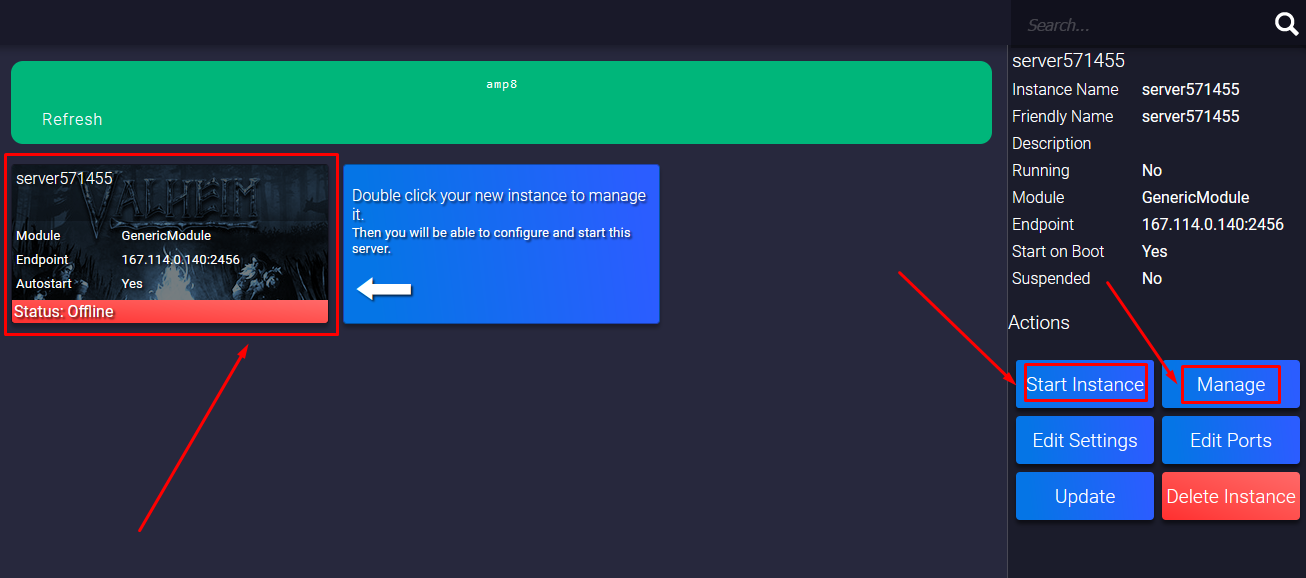
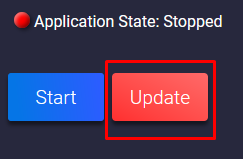
- Before you start playing, you will have to click on the
Managebutton mentioned in the last step, then on theUpdatebutton.
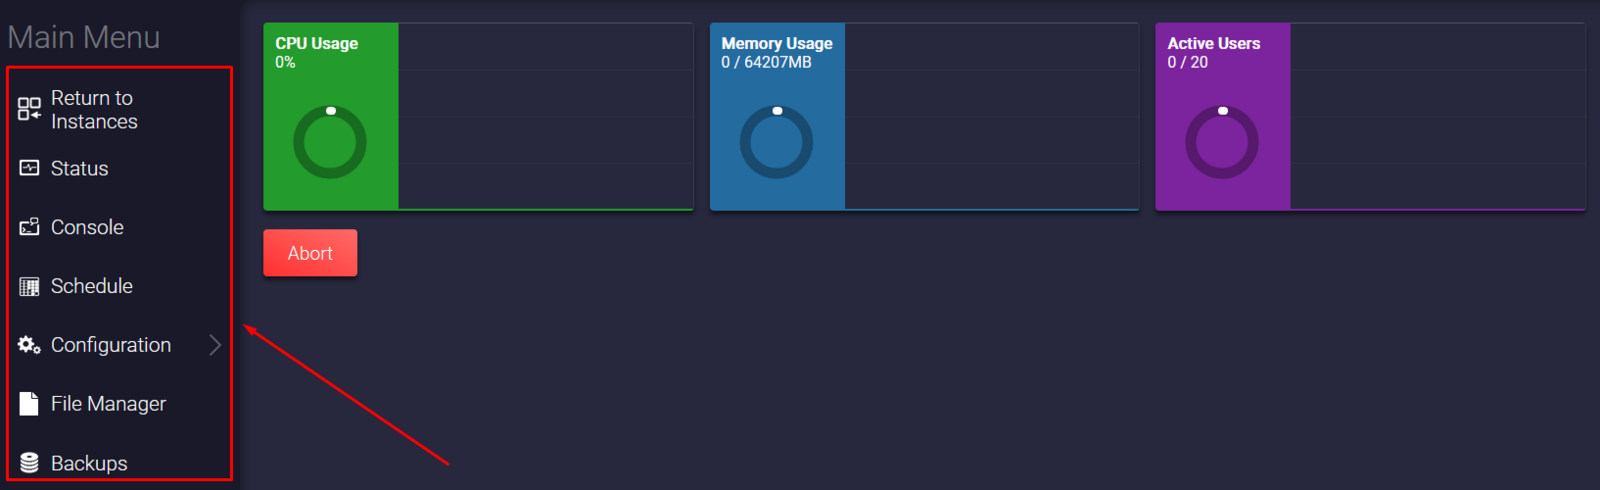
- If you click on the 7 Days to Die instance, then on the
Managebutton, a new page will open where you can fully manage your 7 Days to Die server. Also, a new menu will pop up where you can select between multiple options, such asConsoleto see the server logs orFile Managerto access your server files.
How Do I Join My 7 Days to Die Server
To join your 7 Days to Die server, you will have to use the server connection details that you noted in step number four.
Join Using the Connection Details (IP and Port)
To join your server in-game, you will have to:
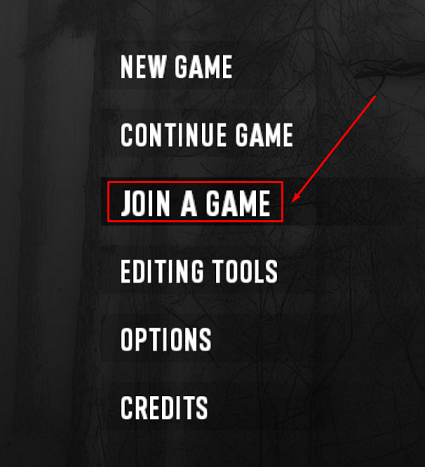
- Start 7 Days to Die, then click on
JOIN A GAME.
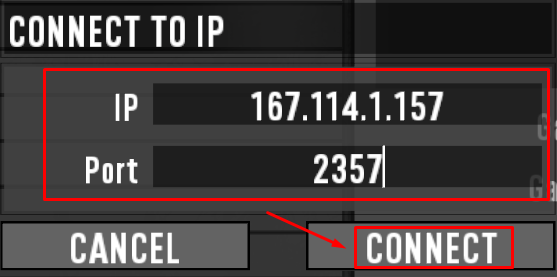
- Click on the
CONNECT TO IP...button.

- Type your server IP and port, then click on
CONNECT.
Now, you’ve just connected to your 7 Days to Die server!
Steam
You can join your server through Steam using your game server panel, or add the server manually.
Game Server Panel
To join your server via Steam using your game server panel, you will have to:
- Log in to your game server panel here.
- Click on the
7 Days to Dieinstance, then click on theManagebutton.
- Click on the icon located after the
View Connection Details, then click onOpen Link.
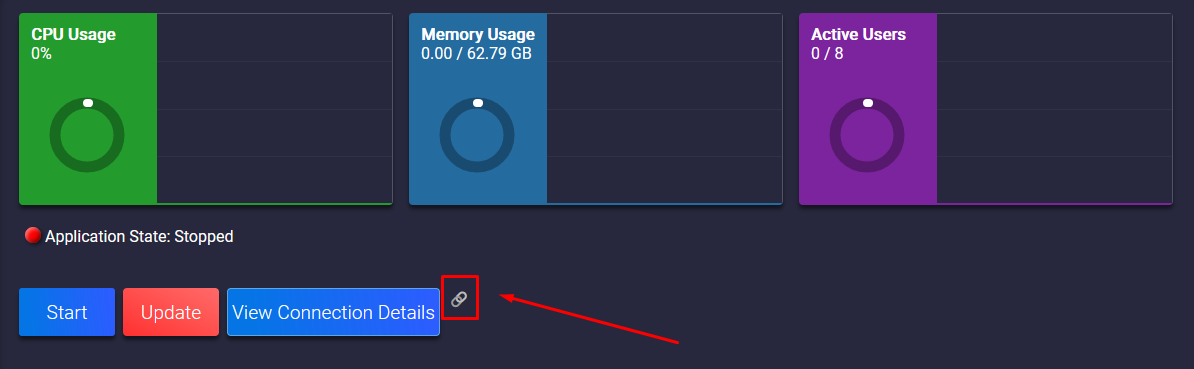

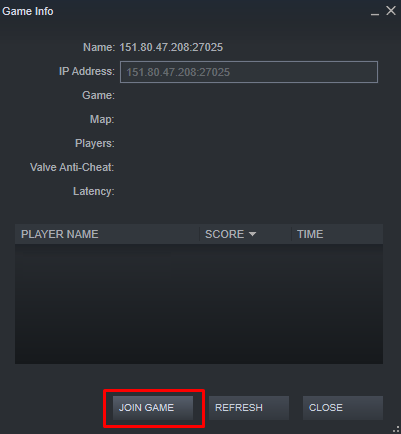
- Click on
Join Game.
Manually
To manually add your server to Steam, you need to follow the next steps:
- Open your Steam client and click on
View, then onServers.
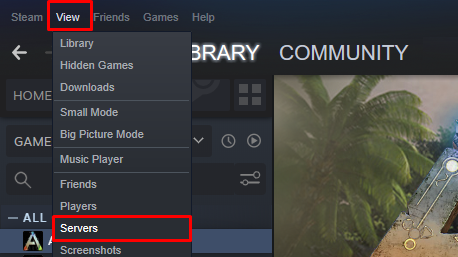
- Click on
FAVORITES.
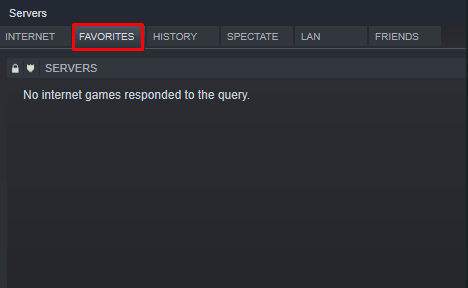
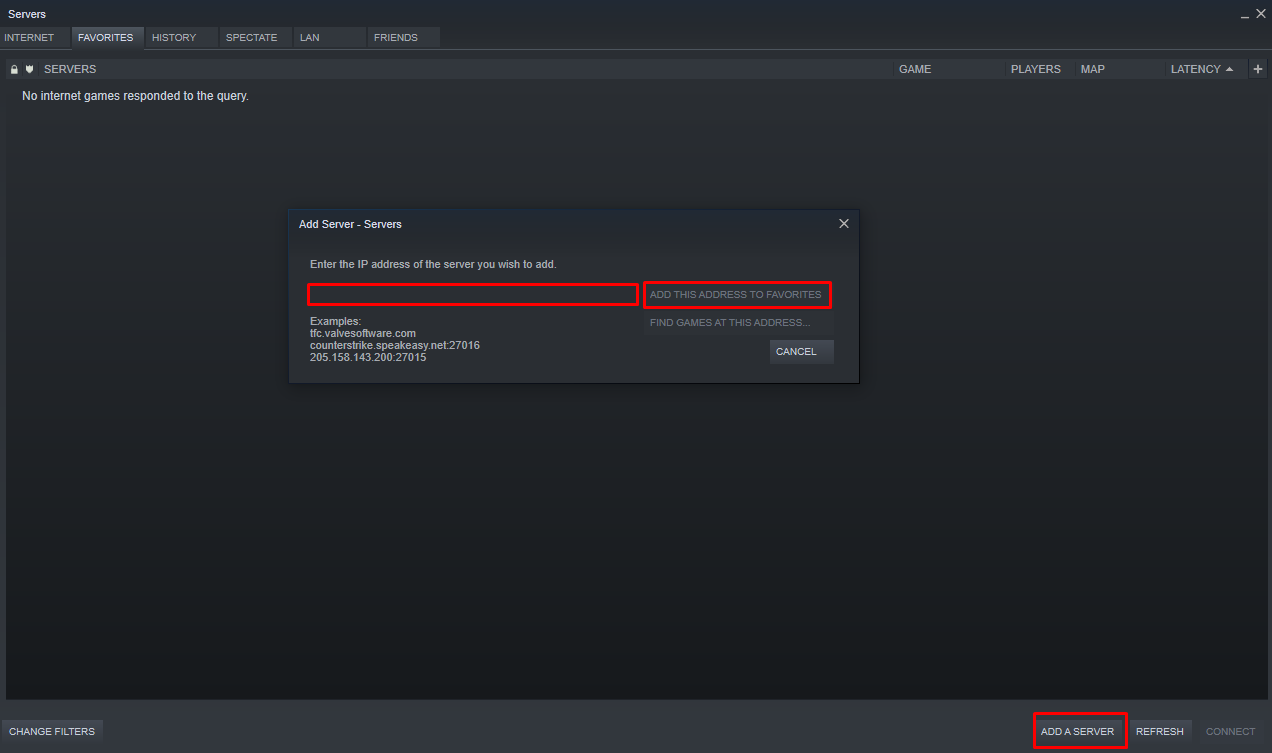
- Click on
Add A Serverand put your server connection details (IP:Port) there in the address box. Then click onADD THIS ADDRESS TO FAVORITES.
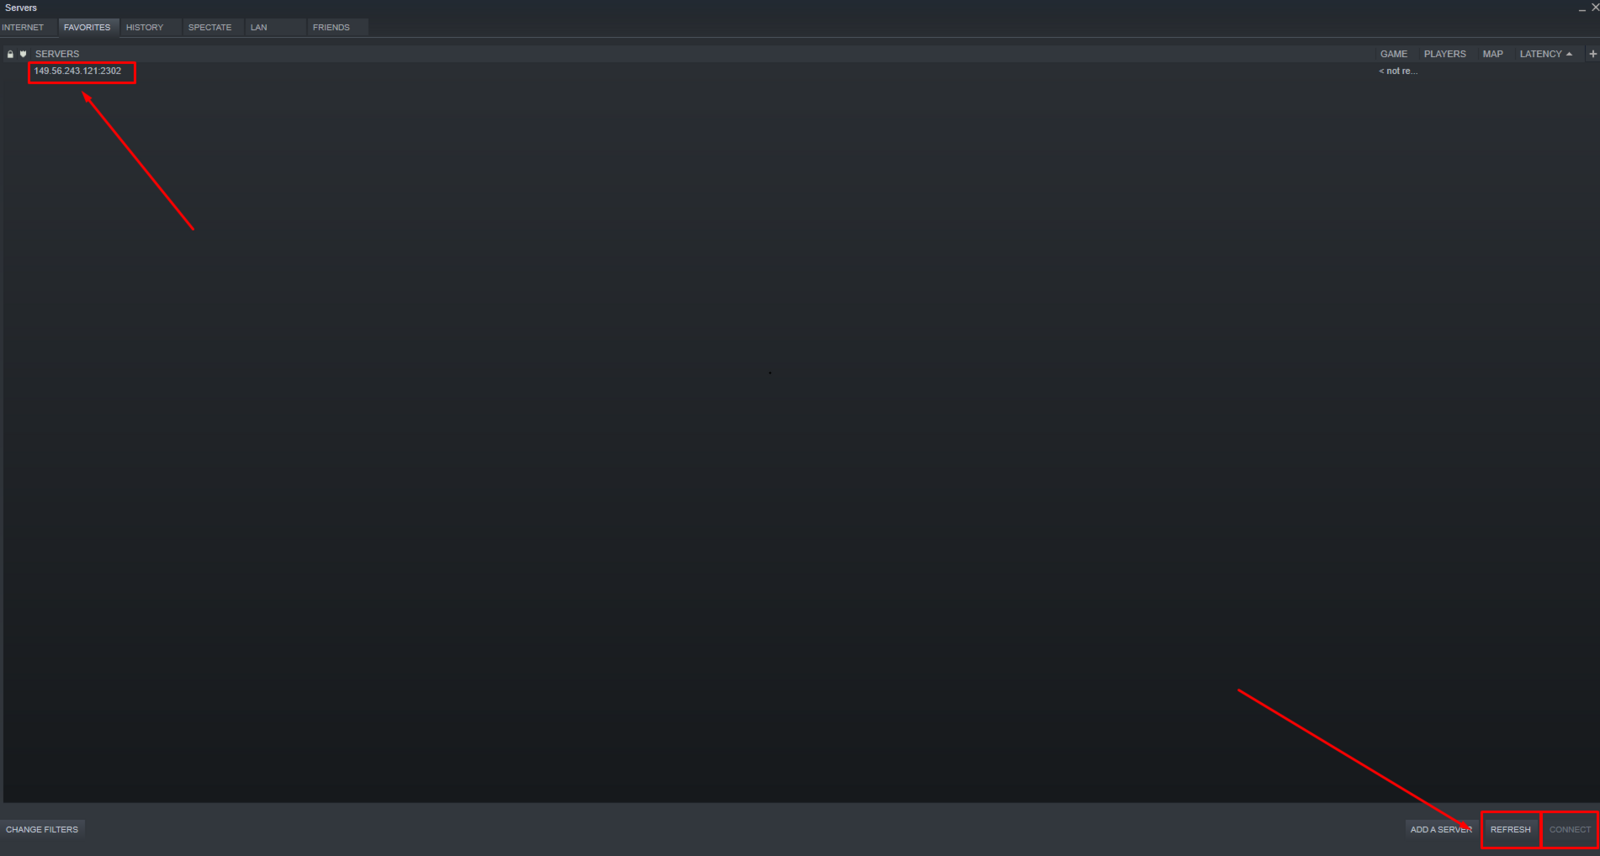
- Now click on
REFRESH, select the server you added, and click onConnect.
Server List
To connect to your server via the in-game server list, you will have to:
- Launch 7 Days to Die and click on
JOIN A GAME.
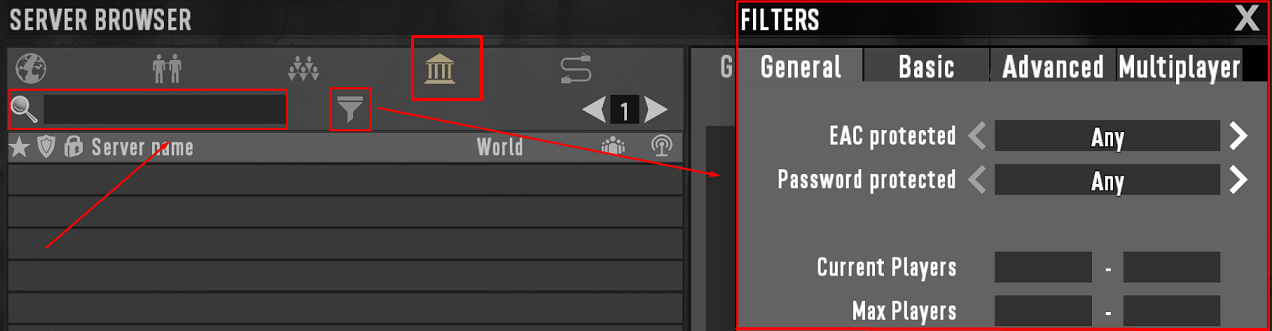
- Find your server using the search function or the filters, then click on it.
- Click on
CONNECT.
Now, you’ve just connected to your 7 Days to Die server!
If you find any issues, contact us on live chat or via the ticket system.